background image

6 Transistors

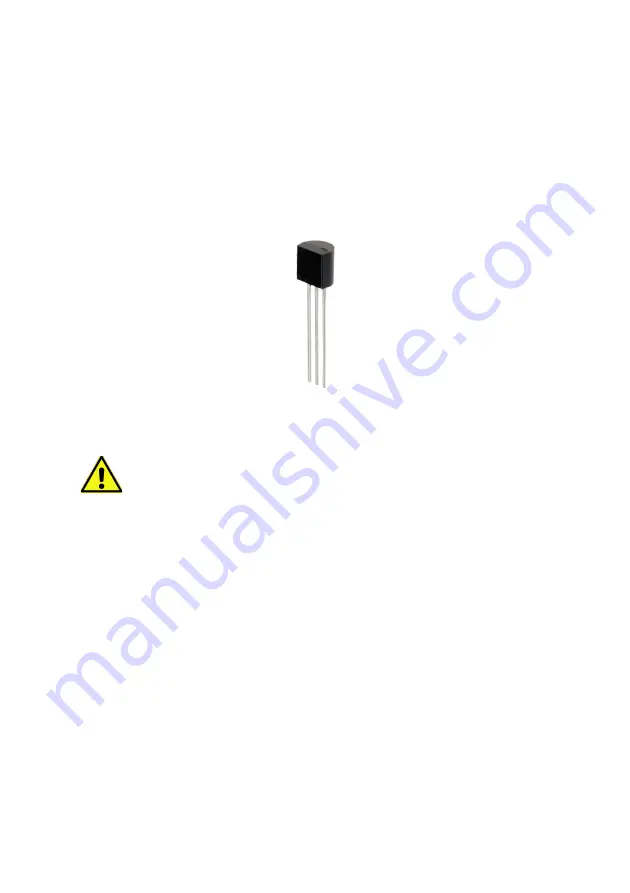
Transistors must be mounted in the correct orientation. The flat
side of the transistor must match the correspondent side in the
silkscreen drawing. The leads may not cross.

Note:   field-effect   transistors   (FETs)   are   extremely
sensitive to ESD. 

7 Crystal

The polarity of the crystal is not relevant, but the bottom side
of the package is conductive.  

To prevent shorts, the crystal

should be mounted with a little distance to the board (see
the image on the next page).

11

Содержание AE20401

Страница 1: ...Æ20401 5 8 GHz Frequency Counter Power Meter Assembly and Operation Manual REV 3 1 EN 2015 Ascel Electronic ...

Страница 2: ...GHz Frequency Counter Power Meter 1 Circuit Description 2 Soldering 4 Component Reference 6 Assembly 14 Adjustment of the input amplifier 18 Troubleshooting Checklist 20 Power Supply 22 Case Mounting 23 Operation 25 Circuit Diagram 44 Bill of Materials 46 Component Placement Diagram 49 Data Interface 50 Specifications 53 i ...

Страница 3: ...ening the case Work on devices only if you made sure that they are disconnected from any power supply and any possible charge inside is discharged Devices must only be used if they are mounted in a case in a way that prevents the user from touching any live wires or parts Disconnect the device from its power supply during assembly Always check the power cords for breaks or damaged insulation Repla...

Страница 4: ...shops the use of this unit must take place under the supervision of qualified staff Do not put this unit in use in an environment where the risk of fire or explosion or explosive gas vapor or dust is present If the unit must be repaired use original parts only The use of inappropriate parts may lead to a safety risk Avoid working alone Keep electronic parts away from children Do not replace parts ...

Страница 5: ...h the appropriate regulations for electronic devices All accompanying papers in particular this manual must also be passed over Where necessary for example in the European Union you must also publish your identity to the consignee Intended Use in countries where applicable The intended use of this device is measuring frequencies and power within the given limits Other uses are not approved iv ...

Страница 6: ...ing from a fabric seat removing some types of plastic packaging or using non ESD compliant tools Danger of ESD The high voltage pulse can easily destroy electronic parts ICs and FETs are very sensitive to high voltage Even a short single touch may destroy a part How do I prevent damage due to ESD Always ground yourself while working with electronic parts A grounded conducting wrist strap and prope...

Страница 7: ...er of pulses per revolution is adjustable Offset and Smooth functions and selectable Trigger Edge extends the possible applications even further The USB interface1 allows remote control of the frequency counter with the included software The easy plain text command protocol allows simple integration with external tools and systems Every single function of the device can be remote controlled All SM...

Страница 8: ...tors are placed next to all ICs Each module has their own power regulation and decoupling capacitors on their own boards Channel A C input circuitry the DC offset is removed from the signal first Then it is impedance matched and fed to the input amplifier D2 D3 limit the signal in case of input overload P1 is used to attenuate it A high speed comparator IC6 with hysteresis is then used to compare ...

Страница 9: ...l ADC This digital value is then used to calculate the power Since the Channel B Module uses 3 3V internally voltage dividers on the data lines R17 R19 R23 R20 and R22 R21 reduce the amplitude from 5V to 3 3V The external input EXT is protected against overvoltage by R15 together with D4 D5 The separately drawn CLK footprint can accept either a standard crystal oscillator or the optional 1ppm TCXO...

Страница 10: ...protective glasses If you use additional flux make sure it is suitable for electronics use Non suitable flux may contain acid which will damage the traces on the PCB over time Try to solder fast Heating up for too long may damage the components and the board Solder wire with a diameter between 0 5 0 75mm 0 02 0 03 is most suitable for through hole components Lead solder is easier to use than lead ...

Страница 11: ...t leg 3 Wait a moment Do not move the part you just soldered for a few seconds while it is cooling down Moving it may cause the solder joint to crack 4 Then remove the iron With lead solder the solder joint should be glossy After soldering use side cutters to cut the leads straight above the solder joint After you are finished check all components for correct placement and orientation Also check f...

Страница 12: ...ve the solder joint The resistance value is given with colored bands on the resistor The code consists of four five or six bands With four bands the first two are the base value see table below the third is the multiplier to the base value and the fourth is the tolerance Five band code uses the first three bands for base value With six bands the sixth is the temperature coefficient The resistor va...

Страница 13: ...citors Capacitors are soldered the same way as resistors Electrolytic capacitors are polar They must be mounted in the correct orientation They will be destroyed when installed in reverse polarity and may even burst Please keep in mind that different manufacturers mark the polarity in different ways The marking may represent the positive or the negative terminal The actual polarity or is printed i...

Страница 14: ...e letter n is the capacitance in nF where 3n9 is 3 9nF Upper case characters denote the tolerance according to this table B C D F G H 0 1pF 0 25pF 0 5pF 1 2 2 5 J K M S Z P 5 10 20 50 20 80 20 0 10 A number following up indicates the electric strength Sometimes you may encounter a number like 0 5 this is the capacitance in µF Electrolytic capacitors are usually labeled with the capacitance in µF s...

Страница 15: ...he symbol The positive terminal is called the anode Diodes are mounted horizontal Try not to heat up the body of the diode while soldering 4 LEDs LEDs light emitting diodes must be soldered with respect to the correct polarity as well The cathode is identified by the short lead and the larger electrode inside 9 ...

Страница 16: ...n mounted incorrectly The mark on the silkscreen must match the notch on top of the IC Pin numbers are counted counter clockwise starting from the notch Note Please also pay attention to the ESD warnings at the beginning of this manual ICs are very ESD sensitive they can be destroyed even by a minor electrostatic discharge event 10 ...

Страница 17: ...in the silkscreen drawing The leads may not cross Note field effect transistors FETs are extremely sensitive to ESD 7 Crystal The polarity of the crystal is not relevant but the bottom side of the package is conductive To prevent shorts the crystal should be mounted with a little distance to the board see the image on the next page 11 ...

Страница 18: ...ble below the third is the multiplier to the base value and the fourth is the tolerance The inductor value is base value multiplier tolerance Color Codes Color Digit Multiplier Tolerance in None 20 Silver 10 2 10 Gold 10 1 5 Black 0 100 Brown 1 101 1 Red 2 102 2 Orange 3 103 Yellow 4 104 Green 5 105 0 5 Blue 6 106 Purple 7 107 Grey 8 108 White 9 109 12 ...

Страница 19: ...her edges are rounded The TCXO Oscillator Module has the same size and pinout as a standard oscillator with Pin 1 as the pointy edge If the oscillator is mounted incorrectly it will cause a short that may damage the device permanently Please double check the correct orientation This also applies to the TCXO Oscillator Module It will be destroyed if mounted with the wrong orientation 13 ...

Страница 20: ...citor labeling such as n10 0 10 nF 100 pF as opposed to 10 nF Also check if all leads of an IC are correctly inserted into the socket They tend to bend during insertion After soldering inspect the board for what are called cold and dry solder joints Cold joints occur if the soldering temperature did not exceed the solder s liquidus temperature or if the flux evaporated before it was applied on the...

Страница 21: ...er it to fix errors which takes extra time and effort See the previous page for more information 2 Solder the parts with an asterisk the LCD the Alps potentiometer the BNC and USB connectors and the tact switches on the opposite side 3 Attach the LCD a Insert the header into the board b Put the LCD on top of the header c Fix the LCD in place with the M2 5 screws and spacer bolts d Solder the heade...

Страница 22: ... be damaged if the power is turned on then The modules may be used with a case only If the original optional case is not used the unit must be enclosed in another suitable case The SMA input jacks must be tightly screwed to the front panel with the two provided nuts before any cables may be connected The pin header and socket must not be exposed to mechanical stress 1ppm TCXO Oscillator Module The...

Страница 23: ...Finished Component Side Finished Solder Side without the LCD LCD Mounting 17 ...

Страница 24: ...x10 probe If the probe is switchable between x1 x10 select x10 x1 probes are not suitable for this procedure b Multimeter The oscilloscope is preferred as it gives a more accurate result Procedure with an oscilloscope Set the coupling to DC on the oscilloscope It is recommended to turn on the 20 MHz bandwidth limit or the RF reject sometimes also called Noise Reject if available it will show less ...

Страница 25: ...ust the vertical position of this signal using trim pot P2 so that the signal is also centered on the base line as shown This completes the adjustment Procedure with a multimeter The input of Channel A must be shorted a 50Ω BNC terminator is also suitable With the multimeter set to measure DC volts measure the voltage between pin 2 and 3 of IC6 plus on pin 2 minus on pin 3 Adjust trim pot P2 until...

Страница 26: ...t match the bar on the silkscreen symbol Verify the polarity of the electrolytic capacitors Keep in mind that the marking on the capacitor can point to the or lead The actual meaning is printed inside the marking Are all ICs in the right place and with correct orientation Are all IC leads plugged inside the socket They can bend and stay outside easily Measure the resistance between the power suppl...

Страница 27: ...old the PCB toward bright light Are there bad cold dry solder joints Jiggle component leads at the solder joint with a pair of tweezers Re solder them if any move If a solder joint looks suspicious better rework it just in case Look if you missed a soldering point With the USB model all pads are used 21 ...

Страница 28: ...eria can be used Warning An AC power supply may not be used Note It is advisable to use a current limiting lab power supply when switching on for the first time Set it to 9V and 300mA this will help to prevent damage from potential shorts Please pay attention to the correct polarity of the power connection The polarity is printed on the silkscreen of the PCB 22 ...

Страница 29: ... caps on the tact switches 2 Join the front panel and the PCB and insert both in the respective brackets The PCB fits in the brackets behind the front panel 3 Install and lightly tighten the lock nut of the BNC connector The lock nut of the BNC connector must be mounted in the orientation shown below or it will prevent the case from closing properly 23 ...

Страница 30: ...e optional modules 5 Solder two pieces of wire about 15cm 6 long to the Cinch connector and its ground leads 6 Put the connector s wires through the appropriate hole in the back plate 7 Attach the ground lead and solder the wires to the PCB 8 Fasten the case with the included screws This completes the case mounting 24 ...

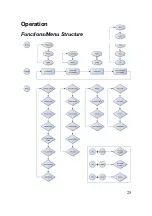
Страница 31: ...Operation Functions Menu Structure 25 ...

Страница 32: ...y be indicated This is not a fault but the result of the inputs high sensitivity and the relatively high input impedance of 1 MΩ Electric fields from the mains 50 60 Hz WLAN cordless phones et al induce a voltage to the input which is then amplified and counted It is the same effect that let a digital multimeter with 10 MΩ input impedance always show a small voltage when not connected to any sourc...

Страница 33: ...Channel select Press Channel to change to the next Channel Channel B and PWR Power Meter are only available if the appropriate module is installed Mode select To change to the next function e g Frequency Period RPM with Channel A or display mode in dBm Vrms mW with the Power Meter press Mode With Channel C Pulse Counter this starts or stops the counting RUN STOP mode 27 ...

Страница 34: ...d line underneath the LCD shows which button corresponds with the item value displayed on each position The indicates that there is a submenu or function that can be started e g the calibration In this example Trigger Edge is the selected item in Channel A menu 1 and RISING the selected value Press Channel to advance to the next item or Mode to switch between the possible values RISING and FALLING...

Страница 35: ... is no overflow if 00090 is the number and the 9 the active digit pressing Mode results in a value of 00000 If the value can become negative the sign can be changed by pressing Mode Press Menu OK to save the number and leave the menu New Measurement Available Indicator Every time a new value is available and displayed the New Measurement Available indicator dot flashes for a short time When Channe...

Страница 36: ...ys lowers the sensitivity for small useful signals so a compromise has to be made here In addition it is required that the adjustment of the input amplifier has been done accurately see the appropriate chapter for details In the first example on the next page the superimposed sawtooth wave would lead to false counts if the sensitivity were set to max since its amplitude is greater than the hystere...

Страница 37: ...31 Example 1 noise Example 2 one signal superimposed on another ...

Страница 38: ...0 Ip is the adjustable number of pulses per revolution Menu Functions Smooth on off active in mode FREQ PER The smooth function provides a means of smoothing the display for easier reading of unstable values When it is on the counter displays a moving average of the four last measurements A small 4 in the display indicates that Smooth is on 32 ...

Страница 39: ...E in the next menu items A small arrow in the display indicates that Offset Scale is on Offset VALUE Here the VALUE for the Offset Scale function can be entered Positive and negative values are allowed Offset SCALE Here the SCALE for the Offset Scale function can be entered Values below 1 can be entered for a division Trigger EDGE rising falling active in mode all This menu item allows selecting w...

Страница 40: ...s separator can be selected between the format 123 123 123 123 Hz or 123 123 123 123 Hz to match the use of different symbols worldwide Note this adjustment is accessible from all channel s menus but the same value is stored for all channels The PC software also uses the selected format for its display T ime base CAL ibration Starts the calibration routine for the time base See the appropriate cha...

Страница 41: ... are Frequency FREQ f and Period PER T where T 1 f Menu Functions Smooth on off active in mode FREQ PER Identical to Channel A Offset Scale on off active in mode FREQ Identical to Channel A Offset VALUE Identical to Channel A Offset SCALE Identical to Channel A D ecimal Point Identical to Channel A T ime base CAL ibration Identical to Channel A 35 ...

Страница 42: ... of the counter can be controlled on the device itself SOURCE BUTTON using the external input jack SOURCE EXT and also through USB Display Annunciators If SOURCE BUTTON is selected pressing Mode starts or stops the counter The display shows the actual status If SOURCE EXT a TTL pulse on the EXT input starts or stops the counting 36 ...

Страница 43: ...ts the limit switches 2x per movement and the number of movements should be counted set IMP COUNT to 2 the counter will count up every 2 pulses SOURCE BUTTON EXT The source of control can be selected between the Mode key and the external input Note it is always possible to control via USB no matter what is selected here D ecimal Point Identical to Channel A 37 ...

Страница 44: ... external attenuators whose value can be entered and included in the displayed measurement Instead of the modes on Channel A and B pressing Mode changes the display from dBm to mW Vrms Vp or Vpp The relationship between the units is as follows PmW 10 PdBm 10 Vrms PmW 50 1000 V p Vrms 2 V pp V p 2 Please pay close attention not to exceed the maximum input power Even short overloads may cause damage...

Страница 45: ...re in dB FREQ uency 1 100 200 300 400 500 MHz AE204015 FREQ uency 10 MHz 1 2 3 4 5 6 7 8 GHz AE204014 The logarithmic amplifiers which are used in this modules has a slight frequency dependence A correction factor that compensates for the frequency error can be applied to the measurement by entering the frequency here in 100 MHz 1 GHz steps Note these correction factors can be adjusted by performi...

Страница 46: ...standards the accuracy of the time base and the Power Meter can be increased further Please let the counter warm up for at least 30 min before performing the calibration Time Base Channel A B The calibration of the time base can be done in two ways manually by entering an offset value in ppm parts per million or automatically with a precise 10 MHz reference After the calibration routine is activat...

Страница 47: ...nized CAL ERROR VALUE NOT SAVED will be shown otherwise CALIBRATION DONE VALUES SAVED Press Menu OK to leave the calibration routine Note there is only one calibration value so performing automatic calibration overwrites a manually entered offset value Power Meter A precise signal source is required that allows accurate adjustment of power and frequency to calibrate the power meter The calibration...

Страница 48: ...calibration CAL ERROR VALUE NOT SAVED will be shown otherwise CALIBRATION DONE VALUES SAVED Press Menu OK to advance to the next part Now you will be required to connect a number of specific signals CONNECT xx dBm yy MHz Set the required values and press Menu OK to advance each time A successful calibration or an error will be shown again after the calibration is finished Press Menu OK one last ti...

Страница 49: ...old Menu OK while switching the counter on LOADING DEFAULTS is shown and the saved values will be cleared Display Firmware Version To display the firmware version hold Mode while switching the counter on Note The PC software also shows the firmware version Firmware Update To update the firmware hold Channel while switching the counter on FIRMWARE UPDATE is shown Connect the counter to a PC via USB...

Страница 50: ...Circuit Diagram Part 1 2 44 ...

Страница 51: ...Part 2 2 45 ...

Страница 52: ... 1 C10 100pF Film 1 C8 100nF Film 1 C15 1nF 1 C5 10µF Electrolytic 1 C13 100µF Electrolytic 1 C2 220µF Electrolytic 5 R1 R11 R19 R20 R21 1KΩ 1 R2 100KΩ 2W 1 R3 100Ω 1 R4 910KΩ 1 R5 20KΩ 2 R6 R10 220Ω 1 R12 910Ω 2 R8 R15 10KΩ 1 R9 330KΩ 1 R14 10Ω 1 R16 470Ω 3 R17 R22 R23 680Ω Continued on next page 46 ...

Страница 53: ...r 1 IC8 LT1460 2 5V Reference 1 P1 ALPS Potentiometer 10K 1 P2 Trimmer 200Ω 1 D1 1N4007 Diode 4 D2 D3 D4 D5 1N4148 Diode 1 T1 BF256A JFET 1 EXT Cinch Connector 1 PWR Power Connector 1 BNC BNC Connector 2 CHANNEL_B POWER METER 2x6 Pin header right angle 1 LCD 2x16 Dot Matrix LCD 3 S1 S2 S3 Tact Switch 1 CLK Crystal Oscillator 20 MHz or 1 ppm TCXO Oscillator Module Continued on next page 47 ...

Страница 54: ...ctrolytic 1 USB USB Type A Connector Other PCB 4 spacer bolts and 8 M2 5 screws for LCD mounting Modules optional Case and 3 extension caps for the tact switches optional AC adapter optional Note Parts whose designator contains an asterisk are mounted on the opposite side of the PCB See Assembly chapter for details 48 ...

Страница 55: ...ose designator contains an asterisk are mounted on the opposite side of the PCB See the chapter Assembly for details Note To help locate the right elements parts and their respective designators are highlighted in the same color Scale in mm 49 ...

Страница 56: ...ates a virtual serial COM port This makes integration with external tools and applications very easy System Requirements USB Interface MS Windows 1 98 ME 2000 XP Vista 7 8 Server 2003 Server 2008 Server 2008 R2 Server 2012 Server 2012 R2 x86 x64 Mac OS X Linux PC Software MS Windows with NET Framework at least version 4 0 1 All trademarks are the property of their respective owners 50 ...

Страница 57: ... by going to Control Panel Device Manager and selecting the port Select Properties Port Settings Advanced and assign a new number It will remain even after the device is disconnected and connected again later Software Installation The PC software can be found in the Software directory Execute setup exe to install the software There is also a portable version of the software in the Portable Softwar...

Страница 58: ...he controls assigned to this channel D will be activated the functions are identical to direct control on the device Use E to change the decimal point The frequency can be shown as a graph F The graph can be saved to a file or printed G allows logging all measurements and saving them as a csv file A pass fail function is also available H It will indicate if the set min max values are exceeded I sh...

Страница 59: ...nctions Offset Smooth Trigger Edge Sensitivity 1 MHz 50 mV 50 MHz 100 mV Sine wave in Vrms Impedance 1 MΩ Coupling AC Attenuation adjustable Max Input Voltage 50 V DC ACpp Input BNC Channel B Frequency Range 70 MHz 5 8 GHz Modes Frequency Period Functions Offset Smooth Sensitivity 200 MHz 50 mV Sine wave in Vrms 53 ...

Страница 60: ...curacy Standard 50 ppm Accuracy TCXO Option 1 ppm Calibratable yes Channel C Pulse Counter Frequency Range 2 Hz 5 MHz 50 duty Sensitivity identical to Channel A Max Value 4 294 967 296 Pulse Count adjustable Impedance 1 MΩ Coupling AC Attenuation adjustable Max Input Voltage 50 V DC ACpp External Control Input TTL 5V 54 ...

Страница 61: ...s Input SMA AE204015 Frequency Range DC 500 MHz Range 55 dBm 30 dBm Max Power 32 dBm AE204014 Frequency Range 10 MHz 8 GHz Range 55 dBm 5 dBm Max Power 10 dBm General Display 2x16 dot matrix LCD PC Interface USB optional Supply Voltage 8 12V DC Power Consumption max 3W Temperature 5 C 40 C Relative Humidity 85 non condensing 55 ...

Страница 62: ...nnel B Mode 0 FREQ 1 PER N Channel B Smooth Enabled 0 FALSE 1 TRUE O Channel B Offset Enabled 0 FALSE 1 TRUE P Channel B Offset Value in Hz Q Channel B Offset Scale in x0 001 R Channel C RUN STOP 0 STOP 1 RUN S Channel C Source 0 INT 1 EXT T Channel C Imp Count in x1 U Channel PWR Mode 0 dBm 1 mW 2 Vrms 3 Vpp 4 Vp V Channel PWR Attenuator Enabled 0 FALSE 1 TRUE W Channel PWR Attenuator Value in 0 ...

Страница 63: ... Nr of valid counts depends on range 57 ...

Страница 64: ...ASCEL ELECTRONIC www ascel electronic de 2015 ...

Отзывы: