background image

ARS RECYCLING SYSTEMS 


DC Manual 20190729 


Page | 3 

Safe Operation 

Warning 


Only qualified personnel should attempt the installation operation and maintenance of this 
equipment.  Do not touch electrical connections before power has been disconnected.  
Electrical shock can cause serious or fatal injury.  Be sure system is properly grounded before 
applying power. 


Engine exhaust can cause sickness or death.  Operate in well ventilated areas only. 
Engine exhaust is hot, avoid contact with exhaust parts. 
Never enter a confined space without properly following your company’s procedure. 


Never operate this unit without all machine guards properly in their place. 

Do not attempt any maintenance without following proper lock-out/tag-out procedures. 

Do not place any extremities into or near inlets on the bag-house, waste chute or fan. 

Do not operate unit for any reason with fan exhaust or coupling guard removed.  

Personal Protective Equipment must be worn during operation.  
 

Caution 

Diesel fuel is highly flammable.  Do not refuel while engine is running, while smoking or near 
open flames or sparks. 

Battery gas can explode.  Keep sparks and open flames away from battery. 

Keep work area clean. 

Keep body parts and clothing away from moving parts and vacuum openings. 

Never wear loose clothing around moving parts or vacuum openings. 

Use sure footing when ascending or descending ladders. 

Dispose of waste properly. 

Содержание DC 20E

Страница 1: ...nk you for choosing Advanced Recycling Systems We greatly appreciate your business and should you have any questions regarding this machine please do not hesitate to contact us ARS Recycling Systems LLC 4000 McCartney Road Lowellville OH 44436 9510 Phone 330 536 8210 Fax 330 536 8211 ...

Страница 2: ...vice strict compliance to these special instructions are major accident prevention measures ARS Recycling can not anticipate every possible circumstance that might involve a hazard The warnings in this manual and on all equipment are therefore not all inclusive OWNER OPERATOR RESPONSIBILITIES Knowledge of and performance of the procedures specified in this manual and the operation and instruction ...

Страница 3: ...nit without all machine guards properly in their place Do not attempt any maintenance without following proper lock out tag out procedures Do not place any extremities into or near inlets on the bag house waste chute or fan Do not operate unit for any reason with fan exhaust or coupling guard removed Personal Protective Equipment must be worn during operation Caution Diesel fuel is highly flammabl...

Страница 4: ...ystem or a gravity discharge system at the rear of the unit and should be emptied at least once per day Pulsation System This system keeps the cartridges clean and increases their life span It turns on automatically with the engine start switch in the run position This system is preset from the factory and no adjustments are needed Air 75 psi max Waste Auger Gravity Discharge The hydraulically dri...

Страница 5: ... fuel will introduce air into the injector system and cause unnecessary down time It may cause severe damage to the PTO unit the coupling 80k units or belts all other units or to the engine itself This damage will not be covered under warranty 2 Check engine oil level Oil level should be at the full mark 3 Check Diesel Exhaust Fluid levels daily DEF tank levels must be maintained at all times Refi...

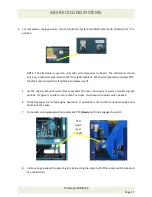
Страница 6: ...60k and 80k units The lower half of the rocker switch denoted with a turtle icon should be depressed 3 Turn the ignition key clockwise to start the engine or push in on ignition switch and turn clockwise Once started release the switch and it will return to the run position This will also start the pulsation system on some models Warning NEVER run the engine above the labeled maximum speed severe ...

Страница 7: ... should be left disabled and powered off 5 Let the engine idle until warm Never exceed 1200 rpm until engine is warm Avoid long idle periods If engine is to idle for more than 5 minutes shut down and restart when needed 6 Check all gauges for normal engine operation If operation is not normal shut down engine and determine the cause 7 For models not equipped with an automatic PTO Slowly but firmly...

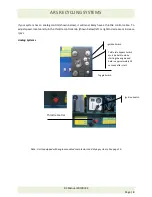
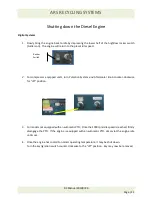
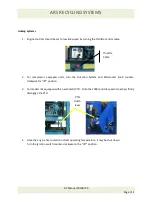
Страница 8: ...e and turn the throttle control knob shown below left or right to decrease or increase rpm s Analog Systems Note Units equipped with engine mounted compressors and drying systems See page 19 Ignition Switch Toggle Switch Tattle tale bypass Switch must be held in while starting the engine and held in approximately 10 seconds after start Ignition Switch Throttle Control ...

Страница 9: ...lfur fuel See Fuels Lubricants and Coolants Section for recommendations Operating the engine in AUTO Mode allows the ECU to perform intelligent exhaust filter cleaning as required The Exhaust Filter Cleaning Indicator will illuminate when the system is actively performing an exhaust filter cleaning During this process the dosser will inject small amounts of fuel into the exhaust stream to assist i...

Страница 10: ...tor has disabled auto exhaust filter cleaning If conditions are safe the operator should enable the auto exhaust filter clean setting or perform manual service regeneration or follow DTC procedure When the exhaust filter indicator is combined with the warning indicator engine performance is reduced by the ECU because there is an aftertreatment system fault or the soot level of the exhaust filter i...

Страница 11: ...quipped units turn Pulsation System and Aftercooler knob counter clockwise for off position 3 For models not equipped with an automatic PTO Once the 1000 rpm idle speed is reached firmly disengage the PTO If the engine is equipped with an automatic PTO simply let the engine idle until cool 4 Once the engine has cooled to normal operating temperature it may be shut down Turn the key ignition switch...

Страница 12: ...d units turn the Pulsation System and Aftercooler knob counter clockwise for off position 3 For models not equipped with an automatic PTO Once the 1000 rpm idle speed is reached firmly disengage the PTO 4 Once the engine has cooled to normal operating temperature it may be shut down Turn the ignition switch counter clockwise to the off position Throttle Cable PTO clutch lever ...

Страница 13: ...te valve or rotate auger switch to on position This will start the auger and push the excess dust that has accumulated in the bottom hopper of the baghouse out through the waste valve at the rear into the drum Be sure to monitor the amount of waste going into the barrel to avoid overfilling and spilling of dust 5 Once all excess dust has emptied from the baghouse depress the push button to stop th...

Страница 14: ...removed by an electric driven auger or a gravity discharge system and should be emptied at least once a day Pulsation System This system keeps the cartridges clean and increases their life span It turns on automatically by pushing the pulsator start button This system is preset from the factory and no adjustments are needed Waste Auger Gravity Discharge An electrically driven auger or gravity disc...

Страница 15: ...follows A 460 volt 3 phase 4 wire 60 Hz input with at least a 50 amp circuit breaker Electrical requirements for the DC 45E 460 volt 3 phase 4 wire 60 Hz input with at least a 300 amp circuit breaker service Connections are made at the disconnect inside the main control cabinet and should be done by a qualified electrician After sufficient electrical connections are made and both 20 hose connectio...

Страница 16: ...on The 7k and 12k units are equipped with one 1 E Stop This emergency stop is located at the main control panel and must be pulled out for the unit to operate Pushing the switch in will shut down the entire system The 20k 45k 60k and 80k units are equipped with two 2 E Stops One at the main control panel and one at the auger start stop station at the rear of the unit Both switches must be pulled o...

Страница 17: ...ated on the upper right of the control panel Light should illuminate on front of panel 2 Start the blower motor push Fan Start button on front of control panel 3 Start the pulse system by pushing the Pulsator Start button System is ready Disconnect Arm Disconnect Arm Control Power On Indicator ...

Страница 18: ...ting Down the System 1 Stop the pulse system push the Pulsator Stop button 2 Shut down the blower motor push Fan Stop button on the front of the control panel 3 Push the disconnect arm DOWN OFF This arm is located on the upper right of the control panel Disconnect Arm ...

Страница 19: ...nel 2 Push the Fan Stop button on the control panel Motor must remain off at this time 3 Place drum under waste chute at rear of machine with barrel lid provided 4 Open rear waste valve 5 6 For units equipped with augers press the start button at remote auger start stop station This will start the auger and push the excess dust that has accumulated in the bottom hopper of the baghouse out through ...

Страница 20: ...press the Stop button to stop the auger 8 Close the waste valve on all units to ensure no fugitive dust falls out during transport or while in use It is the responsibility of the owner s operator s and user s to comply with all regulations and laws pertaining to waste disposal and hazardous waste disposal ...

Страница 21: ... 3 Check drain hoses for any obstructions 4 Check drain hose on filter 5 Pressurize system and check for leaks 6 Drain the bottom of the salt tank at least once every 4 to 8 hours depending on use 7 Drain compressed air filters at the end of every day Filter Cartridges IMPORTANT Use of chemicals other than manufacturers recommended desiccant will void the warranty on the dryer Sight Gauge Filter ...

Страница 22: ...ors run for a few minutes without having the fan engaged This will help clear the filters 3 Emptying of hopper Make sure you empty the hopper at least once a day depending on dust load It is important that the dust does not build up inside of the hopper to prolong filter life Normally we will see a delta of 10 on the gauge when the cartridges need changed but if you are seeing dust coming out of t...

Страница 23: ...ming any maintenance on this unit the unit and or compressor must NOT be running All hoses must be disconnected After maintenance has been performed all hoses connected to the machines must have retaining devices in place Proper personal protection equipment must be worn during operation 1 Remove locking device s from side of baghouse 2 Rotate door handles upward ...

Страница 24: ... 3 Lift up and remove each door from the baghouse filter cells 4 Locate the release handle just inside the baghouse filter cell 5 Pull filter release handle outward and upward until it is in the horizontal position Baghouse Filter Cell Release Handle ...

Страница 25: ...e upward to release it from interlocking filter head plates Repeat this process to remove each filter cartridge from each filter cell 7 Reverse the process to install new filters rotating the filter cartridges downward to interlock the filter head plates Once in place the entire row of filter cartridges should sit within the baghouse enclosure ...

Страница 26: ...ARS RECYCLING SYSTEMS Baghouse Filter Replacement 10 Slowly bring the release handle downward to the vertical position This action will raise and secure the filters ...

Страница 27: ... RECYCLING SYSTEMS Baghouse Filter Replacement 11 Reinstall the doors of each filter cell compartment Rotate the door handles downward into locking position 12 Reinstall locking device on side of baghouse ...

Отзывы: