North America • Latin America • India • Europe / Middle East / Africa • China • Pacific Rim
armstrong
international.com
Designs, materials, weights and performance ratings are approximate and subject to change without notice. Visit
armstrong
international.com for up-to-date information.
53
Combustion Chamber Coil Cleaning Instructions*
*Before beginning this procedure, you must have the following items on hand:
• Nylon brush -
DO NOT use brass, stainless or steel brushes.
• Water
• Vacuum cleaner
• Fernox F3 Cleaner
• Fernox F1 Inhibitor Protector (boilers only)
• Fernox DS 40
• Towel for clean up and plastic sheeting to protect electronics.
NOTE: If electronics do get wet, DO NOT turn on power to appliance until they have been thoroughly dried, as component
failure may result.
Fire Side Cleaning
1. Shut down the ABH by using the following steps:
-Turn off the power, close the gas valve, and shut down the unit. Wait for the unit to be cool to the touch.
- Remove the clean-out cap and place drain bucket according to the directions above.
- Remove the Molex plugs from the fan.
- Remove the (6) 6mm nuts from the burner plate assembly to access the coils.
- Pull the entire burner plate assembly towards you and remove rear target wall.
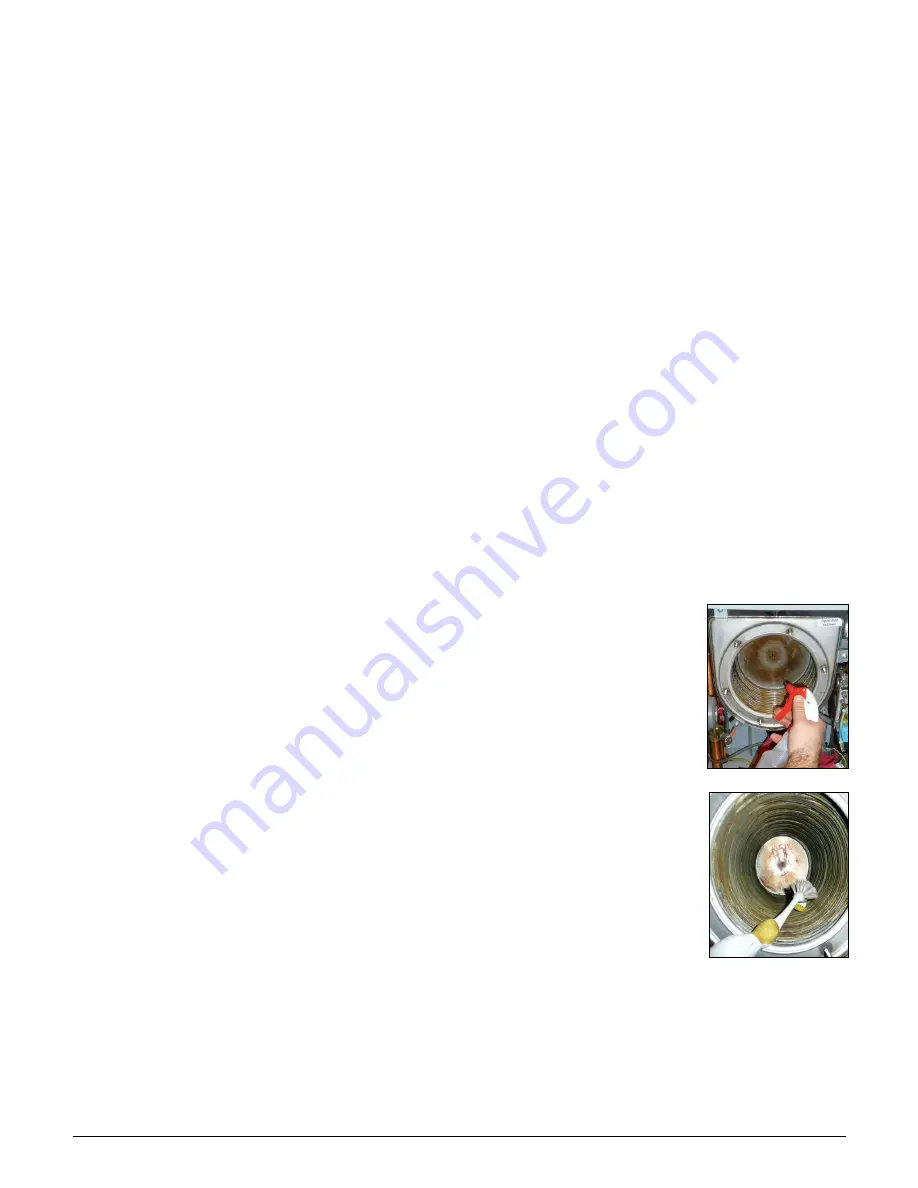
2. Vacuum first and then use the nylon brush to scrub coils to remove any buildup. Vacuum the debris from the coils.
Maintenance - continued
3. Using a spray bottle filled with water or a hose under low pressure to avoid water spraying on
electronics (be sure to cover them to protect against water damage), spray the coils liberally,
making sure the water penetrates and funnels down through the condensate hose. If the
condensate hose is blocked, try to knock any debris loose with a small screwdriver. Replace
hose if not completely clean.
4. If surface or coil gap fouling still exists after the above measures have been taken, the heat
exchanger requires additional cleaning.
Use a
non-acid
based cleaning solution, such as
Fernox F3, to thoroughly soak the remaining residue. Brush clean and then completely rinse
all residue and cleaning solution down the condensate drain assembly. It may take several
applications of the F3, followed by a rinsing, to completely clean the coil surfaces. Use a spray
bottle for
each
(F3 and clear water). Repeat if necessary.
5. Be sure that water is flowing freely through the bottom casing of the heat exchanger and the
drain is not plugged. At this point, the ABH should be ready to power back up.
6. Before powering up the ABH follow the steps below:
-Re-install the burner assembly and rear target wall (fiberboard insulation)
-Replace the (6) 6mm nuts to the burner plate, following appropriate tightening pattern and
torque.
-Re-connect the Molex plugs.
-Re-set system thermostats.
-Replace the clean-out cap.
-Turn the ABH back on** and monitor the condensate drain until flow has been established.
-Re-connect the condensate hose to the outside connection.


