


E T V I S I O N M A N U A L
23
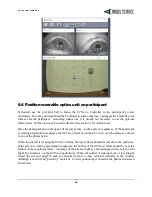
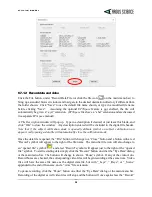
If the point-of-gaze measurement error tends to grow significantly beyond ½ degree as the subject
looks away from the central point, accuracy can usually be improved by adding calibration points.
Not all tasks require that gaze point be known to within ½ degree, and sometimes very rapid
calibration may be more important than best possible accuracy. If measurement accuracy is judged to
be suitable for the task at hand, even if larger than ½ degree, the user may elect to close the calibration
procedure (click the “Calibrate” icon so that it reverts to black) and proceed with data collection, etc.
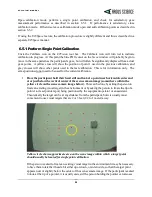
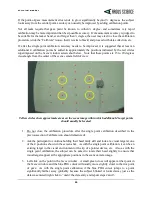
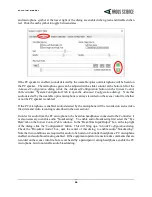
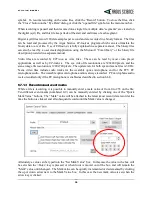
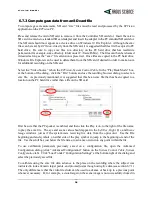
If, after the single point calibration, accuracy needs to be improved, it is suggested that at least an
additional 4 calibration points be added in approximately the positions indicated by the red circles
superimposed on the
Scene
window screen shot below. Note that these points are 15 to 20 degrees
visual angle from the center of the scene camera field of view.
Yellow circles show approximate areas on the scene image within which additional 4 target points
should usually be located.
1.
Do not close the calibration procedure after the single point calibration described in the
previous section (Calibrate icon should remain red).
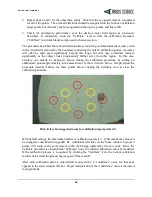
2.
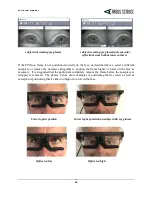
Ask the participant to continue holding their head fairly still and look at a visual target at one
of the 4 positions shown in the screen shot. As with the single point calibration, it can be an
existing target in the visual environment or the tip of a pointer device, etc. Also as with the
single point calibration, the subject can be asked to rotate their head slightly to ensure that
visual targets appear at the appropriate positions in the scene camera image.
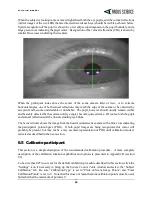
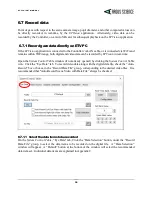
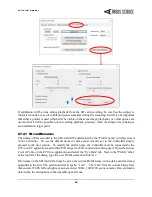
3.
Left click on the point in the
Scene
window. A small green cross will appear at that point in
the
Scene
window, and the blue POG cursor will usually move slightly closer to the true point
of gaze. As with the single point calibration if the blue POG cursor jumps to a point
significantly farther away (probably because the subject blinked or looked away just as the
data was entered) right click to “undo” the data entry and repeat steps 2 and 3.


