


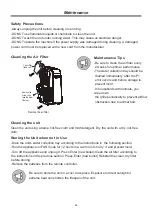


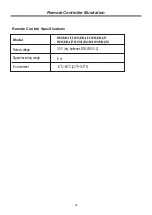


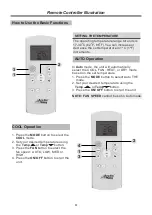
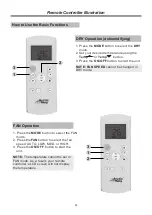


Remote Controller Illustration
19
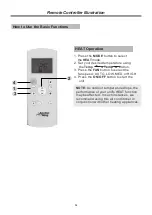
Function Buttons
Before using your new air conditioner, make sure to familiarize yourself with the remote
controller. The following is a brief introduction to the remote controller. For instructions on how to
operate your air conditioner, refer to the "
How to Use the Basic Functions"
section of this manual.
SHORT CUT
Sets and activates your
favourite presettings.
ON/OFF
Turns the unit on or off.
MODE
Scrolls through operation
modes as follows:
AUTO
COOL
DRY
HEAT
FAN
FAN SPEED
Selects fan speeds in
the following order:
AUTO
LOW
MED
HIGH
SLEEP
Saves energy during
sleeping hours.
TEMP
Increases the temperature in
O
O
1 C (1 F) increments.
Max. temperature is
O
O
30 C (86 F) .
TEMP
Decreases temperature in
O
O
1 C (1 F) increments.
Min. temperature is
O
O
17 C (62 F).
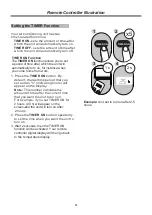
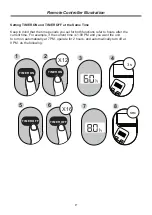
TIMER ON
Sets the timer to turn the unit
on (refer to "
How to Use
Basic Functions
" for
instructions).
TIMER OFF
Sets the timer to turn the unit
off (refer to "
How to Use
Basic Functions
"for
instructions).
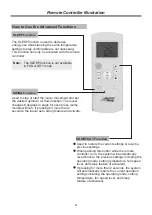
SWING
Starts and stops the louver
movement.
LED
Turns on/off indoor unit s LED
,
NOTE: If you are sensitive
to light when you go to
sleep, you can press the
LED button to turn off
the LED display on the
unit. Press the button
again to turn it back on.
display.
NOTE:
"Swing", "Ion", and "Follow me" features are optional. RG57H1(B)/BG(C)E-M without medium fan speed.
NOTE
:
Please do not select the
HEAT mode if the machine you
purchased is cooling type only.
The heat mode is not supported
by the "Cooling only" appliance.
NOTE: Press and hold the
and buttons together for
3 seconds to switch the
temperature display
O
O
between the C & F scale.


