6 | EN
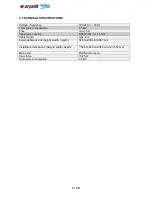
4. TECHNICAL SPECIFICATIONS
Voltage / frequency
220-240 V ~ 50 Hz
Total power consumption
2.5 kW
Fuse
min. 16 A
Cable type / section
H05VV-FG 3 x 1,5 mm
2
Cable length
max. 2 m
External dimensions (height / width / depth)
595 mm/594 mm/567 mm
Installation dimensions (height / width / depth)
**590 or 600 mm/560 mm/min. 550 mm
Main oven
Multifunction oven
Inner lamp
15/25 W
Grill power consumption
2.2 kW
Содержание BARBAROS
Страница 1: ...1 EN BARBAROS BUILT IN BI OVEN SERVICE MANUAL ...
Страница 13: ...13 EN ...
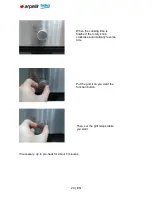
Страница 21: ...21 EN Closing the grid Function button to the off upper position ...
Страница 25: ...25 EN Energy Label lacatıon Energy label products are in a group of periodicals ...
Страница 31: ...31 EN 10 2 Lamp Fault 10 2 1 Furnace is working but the oven does not illuminate ...
Страница 32: ...32 EN 10 2 2 Oven does not work oven lamp does not light ...
Страница 33: ...33 EN 10 3 Termostat Fault 10 3 1 Furnace runs continuosly the thermostat is not tripped ...
Страница 37: ...37 EN 12 COMPONENT ASSEMBLY DISASSEMBLY BE USED IN EQUIPMENT Screwdrivers needlenose Nippers ...
Страница 40: ...40 EN You can change the idle board with a new one Changing the front cover Open the front cover ...
Страница 44: ...44 EN After removing the screws pull as seen in the picture below ...
Страница 45: ...45 EN Remove the vent cover on the side of the decor Get the vent from the metal sheet ...
Страница 47: ...47 EN Pull out the handle grip pins down the drain This can change the blade remains in the grip handle ...
Страница 48: ...48 EN Changing the upper wall Screw off the screws of the top wall Then lift the top wall up ...
Страница 52: ...52 EN View ot the bulbin oven cavity can be seen in the picture ...
Страница 56: ...56 EN By removing the air conditioning thermostat replace the screws Removing the rear wall ...
Страница 57: ...57 EN Remove the 8 screws shown in the picture above ...
Страница 58: ...58 EN Rear wall opens rıgh ward Lift the rear wall up by the area marked red ...
Страница 60: ...60 EN Remove the bottom of the base plate to ground as shown in the parts of the picture ...
Страница 62: ...62 EN Remove the upper left side of the switch is down the drain and replace it in the oven Switch picture ...
Страница 67: ...67 EN Screw off the 2 screws Pull it yourself to remove resistance ...
Страница 75: ...75 EN Replacing the oven lamp Remove the lamp s glass Replace the old lamp with new one ...
Страница 80: ...80 EN Screw off the 2 screws that connect air ventilation with back panel of the oven ...
Страница 84: ...Envelope IV 84 EN ...


