


© 2013 Araknis Networks
®
12
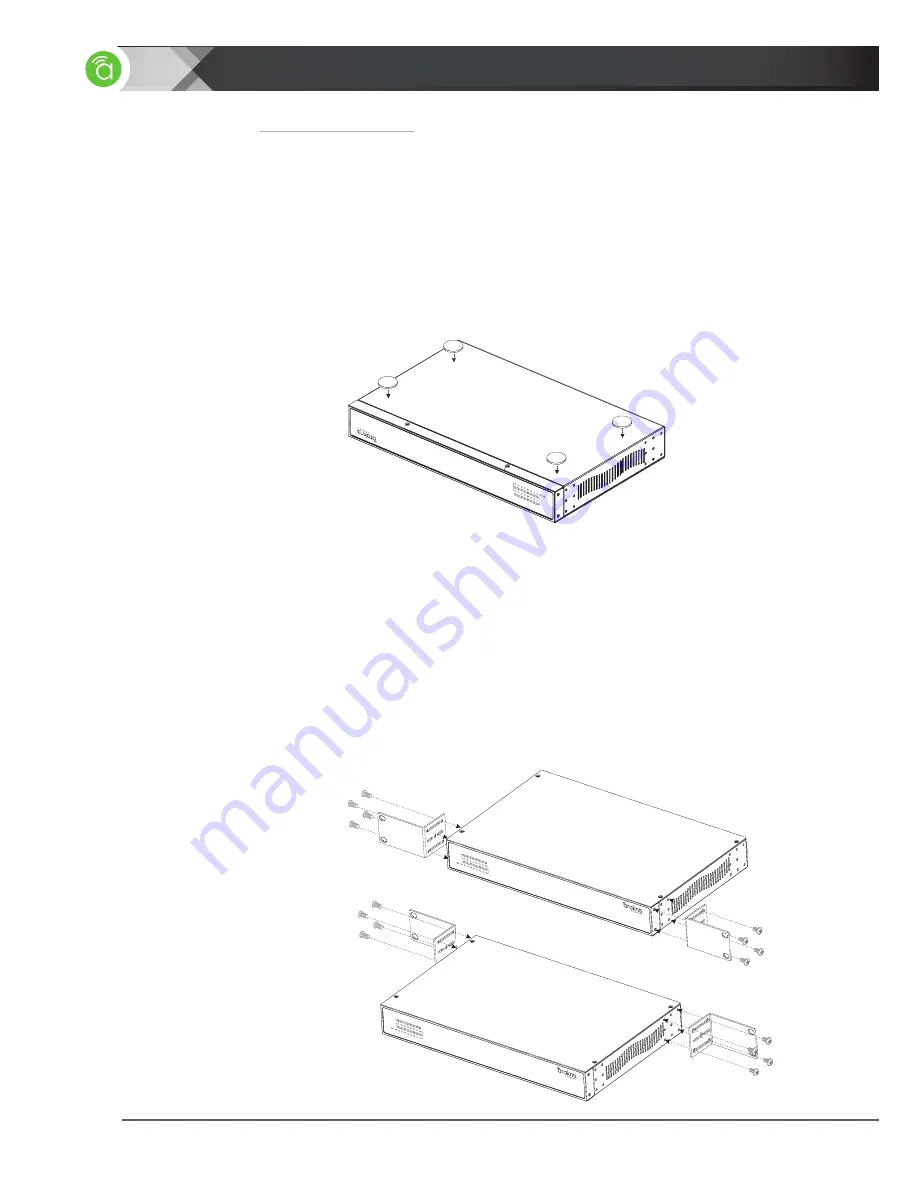
2.2.3.1 Shelf Mounting
To shelf-mount the network switch, first place the included adhesive feet on the bottom of
the unit as shown below. Then place the switch in the desired position. Make sure the shelf
or surface used is flat and stable.
Caution:
Do not stack more than 4 switches together. Do not stack any other equipment
on top of the network switch to avoid possible interference or damage.
2.2.3.2 Rack Mounting
The AN-100-SW-R-8, AN-100-SW-R-16, and AN-100-SW-R-24 models include a variety of
rack mounting hole options that allow for front, rear, or angled positioning in the rack. Follow
these steps to rack-mount the switch, using the images for reference when choosing the
holes for the desired mounting orientation:
1. Locate the included rack-mounting ears and screws from the packaging and a #2
Philips screwdriver.
2. Attach the ears to each side of the switch for the desired mounting angle as shown:
2.2.3
—
AN-100-SW-R-8/16/24
Placement Options
Figure 7.
AN-100-SW-R-8/16/24 Rubber Foot Installation
Figure 8.
AN-100-SW-R-8/16/24 Rack Mounting Options
Front Rack Mounting
Rear Rack Mounting
2
|
INSTALLATION
AN
-10
0-S
W-R
-16
1
3
5
7
9
11
13
15
2
4
6
8
10
12
14
16
1 Gbps
Link/
Act
AN-100-
SW-R-16
1
3
5
7
9
11
13
15
2
4
6
8
10
12
14
16
1 Gb
ps
Link/Ac
t
AN-100-
SW-R-16
1
3
5
7
9
11
13
15
2
4
6
8
10
12
14
16
1 Gbps
Link/Act


