56
Step
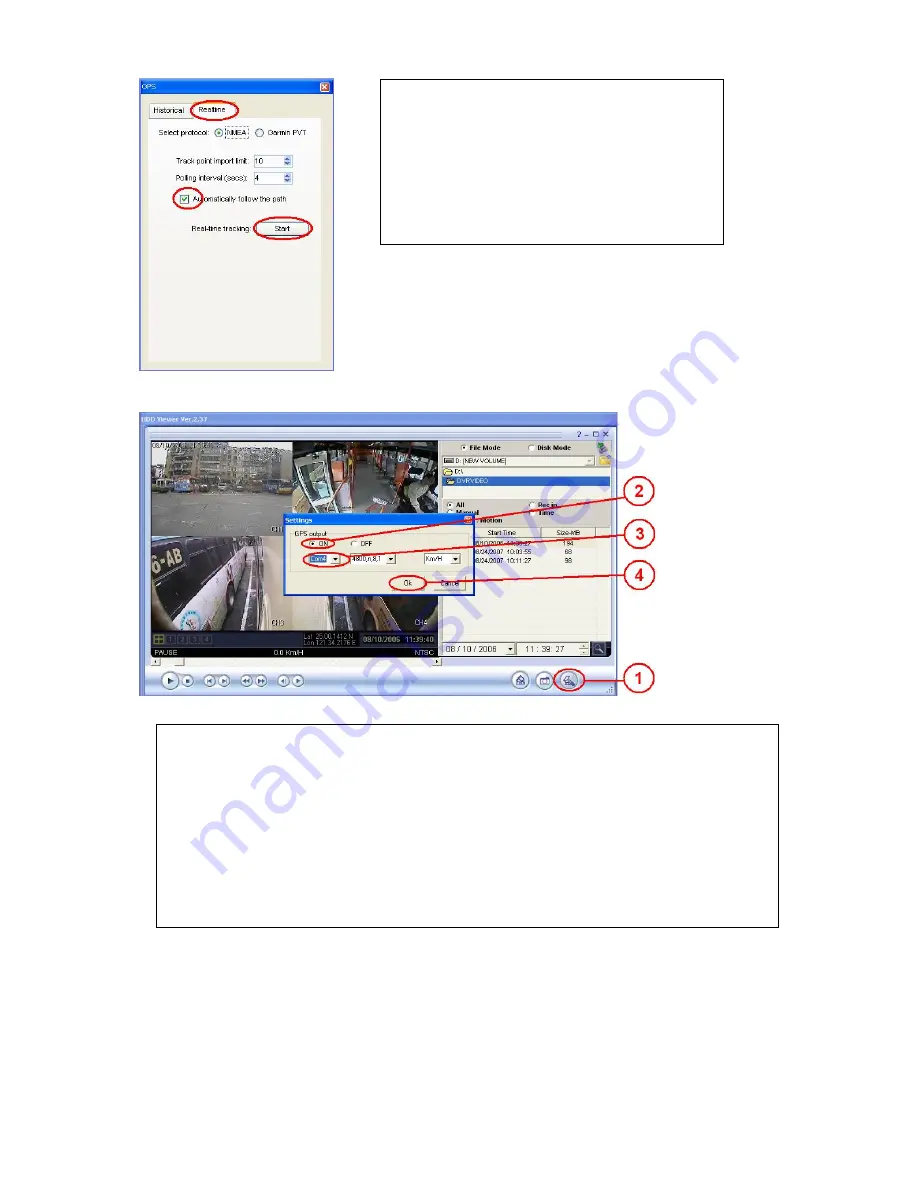
14: Now the "GPS" setting page
appears. Click "Realtime" in the
top bar, then click the
"Automatically follow the path"
item. Then click "Start" button.
Step 15: Open the HDD Viewer software to see the image on the above. Take
steps 1-4 given below to set the GPS settings.
1. Click the "Settings" button at the bottom.
2. Now a small window pops up in the center of the screen. Click "On".
3. Click the "Com" port to select one of the connections you have
added. (Please refer to Step 11.)
4. Click "OK" to close and save the settings and close the window.


