background image

29. Press the next step button       on the top right
corner.

Figure 8

 Figure 11

06

Figure 9

22. Peel off the protection film on the Apostle
Elution Plate. 

23. Place the Apostle Elution Plate on plate
holder 4 in the instrument through the plate-
loading window. 

Ensure A1 well is in the upper

right corner.

24. Press the [Plate position 5] button on the
screen.

25. Take out one Apostle Comb and an empty
plate. 

Don't touch the bottom columns of the

comb, grab the edge of the comb.

 (Figure 8)

26. Place the comb into the empty plate carefully.

Ensure the comb is fully incorporated into the
plate.

 (Figure 9)

27. Place the comb and empty plate on the plate
holder 5 in the instrument through the plate-
loading window. 

Ensure A1 well is in the upper

right corner.

28. Close the plate-loading window gently. 

30. Press the [YES] button to start the program.  

31. After starting the program, check if the comb
gripper successfully grips the comb during [Grip
Comb] process on position 5. If gripping fails,
press the pause button     on the screen and
immediately contact the lab director for hardware
adjustment. (Figure 10) 

[refer to operation

checkpoint 2]

32. Once the turntable moves to position 1,
observe if the comb smoothly inserts into the
plates and mixes the solution without moving
together with the plate. (Figure 11) 

[refer to

operation checkpoint 2]

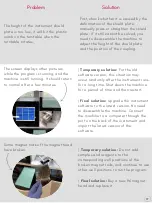
Figure 10

Содержание MagTouch 1000

Страница 1: ...Apostle MagTouch 1000 Nucleic Acids Extraction Automation System USER MANUAL Fast and efficient...

Страница 2: ...h a nucleic acids isolation automation system and Apostle MiniEnrich a high resolution DNA size enrichment technology using a magnetic nano platform Apostle responds to the COVID 19 pandemic to help o...

Страница 3: ...shipping box and place on the designated area 2 Remove and keep all the tapes and foam cushions used for transportation Figure 1 Do NOT connect power before removing the transportation fixing screw 5...

Страница 4: ...are stuck out If not wide open use pipette tip to open the wells Figure 4 refer to operation checkpoint 1 3 Press Initialization button on the top left corner to initialize the machine 5 Wait for the...

Страница 5: ...er 2 in the instrument through the plate loading window Ensure A1 well is in the upper right corner 14 Peel off the protection film on one Apostle EtOH Plate Figure 6 16 Press the Plate position 3 but...

Страница 6: ...d into the plate Figure 9 27 Place the comb and empty plate on the plate holder 5 in the instrument through the plate loading window Ensure A1 well is in the upper right corner 28 Close the plate load...

Страница 7: ...te position 4 button on the screen Figure 12 37 Open the plate loading window gently 38 Take out the Elution Plate from the plate loading window 39 Seal the Elution Plate with protection film Figure 1...

Страница 8: ...open as shown Figure 1 use pipette tip to make sure the wells are wide open 08 1 Figure 1 Figure 2 Checkpoint 2 After the start of the program check if the comb gripper successfully grips comb during...

Страница 9: ...t lifted manual movement of the plate will be limited and does not open up the wells Only adjust the plate when it is lifted up from the turntable Otherwise the turntable may be damaged Operation Chec...

Страница 10: ...er Take out the lysis binding plate and comb then move the plate forward backward to the left and right so that the comb can make the wells wide open Move the comb up and down several times and gently...

Страница 11: ...le MagTouch 1000 Apostle 96 well plates and 96 tip comb micropipettes 1 mL 200 L 20 L tips Adjustable single and multi channel Liquid reservoirs Vortex or shaker Ethanol 200 proof DNase RNase free wat...

Страница 12: ...sults Also vortex the reagent reservoir for Lysis Binding Solution before adding more Lysis Binding Solution C Automated viral Total NA isolation on Apostle MagTouch 1000 Automation Platform 1 Initial...

Страница 13: ...ide the machine immediately clean the area with a dustless cloth dampened into 80 ethanol Frequency when needed Fasten Screws Check whether the magnet head screw turntable screws and screws of the fix...

Страница 14: ...lization Turn off the machine Sterilization Frequency before every run Turn off the machine for at least 15 minutes between each shift Frequency between each shift Close the monitor window and the pla...

Страница 15: ...iation get directly on the skin The glass door of the instrument can block UV leakage Please keep the door closed when using the UV lamp If the door or glass of the door is damaged please contact the...

Страница 16: ...g off the comb grabbing hook Reagent spill in the machine should be cleaned up immediately otherwise the surface of the machine will corrode Clean the spill area with a dustless cloth dampened in 80 e...

Страница 17: ...position of the coupling 17 Temporary solution For the old software version this situation may occur randomly after the instrument runs for a long time Shut down the machine for a period of time and t...

Страница 18: ...e wells of the plate causing liquid leakage Temporary solution Users should pay attention before use Before adding liquid observe whether there are obvious holes at the bottom of the plate and observe...

Страница 19: ...ad will be blocked Straighten the screw rod and then turn on the machine to confirm whether the problem is solved There is abnormal noise when the instrument is turned on or initialized and there is n...

Страница 20: ...d the positions of the other plates are deviated Contact the supplier After the machine has been running for long periods of time the position of the parts is misaligned The technician hits or touches...

Отзывы: