
7
3
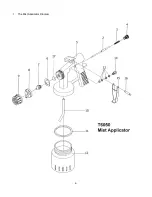
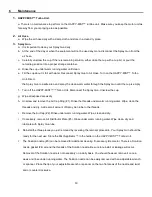
Prepare the T6050 Mist Applicator cont’d.:
1. Follow the diagram to prepare the Spray Gun
a. Unscrew the plastic cup from the Spray Gun. Pour your tanning solution into the cup. Do not fill more than ¾
full. If you over fill the cup leaking may occur.
b. Carefully screw the cup back onto the main body of the Spray Gun. Screw the cup on firmly but
DO NOT
over tighten
.
Over tightening will cause the cup to “pop” and damage the threads. Leakage can
then occur requiring replacement of the cup.
c. Locate the air cap (#2) on the T6050 diagram. Slightly turn the air cap ring (#1) anti or counter clockwise
to loosen the air cap. Notice that you can now rotate the air cap freely.
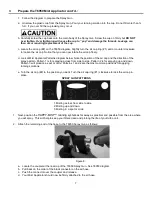
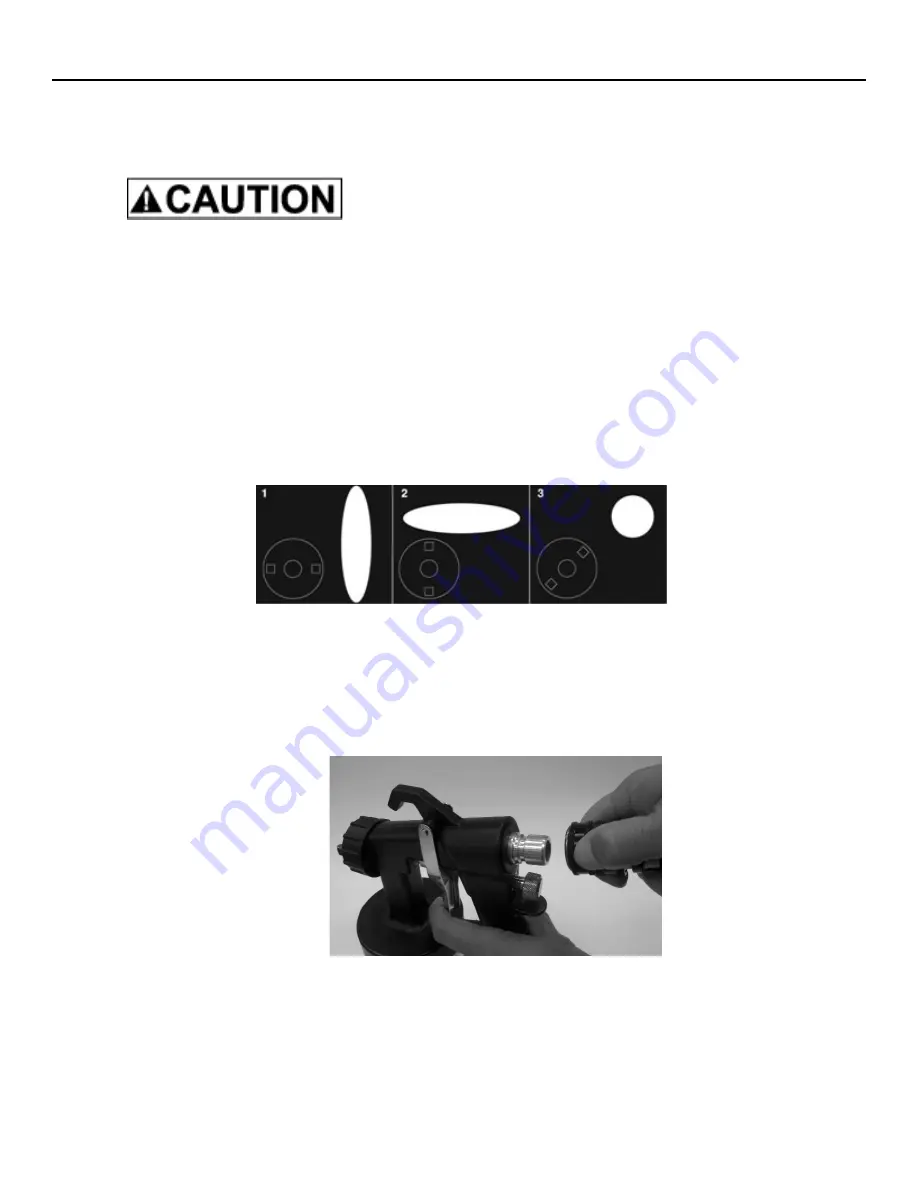
d. Look at Mist Applicator Patterns diagram below. Note the position of the air cap and the direction of the
spray pattern. Pattern 1 is for spraying across from side to side. Pattern 2 is for spraying up and down.
Pattern 3 will produce a spot or circle. Patterns 1 and 2 are the most common positions for applying
tanning solutions.
e. Turn the air cap (#2) to the position you want. Turn the air cap ring (#1) clockwise to lock the air cap in
place.
SPRAY GUN PATTERNS
1. Misting across from side to side
2. Misting up and down.
3. Misting in a spot or circle
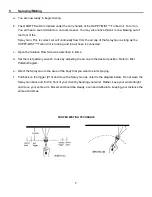
1. Next, position the
HAPPY-MIST™ tanning system
as far away as practical and possible from the area where
you will spray. This will help to keep your filters clean and prolong the life of your turbo unit.
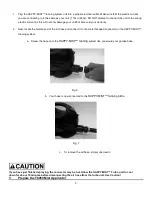
2. Attach the remaining end of the hose to the T6050 Spray Gun as follows:
Figure 8.
a. Locate the coupler at the rear top of the T6050 Spray Gun. See T6050 diagram.
b. Pull back on the collar of the black connector on the air hose.
c. Push the connector over the coupler and release.
d. Your Mist Applicator should now be firmly attached to the air hose.
Содержание Happy-Mist
Страница 6: ...6 1 The Mist Applicator Diagram ...


