


23
‘
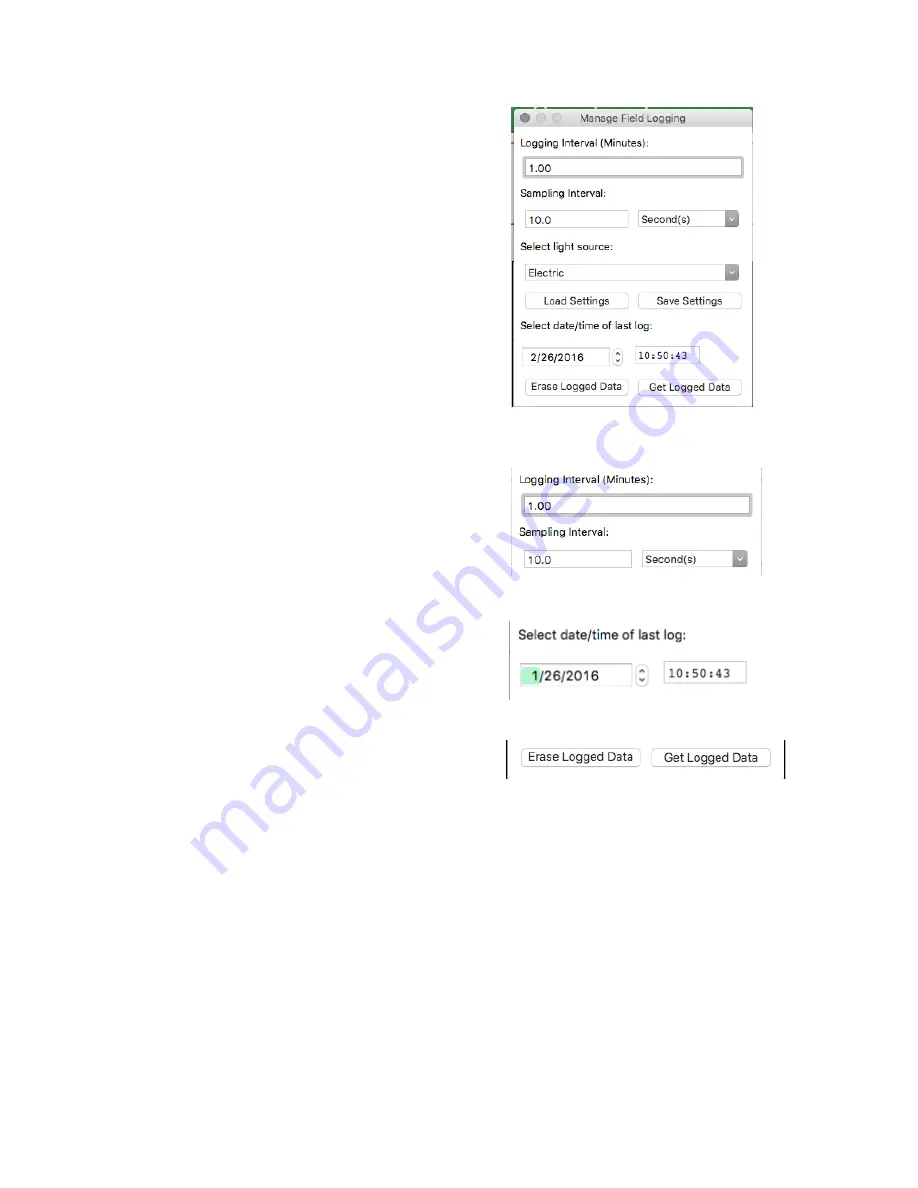
Manage Field Logging
’ is used to setup the SQ-520 for the use in
the field. When the SQ-520 is supplied power from a USB power
source (plug or select batteries) it will log data which you can
retrieve. Choose the interval the data is saved as well as the interval
that data is sampled and the light source used. The shortest
sampling interval is 1 second. The longest sampling or logging
interval is 1440 minutes (1 day). Click ‘Load Settings’ to see current
settings and ‘Save Setting’ to save the settings you want to the
sensor. Note: If you don’t click save the sensor won’t change the
settings.
Set the sampling interval in minutes or seconds. The sampling
interval is how often a measurement is taken and logging interval is
how often the data is saved. The logged data is the average of the
samples. The logging interval must be evenly divided by the
sampling interval. For example if the logging interval is 5 minutes
and the sampling interval is 2 minutes it causes an error. But a
sampling interval of 1 minute is acceptable.
Before clicking ‘Get Logged Data’ it is important to set the time of
the last logged data point. This is used to back calculate the
timestamps for the remaining data points. If you just unplugged
the sensor and plugged it into the computer the preloaded day
and time should be sufficient.
Click ‘
Get Logged Data
’ to save the data to your computer. You
will be asked where you want to save the data.
Click ‘
Erase Data
’ to erase all the save data. This can’t be undone.
To use additional SQ-520 devices, open additional SQ-520 software windows. The device serial number will display in the lower left hand
corner of the corresponding software window. Devices may be selected by serial number in the tool bar.