
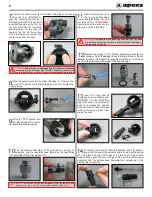
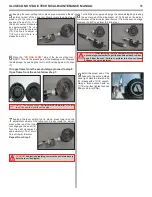


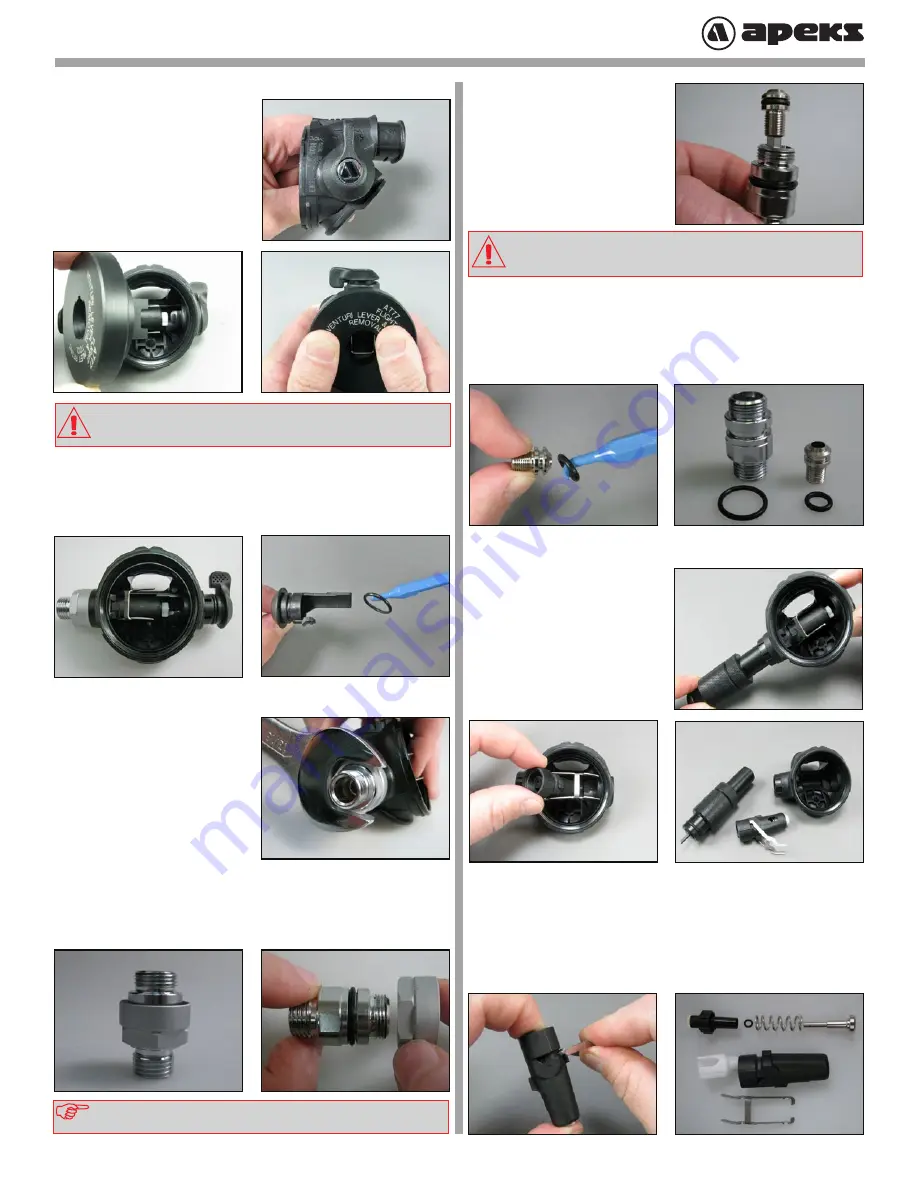
8
Slide the venturi lever (27) out from the body (7). Remove the
o-ring (11) from the venturi lever taking care not to scratch the
o-ring groove.
9
Using a 13/16” wrench turn
the inlet shroud (12) counter-
clockwise to loosen & remove.
10
The inlet shroud assembly (10/12) will remove as one. To
separate, grip the regulator hose thread on the inlet fitting
(10) and slide off the inlet shroud (12).
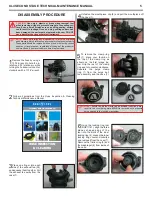
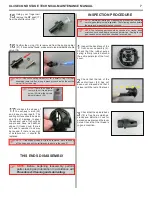
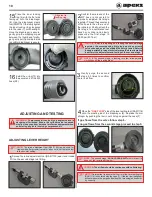
7
Position the venturi lever (24) vertically. Using the venturi lever
removal tool (RG911232),
align the cutout in the tool so it
will engage the tab of the venturi
lever and evenly set the tool on
the top of the case (7). Carefully
pushing down on the tool will
depress the tab of the venturi
lever allowing you to remove the
venturi lever from the case.
CAUTION:
Take care not to damage or distort the venturi tab when
removing the venturi lever (24). DO NOT depress the tab of the
venturi lever too far, as this will result in permanent deformation.
NOTE:
There will be some slight resistance removing the two parts
above due to the o-ring (11) underneath the inlet shroud (12).
Align tool cutout
& venturi tab
CAUTION:
Take care when handling the seat (14). The seal-
ing surface of the seat must be protected from damage or
the regulator will leak.
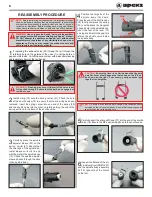
11
Insert a 5mm hex key into
the reg hose threaded
end of the inlet fitting (10) and
turn the seat (14)
CLOCKWISE
.
Carefully push the seat out the
other end of the inlet fitting.
13
Insert the long end of
the micro adjuster tool
(RG911227) into the inlet fitting
side of the case (7) and carefully
push in to release the spindle
body (16) from the case. Carefully
remove the spindle body from
inside the case.
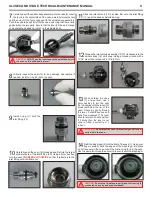
12
Remove the o-rings (11/13). Closely examine the seat for any
scoring or nicks. If damage is found, discard the seat. Do not
attempt to reuse. If the seat is in reusable condition, set it aside on
a soft surface to prevent damage to the sealing edge.
14
To remove the lever (15) from the spindle body (16), press a
finger into the end of the spindle body to compress the spring
(20). Carefully pull one of the legs of the lever out of the spindle
body and then ease the second leg out. Remove the shuttle valve
assembly from the spindle body. Separate the components of the
shuttle valve assembly
6


