6
6
λ
Reformatting AC233
For Windows Users
Please follow the steps below to reformat your AC233 hard drive.
Reminder: Disk formatting will eliminate all the data in your AC233. Back up the
data before you start to format your drive. In addition, the images shown below
are based on Windows XP.
1.
Connect your AC233 hard drive to an unoccupied USB 2.0/3.0 port of a
computer with Windows operating system through the provided USB cable.
(See “System Requirements” for the list of supported operating systems).
2.
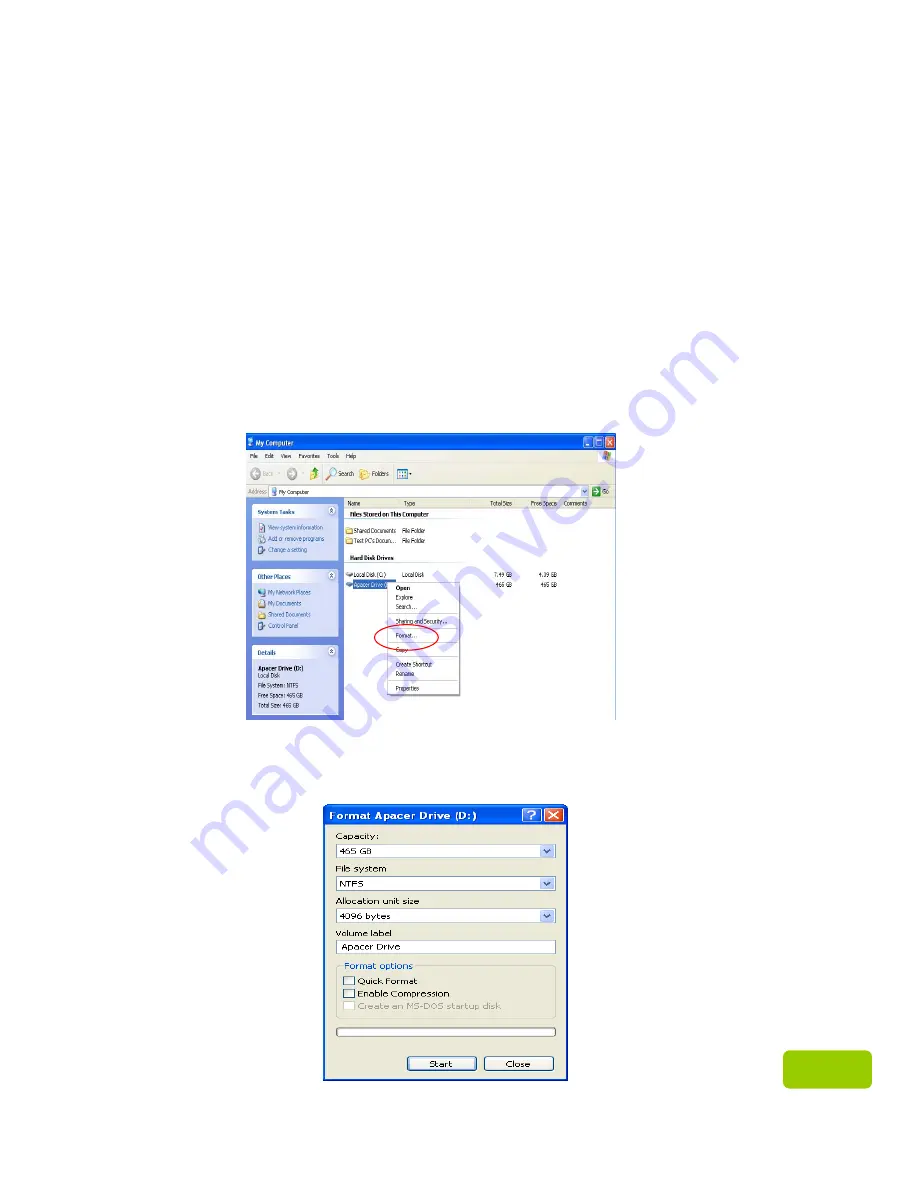
Go to “My Computer”, and right click on the newly added hard drive icon.
Then, select “Format”. The name of the drive can be renamed. Regarding the
name of the drive and the drive letter, it appears in default defined by
Windows once detected (such as “Local Disk”, “Removable Storage”). For the
drive letter, it may vary.
3. A format option window will pop up. Please select the “File System”
(NTFS/FAT32, the default is NTFS for large capacity), name the volume label or
enable “Quick Format”/”Enable Compression”. Then click on “Start” and wait for
it to complete.


