6
BEATING AND WHISKING
1. Firstly, assemble the driving shaft into the motor base. Make sure it is clipped into
position.
2. Place the chopping jar on the motor unit, aligning the arrow symbol on the chopping
jar with the unlock symbol on the motor unit. Slightly turn the chopping jar clockwise
until the chopping jar locks into the lock position on the motor base. Make sure it is
assembled in place correctly, otherwise the appliance will not operate.
3. Insert the whisk into the driving shaft in the jar securely.
4. Place the ingredient into the bowl. You can use it to prepare mayonnaise, sauces, egg
whites, meringues (up to 10 egg whites), and whip cream.
5. Place the lid onto the chopping jar and turn it clockwise until the tab of the lid clicks
into slot in the jar handle. Make sure it is locked in position correctly, otherwise the
appliance will not operate.
6. Set the speed selector to the “2” setting.
Note: Never use this whisk to knead dough or mix cake mixtures
.
Warning: The maximum operating time is 90 seconds. Allow it to rest for 2 minutes
before using it again. After 3 cycles of operation, allow the electric motor to cool down to room
temperature for approximate 30 minutes before using it again.
CLEANING
1.
Disconnect the power supply before cleaning.
2.
Empty the jar and remove the lid, the whisk, pusher, then immerse them in water and clean them with
a damp cloth or soft brush.
3.
Wipe the outside of base with a damp cloth. Never immerse the motor base in water as electric shock
is possible to occur. Then dry thoroughly. Ensure the interlock area is free of food particles.
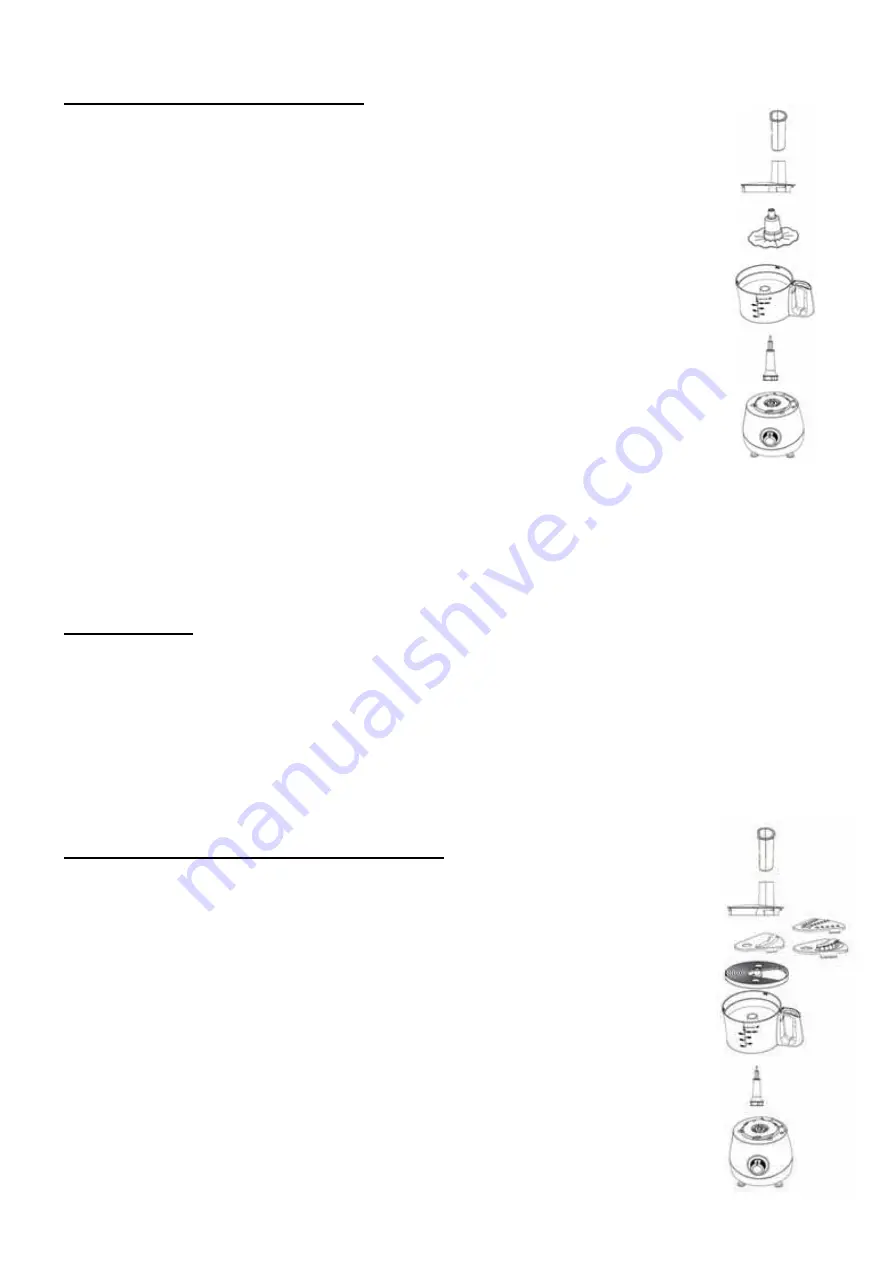
SLICING/CHIPPING/SHREDDING
1. Firstly assemble the driving shaft into the motor base. Make sure it is clipped into
position.
2. Place the chopping jar on the motor unit, aligning the arrow symbol on the chopping
jar with the unlock symbol on the motor unit. Slightly turn
the chopping jar clockwise until the chopping jar locks into the lock position on the
motor base. Make sure it is assembled in place correctly, otherwise the appliance will
not operate.
CAUTION: The blade is extremely sharp, handle with care.
3. Fit the shredding blade or slicing blade or chipping blade (coarse or fine) into the disk
stand, place them in the bowl.
Note: For assembling the blade into the disk stand, firstly push the side without tab into
the disk stand, then push the other side in position. For disassembling, firstly push the
side with tab outwards and then push the other side out of the disk stand.
Содержание FP9053KB-GS
Страница 1: ...1 Food Processor FP9053KB GS User Manual PLEASE READ AND SAVE THESE INSTRUCTIONS FOR FUTURE REFERENCE...
Страница 10: ......
Страница 11: ......
Страница 12: ......


