13
115V Mini-Split
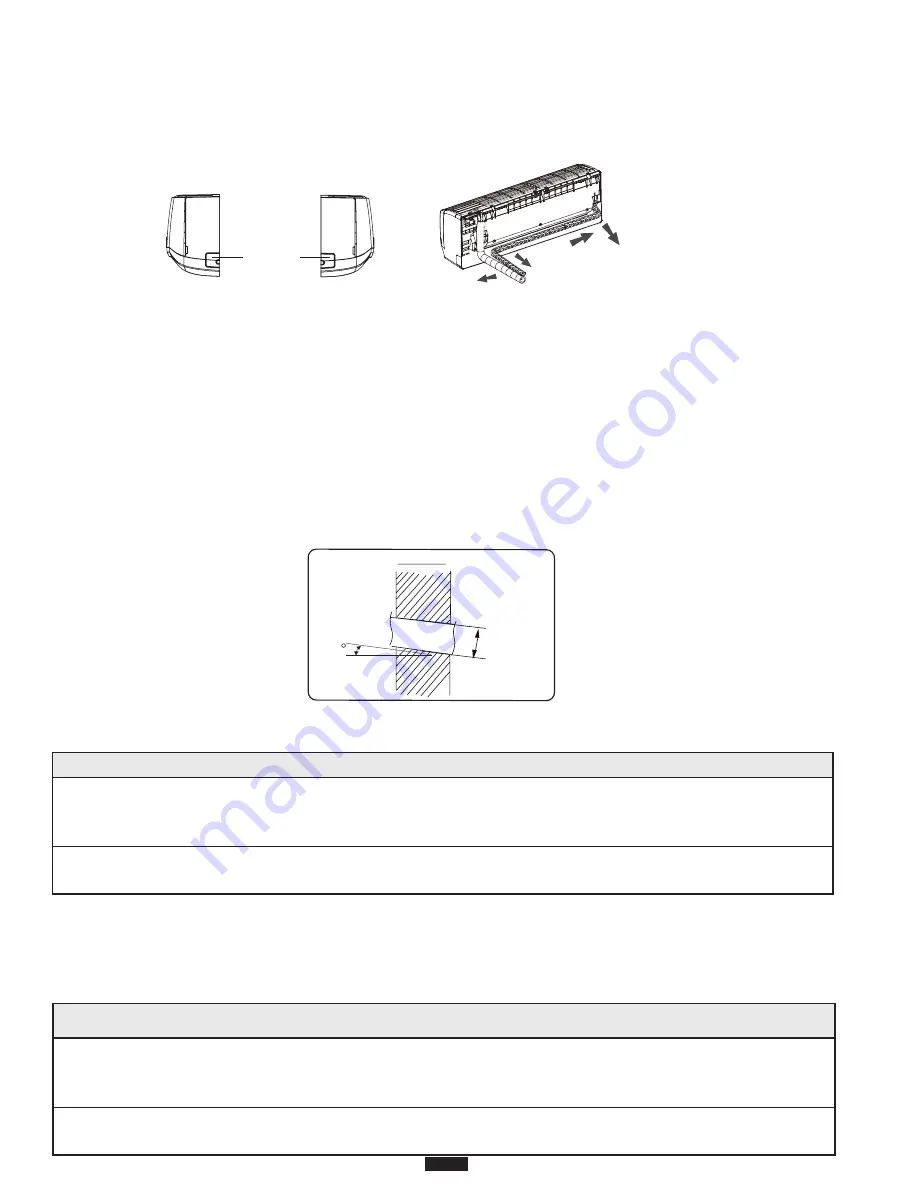
1. When the position of the drain piping has been selected, cut out the corresponding
knock-out from the unit housing.
2. Select the position of the piping hole to be drilled according to the direction of the
drain pipe position selected for the application. The position of the piping hole should
be slightly lower than the wall mounted frame.
3. Drill a hole with the diameter of 2 3/16 inch for the selected outlet pipe position. In
order to drain smoothly, slant the piping hole on the wall slightly downward to the
outdoor side with a gradient of 5-10°. (As shown below)
4. Insert a sleeve into the hole to prevent the connection piping and wiring from being
damaged when passing through the hole.
Drilling the Piping Hole
The piping can be connected in the direction of right, rear right, left or rear left.
Left
Rear left
Right
Rear right
Cut off
the hole
Left
Right
Refrigerant Piping at the Indoor Unit
Detach the caps and plugs from the pipes.
NOTICE
1. Be sure to connect the pipe to the port on the indoor unit correctly. If the centering is
improper, the flare nut cannot be tightened smoothly. If the flare nut is forced to turn, the
threads will be damaged.
2. Do not remove the flare nut until the connection pipe is to be connected so as to prevent dust
and impurities from entering the piping system.
NOTICE
1. When a wall sleeve is not used, it is then necessary to drill a straight hole in the wall. If the
hole is not straight and uniform, this could result in water leaking from condensation resulting
in property damage.
2. If a wall sleeve is not mounted in the wall, the wiring between the indoor unit and the outdoor
unit can possibly be damaged resulting in electrical current loss in the ground wiring.
Indoor
5-10
outdoor
Φ55(2 3/16)
Φ70(2 3/4)
mm(inch)


