


21
© American Time
Wireless Remote Transmitter Installation Manual
Glossary
Appendix
Troubleshooting
Clock
Installation
Transmitter and
System Setup
Intr
oduction
Remote Transmitter Connect
Web Interface
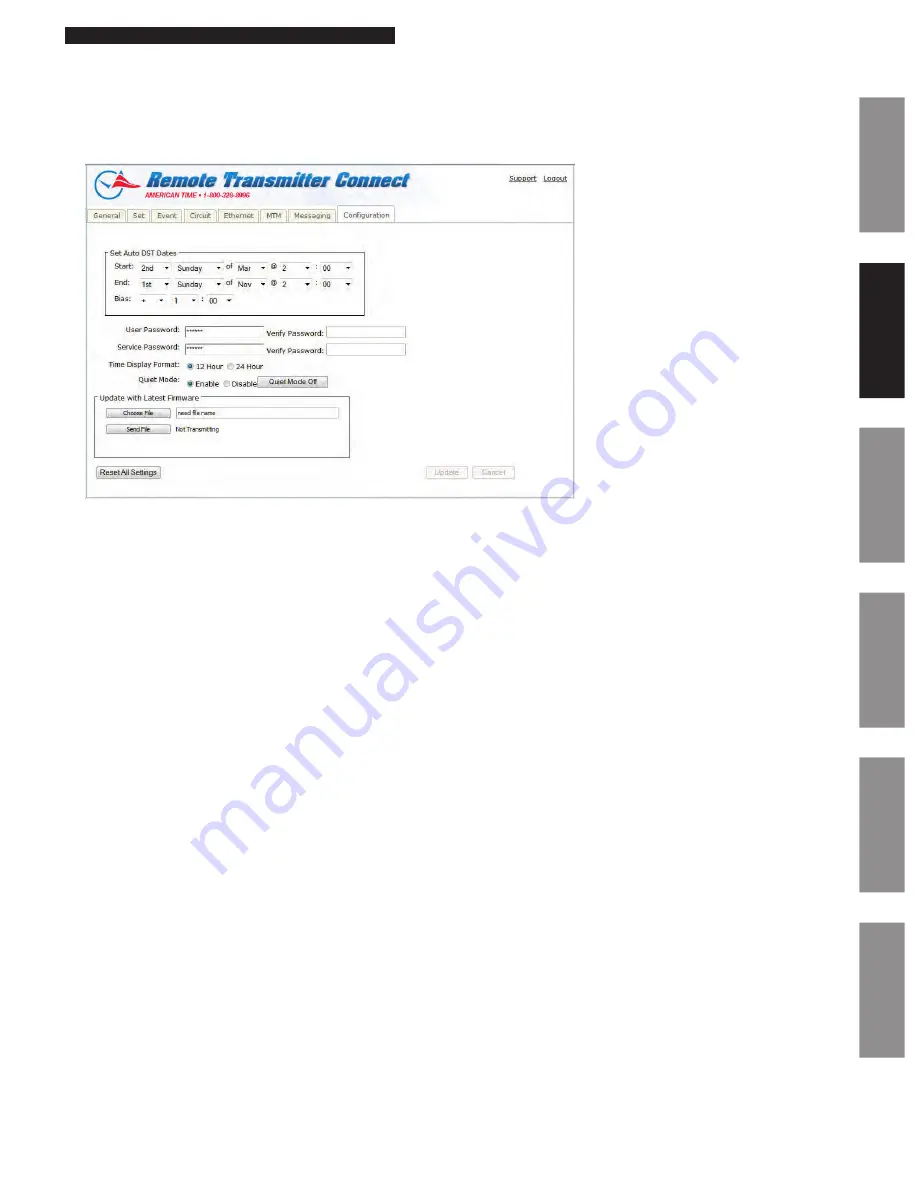
Configuration Tab:
The Configuration Tab requires a service password for access. Within this tab, the user can change their passwords, update their firmware or
change Quiet Mode.
1.
Set Auto DST Dates:
This allows the user to change the AUTO DST dates and times. This allows for future flexibility if the DST were to
change. The
Update
button must be pressed for changes to take effect.
2.
User Password/Verify:
This allows the user to change the
User Password
. The
User Password
must match the
Verify Password
to be
accepted. The
Update
button must be pressed for changes to take effect.
3.
Service Password/Verify:
This allows the user to change the
Service Password
. The
Service Password
must match the
Verify
Password
to be accepted. The
Update
button must be pressed for changes to take effect.
4.
Time Display Format:
This allows the user to change the
Time Display Format
. The format chosen will also be displayed on our
American Digital Series Clocks. The
Update
button must be pressed for changes to take effect.
5.
Quiet Mode:
This allows the user to enable or disable Quiet Mode. If enabled the Remote Transmitter will enter Quiet Mode in 24
hours. The Quiet Mode On/Off toggle button allows user to force Quiet Mode On for debugging. After toggling Quiet Mode, return to
General tab to see status (pg 12). When Quiet Mode is Off nothing will be displayed on the bottom of the screen and when it is On
Quiet Mode in big red letters will be displayed. The
Update
button must be pressed for changes to take effect. Reference Appendix F
for more details on Quiet Mode.
6.
Update with Latest Firmware:
This allows a user to update the firmware of the Remote Transmitter. The firmware file must be
downloaded from the support site to the PC which is running Remote Transmitter Connect.
7.
Reset All Settings:
Pressing this button will reset the Remote Transmitter to factory defaults.
n
Note:
Pressing this may change the IP address of the unit and it will have to be reconfigured to meet the network specifications.
Figure 10


