


19
© American Time
Wireless Remote Transmitter Installation Manual
Glossary
Appendix
Troubleshooting
Clock
Installation
Transmitter and
System Setup
Intr
oduction
Remote Transmitter Connect
Web Interface
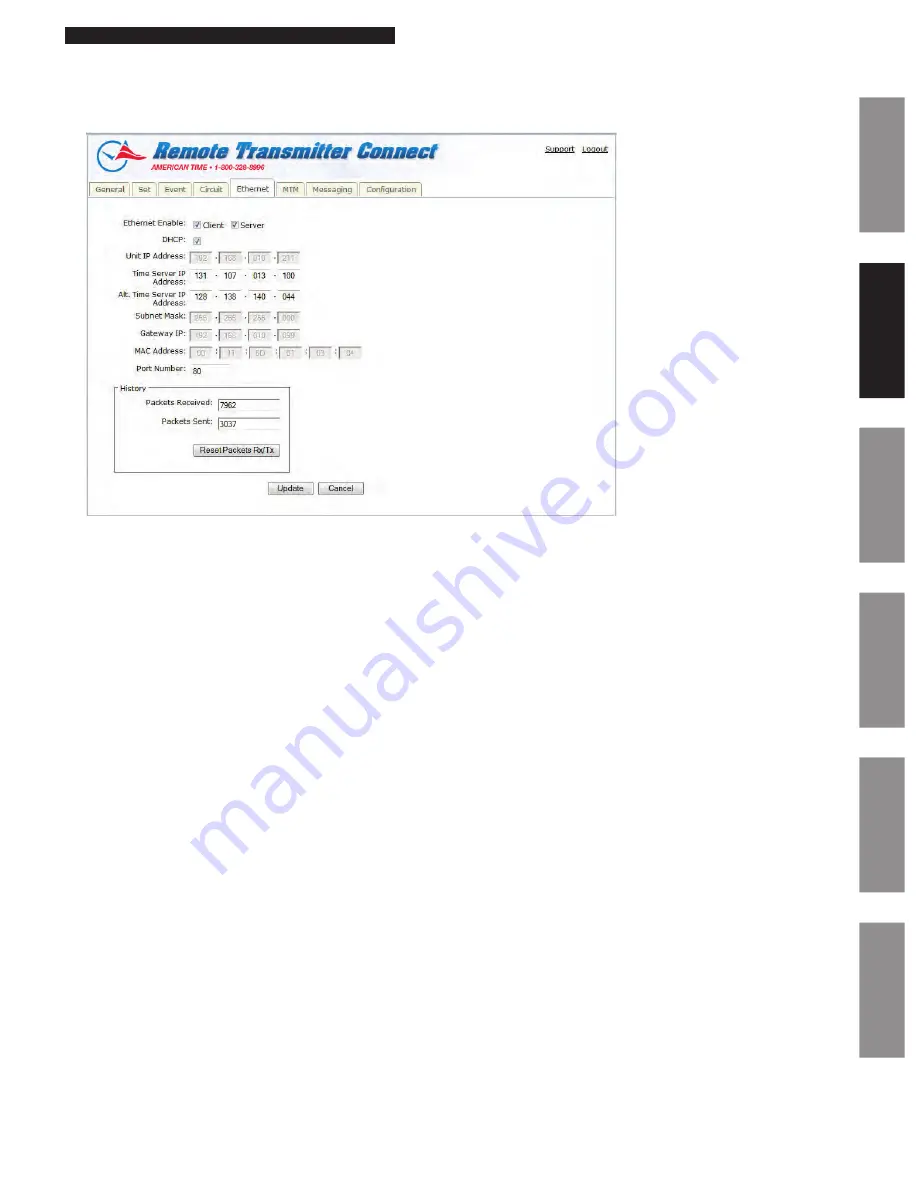
Ethernet Tab:
The Ethernet Tab contains the network settings for the SiteSync IQ Remote Transmitter.
Figure 7
1.
Ethernet Enable:
This allows the user to choose if the SiteSync IQ Remote Transmitter should be a client, server, or both (time
synchronization.
2.
DHCP:
This is the default Ethernet setting. When this box is checked, the device will automatically obtain an IP address from a DHCP
server. The address received will be displayed in the Unit IP Address boxes.
n
Note:
If no DHCP address is received, the device will default to 192.168.10.10. In this situation, directly connect an Ethernet
patch cable from the Remote Transmitter to a computer that is on the same Subnet. Example: Set the connecting computer IP
address to 192.168.10.11. See your Network Administrator if you do not know how to do this. More information is also available
in the Ethernet troubleshooting section.
3.
Unit IP Address:
This displays the IP address of the Remote Transmitter. These boxes are normally grayed out and can only be
changed if the DHCP box is unchecked. After changing all IP fields in the Ethernet Tab, press the
Update
button to save
the configuration.
4.
Time Server IP Address:
This displays the IP address of the time server. After changing this field, press the
Update
button. This is
referred to as Ethernet 1 which is displayed under the general tab. Time Last Set: (Source Ethernet 1).
5.
Alt. Time Serer IP Address:
This displays an alternate IP address of a time server. After changing this field, press the
Update
button.
This is referred to as Ethernet 2 check is displayed under the General tab, Time Last Set: (Source Ethernet 2).
6.
Subnet Mask:
This displays the subnet mask of the Remote Transmitter. After changing all IP fields in the Ethernet Tab, press the
Update
button to save the configuration.
7.
Gateway IP:
This displays the assigned Gateway IP. After changing all the IP fields in the Ethernet Tab, press the
Update
button to
save the configuration.
8.
MAC Address:
This displays the MAC address of the SiteSync IQ Remote Transmitter. This field can't be changed in Remote
Transmitter Connect.
9.
Port Number:
This Port Number is defaulted to 80 so that Remote Transmitter Connect can be displayed. This enables the web
server.
10.
History:
This displays a history of the Ethernet activity to and from the Remote Transmitter. This can be reset by pressing the
Reset
Packets Rx/Tx
button.
n
Note:
When changing these setting in Remote Transmitter Connect, close your browser and log in again (with the new IP address, if
applicable). Use caution when revising these settings, as you could lose connectivity after pressing
Update
.


