


9
Gas Pipework Installation
The installation must conform to all standards and regula-
tions. The gas supply pipework and gas stop valve to be in-
stalled near the unit must be dimensioned so as to assure
the gas pressure is sufficient at the unit inlet when operat-
ing at full load.
The pipework must be self supporting and the final connec-
tion to the burner must be made by flexible pipe. Provide a
dust protection (filter) upstream of the unit connection. Look
for gas pipe leaks using "Typo", "1000 bulles" or a similar
product. Soapy water must not be used.
Caution: Never use an open flame to check for gas
leaks. Required gas pressure at the unit inlet
connection are given in Table 4.
Caution: The gas pipework must not exert any
stress on the burner gas connection.
The heating system must be isolated by a gas stop valve
from the gas supply pipe during the pressure test as soon
as it is higher than 0.035 bar. Applying a pressure higher
than 0.035 bar at the unit valve gas could damage it.
Operating Principles of the Gas Heating Module
The heating function of the YK* units is controlled by the
heating module ignition burner. The burner, of the forced air
type, has two capacity stages controlled by the UCP elec-
tronic controller which optimizes the air conditioner opera-
tion.
A normal call for heat is initiated by the UCP, using the tem-
perature detected at the zone sensor. The UCP module in-
ternal relays K5 and K6 energize, which in turn energize
the heat relay (H), the combustion fan motor (CFM), and
the ignition control module (IGN).
The relay K5 switches CFM into high speed. After approxi-
mately 1 minute K5 switches back and the CFM changes
into low speed. If the low pressure fan switch (LPGS), and
the high limit cutout (TC01) are closed, ignition is allowed.
The ignition control module pre-heats the ignition probe (IP)
during approximately 36 seconds. After this pre-heating
stage the gas valve is energized for approximately 8 sec-
onds to ignite the burner. If the burner fails to ignite, the
control module tries again twice before self-locking out.
When the gas ignites successfully, the IP probe is de-ener-
gized and maintains a flame detection function.
If the zone temperature remains below the first stage heat-
ing setpoint for 90 seconds after the heating cycle has
started, the UCP energizes again the K5 relay. The burner
fan then switches into high speed and the heating capacity
is raised to maximum.
When the temperature of the zone has reached the
setpoint, the UCP de-engerizes the relays K5, K6, H and
IGN; the burner then stops.
If the indoor fan is set to auto operation, it will stop 90 sec-
onds after the burner has stopped in order to recover as
much heat as possible from the exchanger.
To reset the ignition controller which has tripped on safety,
it is necessary to cycle power to the unit.
Note: The supply static pressure should be
checked and should be no less than 200 Pa.
In addition to the safety features of the ignition controller, the
burner includes the following safeties:
- detection of a gas supply minimal pressure by the automatic re-
set pressure switch LPGS.
- detection of an abnormal temperature of the supply air (Thermo-
stat TC01).
- detection of an overheating problem due to a lack of air circula-
tion through the heat exchanger (Thermostat TC02).
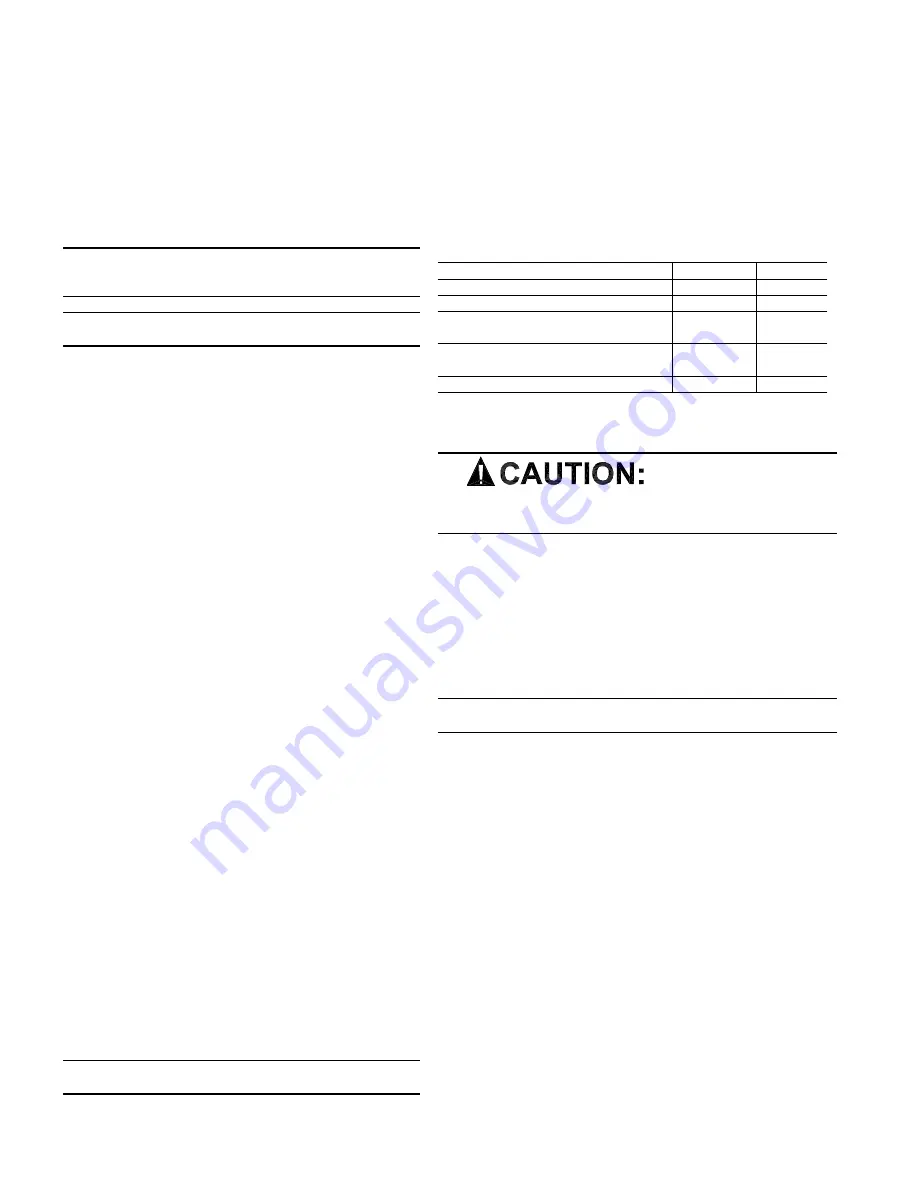
Table 2 - State of LEDs on Gas-Fired Heating Module
Diagnostics
Green LED Red LED
1. Powered without heating demand
Off
Off
2. Heating demand without fault
Flashing
Off
3. No flame detection on ignition or
Off
Flashing
signal detected and then lost
4. Gas unit incorrectly wired or flame
On
Flashing
signal detected on a heating demand
5. Internal fault
Off
On
Putting the Gas-Fired Heating Module into Operation
(Reserved for the qualified gas technician)
This type of burner can only
be put into operation by an approved techician who has
read the following procedure beforehand, or preferably
has undergone the training course on Trane gas burners.
Before performing ignition tests it is first necessary to perform the
following operations:
- Check if gate valve is present
- Check if an expansion valve is present. This valve must be
adapted to the type of gas used:
* G 20 : 20 mb
* G 25 : 25 mb
* G 31 : 37 or 50 mb
Note: To operate with propane gas, the burner is fitted
with a limiter (supplied by Trane).
- Vent the gas line
- Check the gas pipe is leak-tight upstream of the gas unit (see
drawing). Use Typol or a foaming product ("1000 bulles" aerosol or
similar). Do not use soapy water.
- Check the pressure upstream of the gas unit (the pressure con-
nection is located on the minimum gas pressure cut-out). This
cut-out must be set to 15 mbar. This operation must be carried
out while the burner is not operating.
- Check voltage at the TNS2 transformer output:
- 115 volts for power supply of the IGN module (L1 - L2 and S1 -
S2).
230 volts for power supply of the burner fan motor.
Содержание YK-IOM-2
Страница 10: ...10 Figure 5 Figure 6 Detail of the Gas Section...
Страница 17: ...17 Figure 11A Zone Sensor Interconnections...
Страница 18: ...18 Figure 11B Conventional Thermostat Interconnections...
Страница 23: ...23...
Страница 24: ...24...


