QIG
2012
1.3.2
Deploying
an
AP
without
Dynamic
IP
Addressing
(DHCP)
If
your
network
does
not
automatically
assign
IP
addresses
(No
DHCP
service),
follow
these
steps:
Step
1
:
Connect
the
AP
directly
to
your
computer
using
an
Ethernet
cable
and
provide
power.
(Do
NOT
connect
it
to
the
LAN.)
Step
2
:
Configure
the
Ethernet
connection
of
your
computer
as
follows:
‐
IP
Address:
192.168.101.50
‐
Subnet
Mask:
255.255.255.0
Step
3
:
Launch
a
web
browser
and
type
the
default
IP
address
of
the
AP
(
http://
192.168.101.55
).
Enter
the
following
User
Name
and
Password:
‐
User
Name:
admin
‐
Password:
password
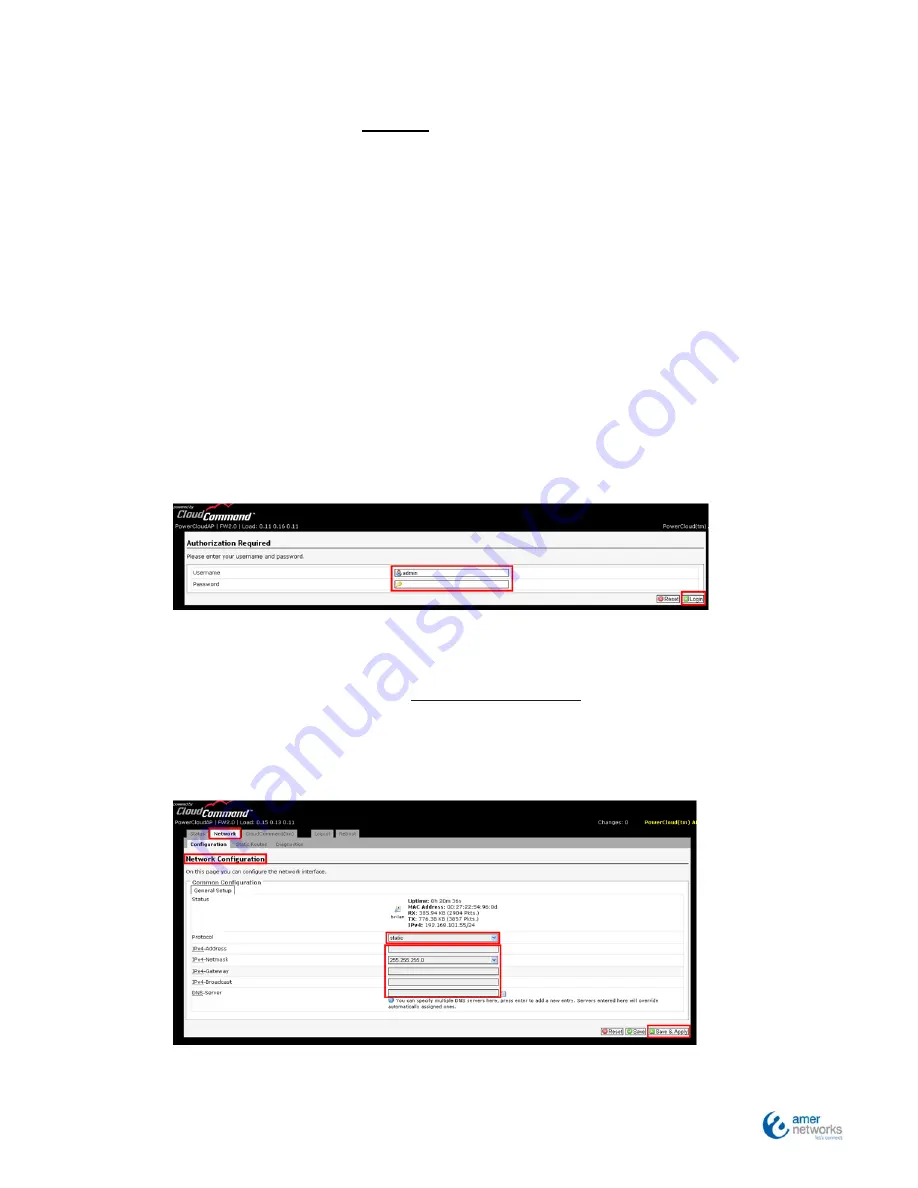
Step
4:
Using
the
dropdown
menu,
select
“
Network
Configuration
.”
Select
“
static
”
and
complete
the
IP
address,
Net
mask,
Gateway
and
DNS
servers
info
based
on
what
your
actual
network
utilizes.
Click
“
Save
and
Apply
.”
Step
5
:
The
AP
is
now
configured.
Select
“
Logout
”
and
disconnect
the
AP
from
your
computer.
Содержание WAP223NC
Страница 1: ...QIG 2012 Quick Install Troubleshooting Guide WAP223NC Cloud Managed Wireless N Access Point...
Страница 15: ...QIG 2012 Appendix 4 Hardware Installation...
Страница 16: ...QIG 2012...
Страница 17: ...QIG 2012...
Страница 18: ...QIG 2012...


