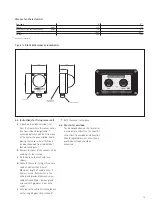
If ignition is successful the flame is detected
by the flame sensing probe and the ignition
spark is switched off. The amber
burner on
lamp indicates that the gas solenoid valve
is energised.
If ignition is unsuccessful the gas valve is
closed and the spark ignition de-energised
after approximately 4 seconds. After
unsuccessful ignition attempt the electronic
sequence controller will lock-out the red
mains on
lamp only will remain illuminated.
To reset this lock-out condition, switch
the power supply to the system, wait until
the fan stops completely then restart it. If
repeated lock-out occurs, investigate the
cause.
Note
If an individual burner assembly unit
is switched off and reconnected it cannot
restart. The fan must stop running before the
burner can be restarted.
To shut down the heaters switch off the
power supply to the system. Automatic
control of the heating system is achieved
through the lockable control panel,
incorporated in the electrical supply, which
may contain a time switch, black bulb
controller with day and night settings, a 3
position mode switch giving constant on/off
auto control and fan starter. It is essential to
allow a delay of 30 seconds after switching
off heaters before attempting to restart the
system.
If at any time after completion of the start
up sequence loss of flame should occur, the
electronic sequence controller will attempt
to re-ignite. If this is unsuccessful, heater
lock-out will occur.
To set the burner gas pressure
Close gas valve. Unplug mains input
connector to heater. Unscrew the fixing
screws of the safety control housing lid and
remove pressure test point screw and
connect a ‘U’ tube manometer to the
pressure test nipple located on the
combination valve. Remove the cover from
the pressure regulator to reveal the
adjusting screw.
Replace mains input connector, open gas
valve and start system.
Using a suitable screwdriver, adjust the
pressure regulator, turning the screw
clockwise to increase the pressure or
anti-clockwise to decrease the pressure.
Set the burner pressure to the required
figure given on the data label. Switch off
the heater by pulling out the mains
connector. Disconnect ‘U’ tube manometer
and refit screw in pressure test nipple. Refit
cover of pressure regulator. Replace cover
plate on safety control housing and refit
screws.
Burner ignition
To re-ignite heater, switch system off at
control panel. Wait until fan stops
completely and then restart system.
Re-ignition
Check the operation of the flame safeguard
equipment as follows:
With the heater running normally switch off
the gas supply at the appliance isolating
valve. Observe that the
burner on
lamp
extinguishes within 1 second. After a purge
period of approximately 9 seconds the
heater should attempt to re-light and if the
gas isolating valves have been left off,
lock-out should occur, indicated by power
light only being illuminated and fan
running.
Vacuum proving switch
Check the operation of the vacuum proving
switch as follows:
With the heater running normally, pull out
the mains input connector. Pull off the
silicone tube connecting the vacuum switch
to the combustion chamber. Observe for at
least 20 seconds that there is no attempt to
re-ignite. Then replace the silicone tube.
Replace the safety control housing lid and
reconnect the mains input connector.
To re-ignite each heater in the system, the
fan must stop running. Switch system off
at the control panel. Wait until fan stops
completely and then restart system.
Repeat the above procedure for each of the
heater units in the heating system.
Balancing system
Important
When all the heaters have been
commissioned as above, the vacuum settings
must be finally balanced in the hot condition.
Start all burners up and allow them to run
for at least 20 minutes. With the use of a ‘U’
tube manometer determine vacuum reading
at the damper assembly on each heater. (See
figure 4 for vacuum test point)
The damper should be readjusted and set at
a hot condition reading as shown in figure 10
for the appropriate size heater and model.
It will be noted that the emitter has a
tendency to bow when hot, this is normal
and quite acceptable.
10
Содержание Herringbone HB
Страница 1: ...HERRINGBONE HB COMBINED FLUE SYSTEM...
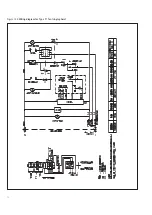
Страница 14: ...Figure 12b Wiring diagram for Type 0 fan single phase 13...


