


PRECAUTIONS
Product Cleaning
Use a soft dry cloth for periodic cleaning of the product. For
more severe stains, please dampen the cloth with water
only. Anything else has the chance of dissolving the paint
or damaging the plastic.
Maintenance
If you have problems, do not attempt to repair the unit
yourself. Return it to your Alpine dealer or the nearest
Alpine Service Station for servicing.
Never Attempt the Following
Do not grip or pull out the disc while it is being pulled back
into the player by the automatic reloading mechanism.
Do not attempt to insert a disc into the unit when the unit
power is off.
Inserting Discs
Your player accepts only one disc at a time for playback. Do
not attempt to load more than one disc.
Make sure the label side is facing up when you insert the
disc. “Disc Error” will be displayed on your player if you
insert a disc incorrectly.
Playing a disc while driving on a very bumpy road may
result in skips, but this will not scratch the disc or damage
the player.
Irregular Shaped Discs
Be sure to use round shaped discs only for this unit and
never use any special shaped discs.
Use of special shaped discs may cause damage to the
mechanism.
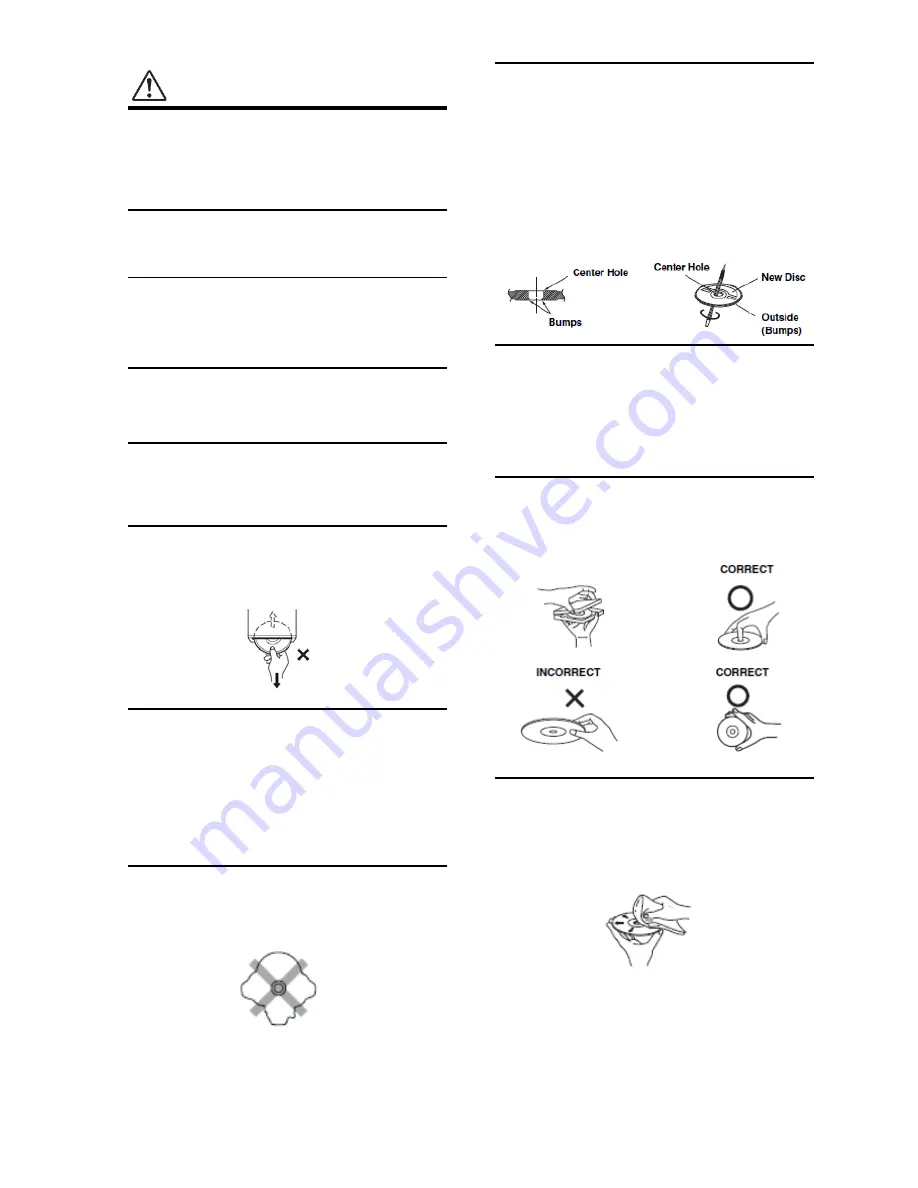
New Discs
To prevent the CD from jamming, “Disc Error” is displayed if
discs with irregular surfaces are inserted or if discs are
inserted incorrectly. When a new disc is ejected
immediately after initial loading, use your finger to feel
around the inside of the center hole and outside edge of
the disc. If you feel any small bumps or irregularities, this
could inhibit proper loading of the disc. To remove the
bumps, rub the inside edge of the hole and outside edge
of the disc with a ballpoint pen or other such instrument,
then insert the disc again.
Installation Location
Make sure the IVX-W200E will not be installed in a location
subjected to:
• Direct sun and heat
• High humidity and water
• Excessive dust
• Excessive vibrations
Correct Handling
Do not drop the disc while handling. Hold the disc so you
will not leave fingerprints on the surface. Do not affix tape,
paper, or gummed labels to the disc. Do not write on the
disc.
Disc Cleaning
Fingerprints, dust, or soil on the surface of the disc could
cause the CD player to skip. For routine cleaning, wipe the
playing surface with a clean, soft cloth from the center of
the disc to the outer edge. If the surface is heavily soiled,
dampen a clean, soft cloth in a solution of mild neutral
detergent before cleaning the disc.
Temperature
Be sure the temperature inside the vehicle is between
+45
°
C (+113
°
F) and 0
°
C (+32
°
F) before turning your unit on.
Moisture Condensation
You may notice the disc playback sound wavering due to
condensation. If this happens, remove the disc from the
player and wait about an hour for the moisture to
evaporate.
Damaged Disc
Do not attempt to play cracked, warped, or damaged discs.
Playing a bad disc could severely damage the playback
mechanism.
5


