


You can be updated through a USB memory device.
Setting item : MCU Version
Setting contents : Upgrade
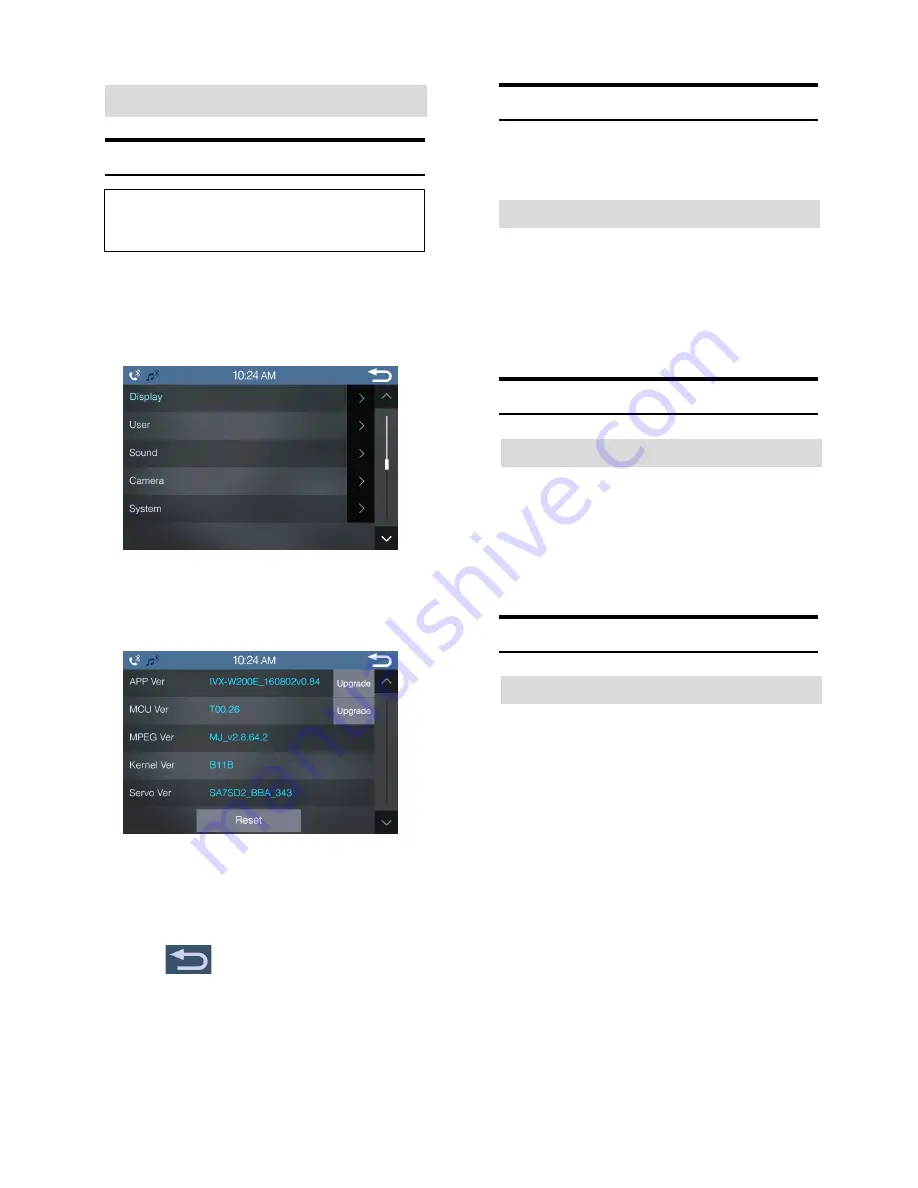
System Setup
System Setup Operation
The following steps 1 to 4 are common operations
to each “Setting item” of Sound Setup. Refer to
each section for details.
1
Touch [Setup] icon in the main screen.
The Setup main screen is displayed.
2
Touch [System].
The System Setup screen appears.
3
Select the desired item
.
Setting items: CPU Version/ MCU Version / Reset
4
Touch
to return to the previous screen
.
Immediately after changing the settings of User Setup
(While the system is writing data automatically) do not turn
the ignition key to OFF. Otherwise, the settings may not be
changed.
CPU Version Upgrade Operation
[CPU Version Upgrade] is selected on the Sound setup
menu in step 3. Refer to “System Setup Operation”.
Upgrade CPU version
You can be updated through a USB memory device.
Setting item : CPU Version
Setting contents : Upgrade
MCU Version Upgrade Operation
Upgrade MCU version
Delete all saved data and reset all settings to their
factory defaults.
Setting item : all Saved Values
Setting contents : Reset
Reset Operation
Reset to Defaults
29


