70
-EN
When an optional camera is connected, the view video of camera can be
output to the monitor.
Front camera or Rear camera can be connected to this unit.
Make the Camera Select setting (Front, Rear or Other) according to your
connected camera. For details, see “Setting the Camera Input” (page 41).
Front camera:
When the HCE-C257FD/HCE-C212FD is connected, conditions in front
of the vehicle, such as objects, people and other hazards, can be seen.
Rear camera:
If an HCE-C127D/HCE-C157D/HCE-C252RD, etc., camera is connected,
when the vehicle is reversed, the rear camera view (guide marks for
vehicle width and available distance) is displayed automatically on
the screen of this unit.
Other camera:
Set when connecting to a camera other than the Front camera or Rear
camera, such as a room camera and side camera.
HDMI Camera:
Set when a HDMI Camera is connected.
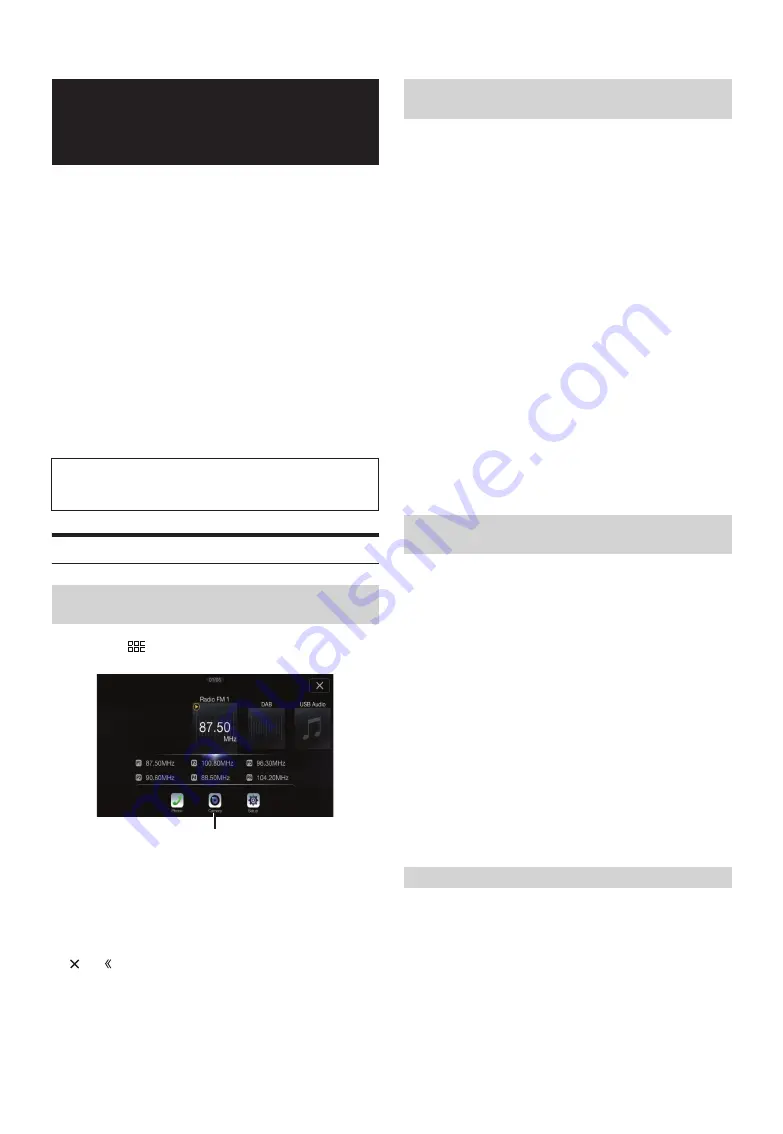
Rear Camera Operation
1
Press the
(MENU)
button.
The menu screen is displayed.
2
Touch
[Camera]
.
The Rear Camera view is displayed.
• If your vehicle support the Rear camera with audio function, you can
choose whether to listen to the outside sound.
Refer to “Setting Camera with Audio On/Off ” (page 43).
• Touch the screen while the camera image is being displayed, and touch
[
]
or
[ ]
to return to the main source screen or previous screen.
• You can perform a Guide Adjustment. For details, see “Adjusting the
Rear/Front/Side Camera Guide” (page 42).
1
Shift the gear lever to the reverse (R) position.
The rear view image is displayed while the car remains in
reverse.
2-1
When “Shutdown Delay” is On:
If you shift the gear lever to a position other than reverse
(R), the monitor will display the front
*1, 3
or rear
*2, 3
view
image for 10 seconds and then return to the previous
screen.
2-2
When “Shutdown Delay” is Off:
If you shift the gear lever to a position other than reverse
(R), the display returns to previous screen soon.
*1
Only when front camera is connected.
*2
When there is no connected front camera.
*3
When the vehicle is moving forward and the speed is greater than a
certain value, the monitor will return to previous source screen
automatically.
• Never depend solely on the camera when backing up. Always turn and
look and only use the camera for additional assistance.
• About Shutdown Delay function, refer to “Setting Shutdown Delay to
On/Off ” (page 43).
• This function is effective when the reverse wire is properly connected.
• You can perform a Guide Adjustment. For details, see “Adjusting the
Rear/Front/Side Camera Guide” (page 42).
If the camera has a view switch function, the Direct Change switch is
displayed.
1
Touch the screen when the image from the rear camera is
displayed.
The operation screen is displayed on the screen.
• After a 5-second time-out, the operation screen returns to the
camera display screen.
2
Touch
[Back]
,
[Panorama]
,
[Corner]
or
[Top]
.
The image pattern changes.
• For detailed information about image patterns, see the camera Owner’s
Manual.
• You can perform a Guide Adjustment. For details, see “Adjusting the
Rear/Front/Side Camera Guide” (page 42).
1
Touch the screen when the image from the camera is
displayed.
The operation screen is displayed on the screen.
• After a 5-second time-out, the operation screen returns to the
camera display screen.
2
Touch
[Guide Off]
on the Rear camera display screen.
The guide disappears, and then the
[Guide Off]
switch changes
to
[Guide On]
.
3
Touch
[Guide On]
to turn on the guide.
Camera Operation
(Optional)
You can adjust the quality of the camera image.
Setting items: Brightness / Colour / Contrast
See “Visual Setup” (page 33).
Displaying the Rear Camera Image from the
Menu screen
[Camera] button
Displaying the rear view video while the car is
in reverse
Switching the Image Pattern for the Rear
Camera
[Back]:
Rear View
[Panorama]: Panorama View
[Corner]:
Corner View
[Top]:
Ground View
Guide Display ON/OFF Setting


