Chapter 9: Replacing Modules
178
Replacing AT-SBxPWRSYS2 AC Power Supplies
This section contains the procedure for removing or replacing AT-
SBxPWRSYS2 AC Power Supplies in the AT-SBx908 Gen2 Switch.
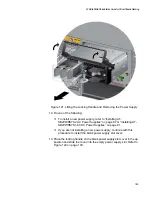
The following illustrations show the removal of the power supply from slot
PSU A. The procedure is the same for removing a power supply from slot
PSU B.
Note
Allied Telesis recommends saving a backup copy of the
configuration file in the switch before removing or replacing power
supplies. For instructions, refer to the Software Reference for
SwitchBlade x908 Gen2 Switches
.
Caution
If you are installing the AT-SBxPWRSYS2 AC Power Supply in an
active, operational switch, you should connect the AC power cord to
the switch before installing the power supply. Attaching the power
cord after installing the AT-SBxPWRSYS2 AC Power Supply might
cause the unit to restart its operating system. This can result in a
temporary interruption of network operations.
To remove power supplies from the switch, perform the following
procedure:
1. Disconnect the AC power cord for the power supply from the AC
power source. Refer to Figure 109.
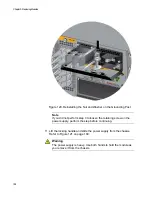
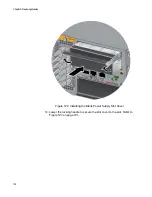
Figure 109. Disconnecting the AC Power Cord from the Power Source
Содержание AT-FAN08
Страница 10: ...Figures 10...
Страница 12: ...Tables 12...
Страница 16: ...Preface 16...
Страница 38: ...Chapter 1 Overview 38...
Страница 60: ...Chapter 2 Virtual Chassis Stacking 60...
Страница 80: ...Chapter 4 Installing the Chassis 80 Figure 32 Chassis Orientations in the Equipment Rack Continued...
Страница 82: ...Chapter 4 Installing the Chassis 82 Figure 34 Example of Adjusting the Equipment Rack Brackets...
Страница 104: ...Chapter 4 Installing the Chassis 104...
Страница 140: ...Chapter 5 Powering On the Chassis 140...
Страница 166: ...Chapter 7 Cabling the AT XEM2 Line Card Ports 166...
Страница 214: ...Appendix A Technical Specifications 214...

