Rockwell Automation Publication VIEW-IN002C-EN-P - October 2018
9
Adapter Kit for PanelView 5000 and PanelView Plus 7 Performance Terminals
Mount the Terminal
Installing the mounting levers is a multi-step process. Step
installs each lever so that the
terminal is snug in the adapter plate and the gasket is slightly compressed. Step
moves the
mounting levers into tighter locking positions until you reach the final locking position that you
previously marked with a marker or grease pencil.
To mount the terminal in the adapter plate, follow these steps.
1.
Verify that the sealing gasket is present on the terminal and is not damaged.
This gasket forms a compression seal. Do not use sealing compounds.
2.
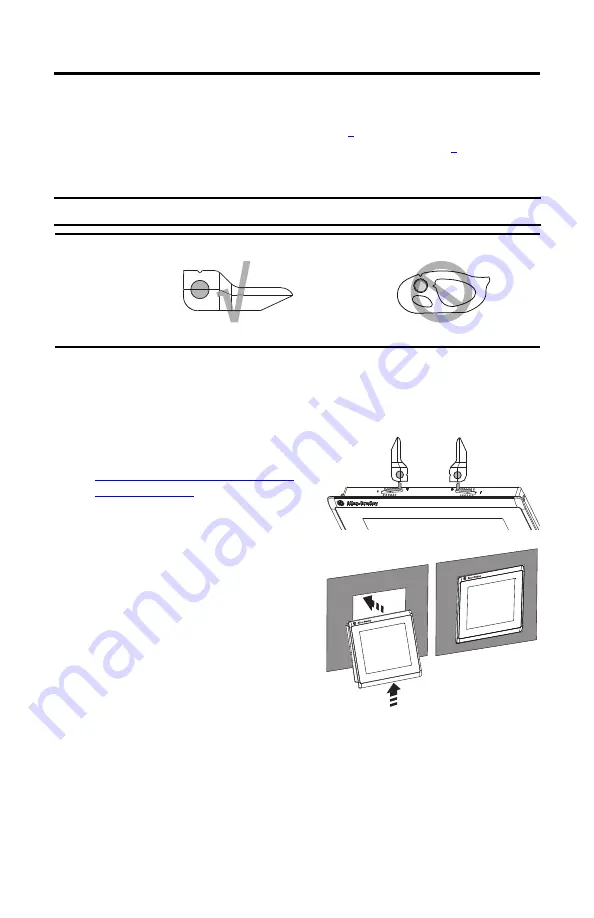
Insert adapter kit mounting levers in the
top corner slots
by using the orientation in
Mounting Lever Orientation and Lock
Sequence on page 8
The example at right shows the top of a
6.5-in. touch screen terminal.
3.
Tilt the terminal into the adapter plate and
guide the terminal upward so that the
mounting levers hold the top of the
terminal in the adapter plate.
If it is difficult to insert the terminal into
the adapter plate, press the bezel at the top
of the terminal to compress the gasket so
you can insert the terminal into the adapter
plate.
4.
Insert a mounting lever in the
bottom
of
the terminal to stabilize the terminal in the adapter plate.
IMPORTANT
Before you begin to mount the terminal, read this section and understand the process.
IMPORTANT
Use only the adapter kit mounting levers. Do not use any other mounting levers.
Use the Adapter Kit Mounting Levers
Do Not Use the Oval Mounting Levers


