background image

34

5/07/2022

EN

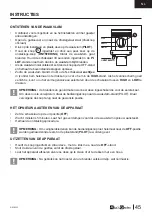
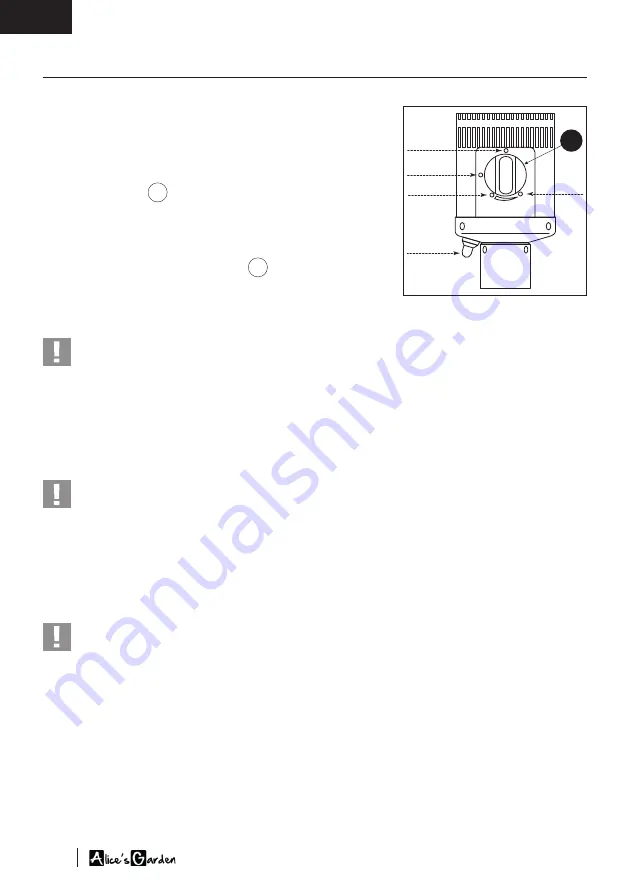
IGNITING THE PILOT LIGHT 

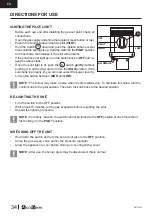
•  Before each use and after installing the gas set point, check all 

connections.

•  Open the gas supply and prime the regulator (push button or tap).

•  Push in the control knob and set it to pilot (

PILOT

).

•  Hold the button 

N

 down and push the ignition button several 

times until the pilot lights up. Hold the switch in the 

PILOT

 position 

for 30 seconds, then release it, the pilot will remain lit.

•  If the pilot does not light up, turn the switch back to 

OFF

 and re-

peat the above steps.

•  Once the pilot light is lit, push the 

N

 switch 

gently

 (without 

pushing it in all the way) and turn it to the 

HIGH

 position. If the 

sunshade is properly lit, you can now select the power level by 

turning the switch between 

HIGH

 and 

LOW

.

NOTE : 

The burner may make a noise when it is first switched on. To eliminate this noise, turn the 

control knob to the pilot position. Then turn the knob back to the desired position.

RE-LIGHTING THE UNIT

•  Turn the switch to the OFF position.

•  Wait at least 5 minutes, let the gas evaporate before relighting the pilot.

•  Repeat the lighting procedure.

NOTE : 

For safety reasons, the switch cannot be turned to the 

OFF

 position at one time without 

first holding it in the 

PILOT

 position.

SWITCHING OFF THE UNIT

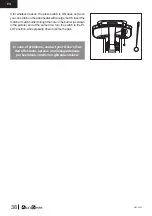
•  Hold down the switch and turn the knob clockwise to the 

OFF

 position.

•  Close the gas supply valve and/or the pressure regulator.

•  Allow the appliance to cool before storing or covering with a cover.

NOTE : 

After use, the burner grate may be discoloured, this is normal.

DIRECTIONS FOR USE

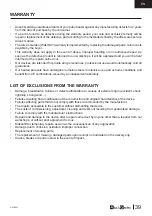
OFF

PILOT

HIGH

ALLUMAGE

LOW

N

Содержание FINLAND

Страница 1: ...45 MIN PC1204HC PC1104HC PC1204HCGC PC1104HCGC PC1204HCDE PC1104HCDE alicesgarden fr alicesgarden be alicesgarden es alicesgarden nl alicesgarden co uk alicesgarden pt alicesgarden it alicesgarden com...

Страница 2: ...e 88 IMPORTANT CONSERVER POUR CONSULTATION ULT RIEURE LIRE ATTENTIVEMENT ESPA OL Technical characteristics 16 Caracter sticas t cnicas 18 Advertencias de seguridad 19 Consejos de seguridad importantes...

Страница 3: ...ty 39 Assembly 85 Parts list 86 Assembly 88 NEDERLANDS Technische gegevens 40 Veiligheidswaarschuwingen 41 Belangrijke veiligheidsinformatie 42 Vereisten voor gas 43 Gasaansluting 43 Controle op lekka...

Страница 4: ...ANTE MANTENHA PARA RE FER NCIA FUTURA LEIAATENTA MENTE ITALIANO Technical characteristics 16 Caratteristiche tecniche 62 Avvertenze di sicurezza 63 Istruzioni di sicurezza importanti 64 Esigenze relat...

Страница 5: ...eitshinweise 75 Gasanforderungen 76 Anschlie en an eine Gasversorgung 76 Leckagekontrolle 77 Betriebsanleitung 78 Pflege 79 Service 79 Lagerung 80 Tipps zur Fehlerbehebung 81 Garantie 83 Aufbau 84 St...

Страница 6: ...ado a un uso dom stico For domestic use Bestemd voor huishoudelijk gebruik Para uso dom stico Destinato ad un uso domestico F r den Haushaltsgebrauch vorgesehen Attention risques de blessures Cuidado...

Страница 7: ...r f rence ult rieure H1207G H1107G PC1104HC PC1104HCGC PC1204HC PC1204HCGC 0063 22 0063CO7365 FINLAND Pays de destination BE ES FR GB IT PT IT NL DE Cat gorie de gaz I3 28 30 37 I3B P 30 I3P 50 Type...

Страница 8: ...ce s Garden Fixer l appareil au sol avant utilisation En cas de vent violent des pr cautions doivent tre prises contre le basculement de l appareil Le changement de la consigne de gaz doit tre effectu...

Страница 9: ...i ne laisser de mati res inflammables moins de 2 20m de celui ci Toujours se tenir une distance d au moins 1 m tre du parasol chauffant Ce parasol chauffant ne doit tre utilis qu en plein air ou dans...

Страница 10: ...fournisseur de gaz pour obtenir les instructions relatives l utilisation de leurs consignes Remplacer la consigne de gaz l air libre uniquement ou dans un endroit bien a r loign de toute flamme nue et...

Страница 11: ...es de pr senter des fuites comme le montre le sch ma ci contre Le robinet de la bonbonne de gaz doit se trouver sur la position ferm e OFF cette tape du test Une fois la solution savonneuse appliqu e...

Страница 12: ...ur entre HIGH et LOW NOTE le br leur peut faire du bruit lorsqu il est allum pour la premi re fois Pour liminer ce bruit tournez le bouton de commande sur la position veilleuse Puis tournez de nouveau...

Страница 13: ...du br leur au moyen d un d bourre pipe usage industriel Les particules plus fines peuvent tre limin es l air com prim Les r sidus de carbone risquent de provoquer un incendie Si des r sidus de carbone...

Страница 14: ...i vous le souhaitez recouvrez le parasol chauffant d une housse pour le prot ger et emp cher que les orifices d a ration ne se bouchent Remarque attendez que l appareil soit compl tement froid avant d...

Страница 15: ...mocouple Le br leur ne s allume pas La pression de gaz est basse Remplacez la bonbonne de gaz L orifice est bouch Nettoyez l orifice Le commutateur ne se trouve pas sur la position HIGH ou LOW Tournez...

Страница 16: ...l aide d une grande allumette ou du porte allumette fourni Ins rez l allumette ou le porte allumette par le trou du br leur sch ma ci contre et en m me temps tournez le com mutateur sur la position P...

Страница 17: ...tensif et conditions extr mes et b n ficient des certifications CE d livr es par un laboratoire ind pendant LISTE DES EXCLUSIONS DE LA GARANTIE Les dommages pannes d faillances ou d fauts imputables d...

Страница 18: ...s instrucciones para una consulta posterior H1207G H1107G PC1104HC PC1104HCGC PC1204HC PC1204HCGC 0063 22 0063CO7365 FINLAND Pa s BE ES FR GB IT PT IT NL DE Categor a I3 28 30 37 I3B P 30 I3P 50 Tipo...

Страница 19: ...el aparato al suelo antes de usarlo Le recomendamos encarecidamente que guarde la estufa de terraza en caso de viento fuerte para evitar que se caiga Es preferible cambiar la bombona de gas en un luga...

Страница 20: ...e materiales inflamables a menos de 2 20 m del mismo Mant ngase siempre a una distancia de al menos 1 metro Este aparato se debe utilizar exclusivamente al aire libre o en un lugar ventilado que dispo...

Страница 21: ...dentro del tiempo prescrito Utilice nicamente el tipo de gas y la bombona indicados en estas instrucciones Solicite a su distribuidor de gas las instrucciones de uso de sus bombonas Cambie las bombon...

Страница 22: ...el esquema que figura al lado La llave de paso de la bombona de gas debe estar en la posici n CERRADO OFF en este paso de la prueba Una vez que haya aplicado la soluci n jabonosa en las conexiones del...

Страница 23: ...de potencia girando el interruptor entre HIGH y LOW NOTA el quemador puede hacer ruido cuando se enciende por primera vez Para que no esto no ocurra gire el bot n de mando hasta la posici n de llama p...

Страница 24: ...s del quemador con un limpiapipas Las part culas m s finas se pueden eliminar mediante aire comprimido Los restos de carb n pueden provocar un incendio Si hay restos de carb n limpie el reflector y el...

Страница 25: ...tiempo lluvia nieve gra nizo as como del polvo y otras part culas Si lo desea puede cubrirlo con una funda para protegerlo e impedir que se atasquen los orificios de ventilaci n Observaci n espere a q...

Страница 26: ...nciona correc tamente Cambie el termopar El quemador no se enciende La presi n del gas es baja Cambie la bombona El orificio est atascado Limpie el orificio El conmutador no est en la posi ci n HIGH o...

Страница 27: ...e para cerillas suministrado Introduzca la cerilla o el portacerillas por el orificio del quema dor diagrama adjunto y al mismo tiempo gire el interruptor a la posici n PILOT mientras presiona para en...

Страница 28: ...n uso intensivo y condiciones extre mas y disponen de certificaciones CE emitidas por el laboratorio externo LISTA DE EXCLUSIONES DE LA GARANT A Los da os aver as incumplimientos o defectos imputables...

Страница 29: ...H1107G PC1104HC PC1104HCGC PC1204HC PC1204HCGC 0063 22 0063CO7365 FINLAND Designated countries BE ES FR GB IT PT IT NL DE Gas category I3 28 30 37 I3B P 30 I3P 50 Gas type G30 Butane G31 Propane G30 G...

Страница 30: ...precautions must be taken to prevent the appliance from tipping over The gas setpoint must be changed in a ventilated area and away from any source of ignition can dles cigarettes other flaming device...

Страница 31: ...within 2 20m of it Always keep at least 1 metre away from the heater This patio heater should only be used in the open air or in a ventilated area with at least 25 of the surface area completely open...

Страница 32: ...tructions Contact your gas supplier for instructions on how to use their product Replace the gas set point in the open air only or in a well ventilated area away from open flames and sources of igniti...

Страница 33: ...aks as shown in the diagram opposite The gas cylinder valve must be in the OFF position at this stage of the test Once the soapy solution has been applied to the gas connections the gas supply valve c...

Страница 34: ...select the power level by turning the switch between HIGH and LOW NOTE The burner may make a noise when it is first switched on To eliminate this noise turn the control knob to the pilot position The...

Страница 35: ...fe to use Clean the burner openings with a heavy duty pipe cleaner Finer particles can be removed with compressed air Carbon residues may cause a fire If carbon residue is present clean the reflector...

Страница 36: ...f desired cover the heater with a cover to protect it and prevent the air vents from becoming blocked NOTE Wait until the unit is completely cool before covering it PROTECTIVE COVER PRECAUTIONS FOR US...

Страница 37: ...ocouple The burner does not light Gas pressure is low Replace the gas cylinder The orifice is blocked Clean the orifice The switch is not on the HIGH or LOW position Turn the button to the ON position...

Страница 38: ...ge match Insert the match or match holder through the hole in the burner as shown in the picture and at the same time turn the switch to the PI LOT position while pressing down to prime the gas In cas...

Страница 39: ...d extreme conditions and benefit from CE certifications issued by an independent laboratory LIST OF EXCLUSIONS FROM THE WARRANTY Damage breakdowns failures or defects attributable to causes of externa...

Страница 40: ...at niet TECHNISCHE GEGEVENS Bewaar de instructies voor toekomstig gebruik H1207G H1107G PC1104HC PC1104HCGC PC1204HC PC1204HCGC 0063 22 0063CO7365 FINLAND Land van bestemming BE ES FR GB IT PT IT NL D...

Страница 41: ...van Alice s Garden Bevestig het toestel aan de vloer v r gebruik Bij sterke wind moeten voorzorgsmaatregelen worden genomen tegen het kantelen van het apparaat Het is aangeraden om de gasfles te verv...

Страница 42: ...Sta altijd op een afstand van ten minste 1 meter van de terrasverwarmer Deze verwarmer mag alleen buiten worden gebruikt of in een geventileerde ruimte waar ten minste 25 van het oppervlak volledig o...

Страница 43: ...en gasfles dat in deze instructies wordt aangegeven Praat met uw gasleverancier voor instructies over het gebruik van hun gasflessen Vervang een gasfles alleen in open lucht of in een goed geventilee...

Страница 44: ...oleren zoals weergegeven in het diagram De gasfleskraan moet in dit stadium van de test in de OFF stand staan Zodra de zeepoplossing op de ga saansluitingen is aangebracht kan de gasklep naar de posit...

Страница 45: ...or de schakelaar tussen HIGH en LOW te draaien OPMERKING de brander kan geluid maken wanneer deze ingeschakeld is voor de eerste keer Om deze ruis te verwijderen draai de bedieningsknop naar de waakvl...

Страница 46: ...enstopper voor industrieel gebruik De fijnere deeltjes kunnen met perslucht worden verwijderd Koolstofresten kunnen brand veroorzaken Als zich koolstofresten vormen reinig u het rooster en de brander...

Страница 47: ...tegen stof en ander vuil Als u wenst kunt u de terrasverwarmer bedekken met een beschermhoes dit voorkomt dat de ven tilatie openingen verstopt raken Opmerking wacht totdat het apparaat volledig afgek...

Страница 48: ...ntsteekt niet De gasdruk is te laag Vervang de gasfles De opening is geblokkeerd Reinig de opening De knop bevindt zich niet in de positie HIGH of LOW Draai de knop nee de ON stand De vlam van de bran...

Страница 49: ...e bijgeleverde luciferhouder Steek de lucifer of lucife rhouder door het gat van de brander diagram er tegenover en draai tegelijkertijd de knop naar de PILOT stand terwijl u er op drukt om het gas te...

Страница 50: ...et automatisch alle garanties vervallen Onze terrasverwarmers hebben talloze tests ondergaan bij intensief gebruik en extreme omstandi gheden en hebben CE certificeringen uitgegeven door onafhankelijk...

Страница 51: ...a H1207G H1107G PC1104HC PC1104HCGC PC1204HC PC1204HCGC 0063 22 0063CO7365 FINLAND Pa s de destino BE ES FR GB IT PT IT NL DE Categoria de g s I3 28 30 37 I3B P 30 I3P 50 Tipo de g s G30 Butano G31 Pr...

Страница 52: ...rvi o p s venda da Alice s Garden s Fixar a produto ao ch o antes da utiliza o Em ventos fortes devem ser tomadas precau es contra a inclina o da unidade aconselh vel mudar o cilindro de g s num local...

Страница 53: ...o de dist ncia do aquecedor do p tio Este aquecedor deve ser utilizado apenas ao ar livre ou numa rea ventilada onde pelo menos 25 da superf cie esteja completamente aberta a rea total calculada adici...

Страница 54: ...u es Fale com o seu fornecedor de g s para obter instru es sobre como utilizar as suas garrafas de g s Substituir uma garrafa de g s apenas ao ar livre ou numa rea bem ventilada longe de chamas aberta...

Страница 55: ...i ficar a exist ncia de fugas como se mostra no diagrama A v lvula da garrafa de g s deve estar na posi o OFF nesta fase do teste Uma vez aplicada a solu o de sab o nas conex es de g s a v lvula de g...

Страница 56: ...a seleccionar o n vel de pot ncia rodando o interruptor entre LOW e HIGH NOTA o queimador pode fazer um ru do quando ligado pela primeira vez Para eliminar este ru do rode o bot o de controlo para a p...

Страница 57: ...Limpar os orif cios do queimador com um limpador industrial de tubos As part culas mais finas podem ser removidas com ar comprimido Os res duos de carbono podem causar um inc ndio Se se formarem res...

Страница 58: ...e cobrir o aquecedor do p tio com uma cobertura protectora que evita que as aberturas das janelas fiquem entupidas NOTA Aguarde que a unidade arrefe a completamente antes de a cobrir COBERTURA DE PROT...

Страница 59: ...eimad or n o incendeia A press o do g s demasiado baixa Substituir a garrafa de g s A abertura est bloqueada Limpar a abertura O bot o n o se encontra na posi o HIGH ou LOW Rode o bot o n o para a pos...

Страница 60: ...grande ou o suporte do f sforo fornecido Inserir o f sforo ou suporte de f sforo atrav s do orif cio do queimador diagrama oposto e simultaneamente rodar o bot o para a posi o PI LOT enquanto o pressi...

Страница 61: ...al invalida automaticamente todas as garantias Os nossos aquecedores de p tio foram submetidos a numerosos testes em condi es extremas e de utiliza o intensiva e t m certifica o CE emitida por um labo...

Страница 62: ...H1207G H1107G PC1104HC PC1104HCGC PC1204HC PC1204HCGC 0063 22 0063CO7365 FINLAND Paesi di destinazione BE ES FR GB IT PT IT NL DE Categoria di gas I3 28 30 37 I3B P 30 I3P 50 Tipo di gas G30 Butano G...

Страница 63: ...e delle precauzioni per impedire che il dispositivo sia soggetto a oscillazioni Fissare il dispositivo al pavimento prima dell uso La sostituzione della bombola del gas deve essere effettuata in un lu...

Страница 64: ...ciare materiali infiammabili a meno di 2 20 m dal dispositivo stesso Tenersi sempre a una distanza di almeno 1 metro dalla stufa a piramide riscaldante Questa stufa a piramide riscaldante deve essere...

Страница 65: ...la indicati in queste istruzioni Rivolgersi al proprio fornitore di gas per ricevere istruzioni relative all uso delle loro bombole Sostituire la bombola del gas unicamente all aria aperta o in luogo...

Страница 66: ...ro presentare fu ghe come indicato nello schema qui a fianco Il rubinetto della bombola del gas deve essere in posizione CHIUSA OFF in questa fase del test Dopo aver applicato la so luzione saponata s...

Страница 67: ...HIGH e LOW NOTA il bruciatore pu emettere un rumore quando viene acceso per la prima volta Per eliminare questo rumore ruotare il pulsante di comando sulla posizione fiamma pilota Quindi ruotare nuova...

Страница 68: ...bruciatore per mezzo di un dispositivo per la pulizia dei tubi a uso industriale Le particelle pi fini possono essere eliminate servendosi di aria compressa I residui di carbonio rischiano di causare...

Страница 69: ...da altri tipi di sporcizia Qualora lo si desideri possibile ricoprire la stufa a piramide riscaldante con una custodia per prote ggerla e impedire che i fori di aerazione si ostruiscano NOTA aspettare...

Страница 70: ...iona corret tamente Sostituire la termocoppia Il bruciatore non si accende La pressione del gas bassa Sostituire la bombola del gas Il foro ostruito Pulire il foro Il commutatore non si trova in posi...

Страница 71: ...n grande fiammifero o il portafiammiferi for nito Inserire il fiammifero o il portafiammifero attraverso il foro del bruciatore schema a fianco e allo stesso tempo girare l in terruttore in posizione...

Страница 72: ...ono stati ampiamente testati in condizioni di uso intensivo ed estremo e sono certi ficati CE da un laboratorio indipendent ELENCO DELLE ESCLUSIONI DELLA GARANZIA I danni guasti d faillance o i difett...

Страница 73: ...MERKMALE Bewahren Sie die Anleitung zum sp teren Nachschlagen auf H1207G H1107G PC1104HCDE PC1204HCDE 0063 22 0063CO7365 FINLAND Land der Bestimmung BE ES FR GB IT PT IT NL DE Kategorie Gas I3 28 30 3...

Страница 74: ...Befestigen Sie das Ger t vor dem Gebrauch am Boden Bei starkem Wind m ssen Vorkehrungen getroffen werden um ein Umkippen des Ger ts zu verhindern Der Gassollwert muss in einem bel fteten Bereich und w...

Страница 75: ...von 2 20 m um das Heizger t liegen Halten Sie immer einen Mindestabstand von 1 Meter zum Heizger t ein Dieser Sonnenschutz sollte nur im Freien oder in einem bel fteten Bereich verwendet werden in de...

Страница 76: ...er Anleitung angegebene Gasart und Flasche Wenden Sie sich an Ihren Gasversorger um Anweisungen zur Verwendung seiner Gebrauchshinweise zu erhalten Ersetzen Sie die Gasflasche nur im Freien oder in ei...

Страница 77: ...fen wie in der Abbildung dargestellt Das Gasflaschenventil muss in dieser Phase des Tests in der Position OFF stehen Nachdem die Seifenl sung auf die Gasanschl sse aufgetragen wurde kann das Gasventi...

Страница 78: ...n indem Sie den Schalter zwischen HIGH und LOW umschalten HINWEIS Der Brenner kann beim ersten Einschalten Ger usche verursachen Um dieses Ger usch zu beseitigen drehen Sie den Drehknopf auf die Pilot...

Страница 79: ...hl sse mit einem kr ftigen Rohrreiniger Feinere Partikel k nnen mit Druckluft entfernt werden Kohlenstoffr ckst nde k nnen einen Brand verursachen Wenn sich Kohlenstoffr ckst nde bilden reinigen Sie d...

Страница 80: ...t einer Abdeckung ab um ihn zu sch tzen und zu ve rhindern dass die L ftungs ffnungen verstopft werden Hinweis Warten Sie bis das Ger t vollst ndig abgek hlt ist bevor Sie es abdecken SCHUTZH LLE RATS...

Страница 81: ...er Gasdruck ist niedrig Tauschen Sie die Gasflasche aus Die ffnung ist verstopft Reinigen Sie die ffnung Der Schalter ist nicht in der Position HIGH oder LOW Drehen Sie den Schalter auf ON Die Flamme...

Страница 82: ...erten Streichholzhalter anz n den Stecken Sie das Streichholz oder den Streichholzhalter durch das Loch im Brenner nebenstehende Abbildung und drehen Sie gleichzeitig den gedr ckten Schalter auf die P...

Страница 83: ...er extremen Bedin gungen unterzogen und sind von einem unabh ngigen Labor CE zertifiziert GARANTIEAUSSCHLUSS Sch den Pannen Ausf lle oder M ngel die auf u ere Ursachen zur ckzuf hren sind Unfall Schoc...

Страница 84: ...84 05 07 2022 ASSEMBLAGE ENSAMBLAJE ASSEMBLY VERZAME LING MONTAGEM ASSEMBLAGGIO MONTAGE A C D I J N L M B E G H F K...

Страница 85: ...I Connecteur gaz G1 2 viss Conector del gas x1 J Piezo allumage Encendido piezoel ctrico x1 K M t M stil x1 L Socle Base x1 M Kit roulettes Kit de ruedas x1 N Commutateur Conmutador x1 A Reflector pan...

Страница 86: ...ontiert x1 F Porta de acesso garrafa de g s pr instalada Porta di accesso preassem blata Zylinderzugangst r vormon tiert x1 G Punho pr montado Chiusura preassemblata Verriegelung vormontiert x1 H Cili...

Страница 87: ...al Em op o Opzionale GC x1 x2 x2 x4 x16 x9 x12 x9 x3 x9 x6 AA BB CC DD EE FF M6x8 6 mm M6x16 M8 M8x16 5 mm GG HH JJ KK M5x10 M5x14 PR ASSEMBL PRE MONTADO PRE ASSEMBLED VOORGEMONTEERD PR MONTADO PREASS...

Страница 88: ...del aparato o de los art culos de ferreter a difiera ligeramente de las ilustraciones del manual de instrucciones Es normal y se debe a que nuestros productos est n siempre en constante mejora EN ASS...

Страница 89: ...del gas G1 2 Per prima cosa stringere tutti i dadi e i bulloni a mano Stringete tutto dopo aver completato il mon taggio Questo vi faciliter e garantir stabilit Prima del montaggio assicurarsi che tut...

Страница 90: ...paralelas a la base EN Make sure the wheels are parallel to the base NL Zorg dat de zwenkwielen parallellopen met de basis Certifique se de que os rod zios est o paralelos base Assicuratevi che le rot...

Страница 91: ...ctor monteert Draai niet te hard aan de bouten om de verschillende delen van de reflectorengoed uit te kunnen lijnen Eenmaal goed uitgelijnd draai ze stevig vast PT Certificar se de que as pel culas d...

Страница 92: ...ten firmly NL Draai niet te vast Eenmaal goed uitgelijnd kunt u ze stevig vastzetten N o apertar demais Correc o de um vezes alinhado voc pode apertar com firmeza Non stringere troppo Una volta alline...

Страница 93: ...2 connector met slangtule Pode agora aparafusar a mangueira de g s vendida separadamente na entrada de g s do queimador Certifique se de que retira a tampa de protec o preta A mangueira deve ir para...

Страница 94: ...basis L met behulp van de schroeven KK 2 schroe ven per stabilisator 3 borgringen JJ en 3 ringen EE Bevestig de eenheid aan de vloer met de MM haringen of pinnen niet meegeleverd Montar os 3 estabiliz...

Страница 95: ...8 29cm 60cm...
Страница 96: ...ALICE S GARDEN OUTDOOR PTY LTD 135 153 New South Head Road Edgecliff NSW 2027 AUSTRALIA Contact service alicesgarden com au IMPORTADO POR WALIBUY SPAIN SL Carrer de Mallorca 289 Entresuelo 2 08037 BAR...

Отзывы: