65
ALI-TP7112RH PTZ Outdoor Camera User Manual
SECTION 5: OSD MENU REFERENCE
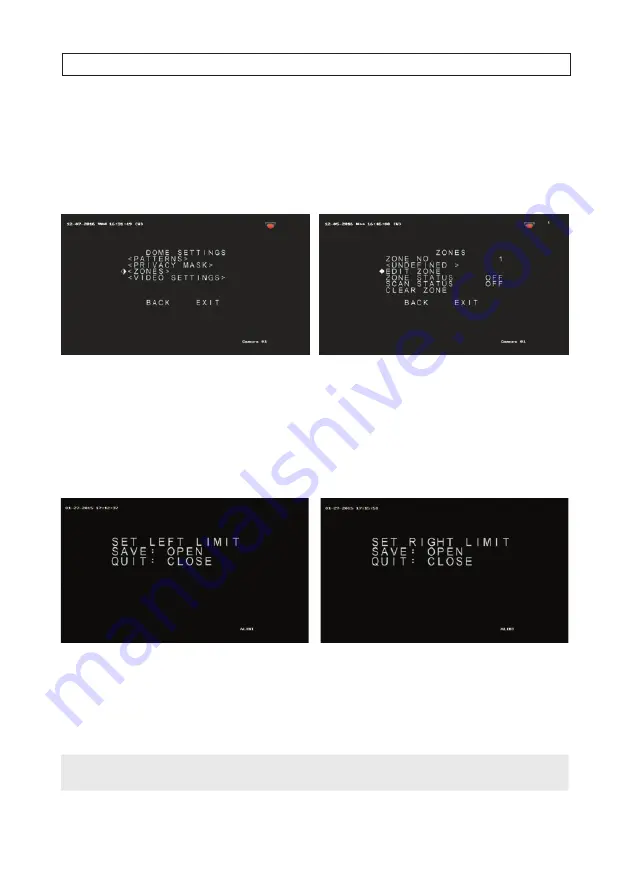
5.3.10 ZONES submenu
ZONE submenu is used to divide a scene into different parts. You can define labels that are displayed on the screen, and also set the
camera to scan in a zone automatically after a period of inactivity. You can configure up to 8 zones.
1.
Open the
ZONES
submenu from the OSD
MAIN MENUS | DOME SETTINGS
(page 2)
menu.
2.
Click
Iris+
to change the
ZONE NO
field.
3.
Use the
p
and
q
buttons to change the number shown for the zone. Zones can be numbered from 1 .. 8.
4.
Click
Iris+
to create the zone.
5.
Move the position icon to the
EDIT ZONE
option, and then click
Iris+
. The
SET LEFT LIMIT
screen window will open.
6.
Use the
t
and
u
buttons to position the camera to the left extreme of the zone you are configuring, and then click
Iris+
to save the settings. The SET RIGHT LIMIT screen will open.
7.
Use the
t
and
u
buttons to position the camera to the right extreme of the zone you are configuring, and then click
Iris+
to save the settings and return to the ZONES menu.
NOTE
After the zone is defined, the ZONE STATUS changes from OFF to ON. This status is not directly configurable.


