


6
Latency
(
Windows only
)
“Latency” is the time it takes for your computer’s soundcard to process incoming data and output a sound.
The lower your latency is, the faster your computer will respond to commands and output sound. If you
experience too much latency, we recommend the free ASIO4ALL (Audio Stream Input/Output) driver for
Windows at
asio4all.com
. ASIO drivers generally perform better than the computer’s built-in drivers and
with lower latency since they create a more efficient communication between audio devices and software.
1.
Download and install the free ASIO4ALL driver from
asio4all.com
. This will allow for low-latency
performance.
2.
Double click the installer file (
.exe
). Follow the on-screen prompts to install the included low-latency
ASIO4ALL driver.
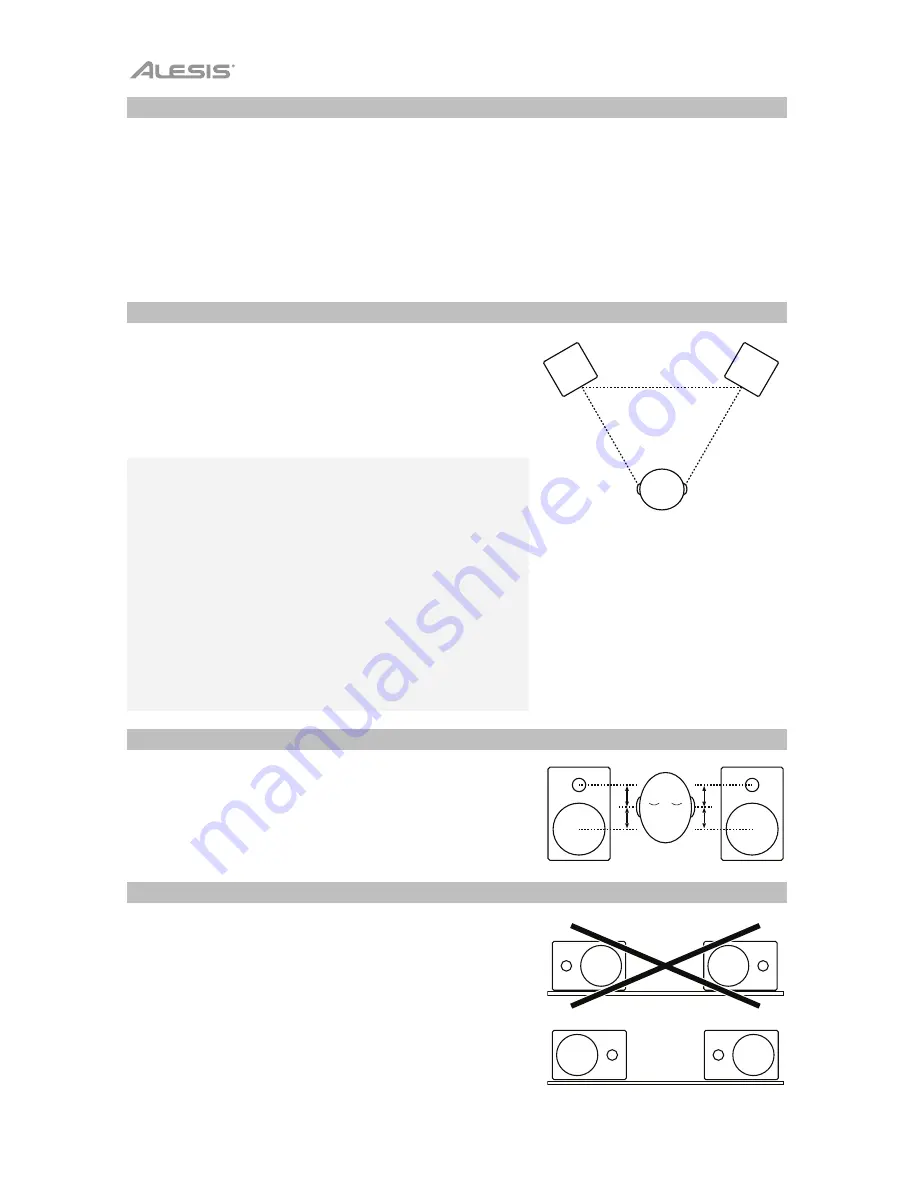
Placement
Place your monitors 3–5 feet (1–1.5 meters) apart from each
other and from you so that they form an equilateral triangle with
your position when viewed from above. Angle them slightly
inward so that the drivers face you.
In general, we recommend placing them at least 3 feet
(approximately 1 meter) away from the nearest wall and other flat
surfaces.
Tips:
Make sure your studio and monitors are equidistant from the
walls on either side of it. This helps ensure proper symmetry of
your stereo signal.
If possible, set up your studio and monitors in the “front” third of
the room. This helps prevent the reflections of peak frequencies
from building up.
If possible, place your monitors on speaker stands instead of
directly on your desk. Desks tend to resonate sympathetically at
low frequencies and may adversely affect the monitors’ bass
response. If you cannot use speaker stands, try placing the
monitors on isolation pads to acoustically “decouple” the
monitors from the desk.
Use other sound-absorbent materials (carpeting, foam, etc.) to
prevent reflections in the room.
Height
Position the monitors so that they are parallel to the ground and
that your ears are between the midpoint of the woofer and the
tweeter.
Orientation
If possible, place the monitors in their upright position; avoid
laying them on their sides. The woofer and tweeter are vertically
aligned and will provide the best performance when the monitors
are upright. Placing them on their sides may create strong
reflections from nearby surfaces resulting in spectrally
unbalanced sound.
If your monitors must be oriented horizontally due to space or
line-of-sight considerations, place them so that their tweeters are
on the “inside” to improve imaging.
Содержание M1 Active 330 USB
Страница 2: ...2...
Страница 24: ...alesis com Manual Version 1 1...


