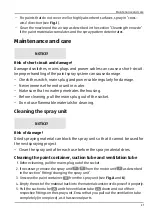
Maintenance and care
23
8. Clean the needle thoroughly with a lint free cloth and solvent or water.
9. Check the nozzle seal for damage.
10. Let all parts dry thoroughly.
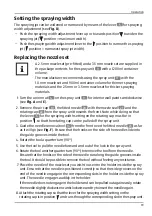
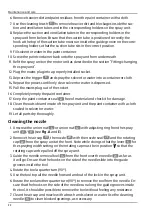
11. Insert the needle back into the holder inside the spray unit. Ensure that the needle
is positioned correctly so that the side grooves on the end of the needle engage
in the corresponding slots in the holder inside the spray unit. The needle engages
audibly in the holder.
If the needle does not engage in the holder and can be pulled out again easily,
rotate the needle slightly clockwise or anticlockwise and try to insert the needle
again.
12. Attach the rotating cap so that the lever for the spraying width setting on the ro-
tating cap is in position and runs through the corresponding slot in the spray
unit.
13. Push the nozzle of the selected nozzle set with the nozzle seal in place onto the
spray unit. Ensure in doing so that you align the nozzle in such a way that the
edge of the spray unit engages in the corresponding slot in the nozzle edge and
the inserted needle sits in the centre of the nozzle opening.
14. Place the air cap on the spray unit so that the two side hooks on the air cap lie in
the corresponding slots on the edge of the nozzle.
15. Screw the union nut or union nut with adjusting ring onto the spray unit in a
clockwise direction.
When screwing on the union nut with adjusting ring, ensure that the two caps sit
in the indentations in the adjusting ring, otherwise it will not be possible to set the
spraying pattern with the adjusting ring.
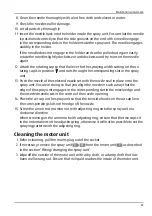
Cleaning the motor unit
1. Before cleaning, pull the mains plug out of the socket.
2. If necessary, remove the spray unit
9
/
11
from the motor unit
2
as described
in the section “Fitting/changing the spray unit”.
3. Wipe off the outside of the motor unit with a dry cloth, or a damp cloth that has
been well wrung out. Ensure that no liquid reaches the inside of the motor unit.


