


— 7 —
— 6 —
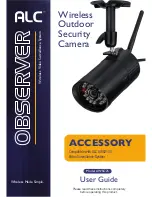
INTRODUCTION
Getting to Know Your Camera
INSTALLATION
Installation Tips
Night Vision
• Before you install the camera, plan where and how it will be positioned, and where you will
route the cable that connects the camera to the power adapter.
•
Optimized motion detection range is 6 - 18 feet for camera. The farther away an object is,
the less accurate the motion detection.
• Avoid having a direct light source in the view of the camera, including street lights, ceiling
or floor lamps, spotlights in the driveway, etc.
•
Rainfall, pool water ripples/reflections, tree/shrub leaves blowing in the wind – and the
shadows they create – can generate motion detection false alarms.
• Before starting permanent installation, have another person check the camera image on
the monitor with the camera positioned in the same place it will be permanently installed.
• It is recommended to ensure a clear line of sight between the camera and monitor and to
limit the amount of obstructions, such as walls and tree branches, between the camera
and monitor. Walls made of heavy building materials such as brick or concrete will
significantly reduce signal range.
• If the signal will have to pass through a wall, placing the monitor or camera next to a
window will improve the signal strength.
• Do not install the camera pointing out of a window. The night time picture will be unusable
due to reflection from the night vision LEDs.
• The cameras are pre-paired so they work out of the box. If you have purchased additional
cameras, you will need to pair them to the monitor, see “Camera Pairing” on page 24.
•
As dust, grime, and cobwebs accumulate on the camera glass, they can reflect light from
the infrared LED and might lower video quality. Periodically clean the lens glass with a
soft cloth.
•
If the camera is too close to the monitor, you may get a whistling interference sound.
Simply move the camera away from the monitor to eliminate the interference sound.
The camera has built-in infrared LEDs to allow you to view at night for 24-hour surveillance. The
LEDs will automatically activate at night and the picture viewed will turn to black and white. The
night viewing range is up to 40 feet.
WARNING:
Weatherproof, IP66 rated cameras are suitable for outdoor installation. However, if possible, it is recommended
to install in a location that provides some shelter from the elements, such as beneath roof eaves.
Содержание observer AWS2155
Страница 12: ...Wireless Made Simple ALCWireless com...


