background image


Instructions


for


Re

activating


Breakaway


(WireLess)


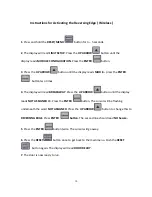
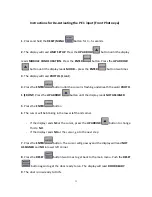
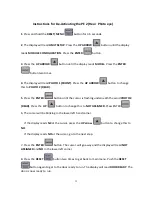
1.


Press


and


hold


the


Reset/Menu


button


for


3

5


seconds.


2.


The


display


will


read


LIMIT


SETUP

.


Press


the


UP


ARROW


button


until


the


display


reads


MODULE


CONFIGURATION

.


Press


the


ENTER


button.


3.


Press


the


UP


ARROW


button


until


the


display


reads


MOD


Z…


press


the


ENTER


button


two


times.


Note:


there


are


two


breakaway


inputs


I


1


and


I


2

.


I


1


should


be


the


left


side


and


I


2


should


be


the


right


side,


determine


which


one


you


wish


to


activate.


4.


The


display


will


read


Breakaway


I


1


or


NOT


ASSIGNED


I


1

,


press


the


up


arrow


button


if


you


want


Breakaway


I


2


or


NOT


ASSIGNED


I


2


press


the


ENTER


Button.


The


cursor


will


be


flashing


underneath


the


word


NOT


ASSIGNED

.


Press


the


UP


ARROW


button


to


change


this


to


BREAKAWAY

.


Press


the


ENTER


button.


The


second


line


should


read


NO

.


Press


the


ENTER


button


Twice.


The


cursor


will


go


away.


5.


Press


the


RESET


button


once


to


get


back


to


the


main


menu.


6.


Press


the


RESET


button


once


again


the


display


will


read


DOOR


READY

.


7.


The


door


is


now


ready


to


run.


Содержание R-BAC UltraSmart

Страница 1: ...UltraSmart ...

Страница 2: ...kaway Page 8 Wireless Instructions for De Activating Reversing Edge Wireless Page 9 Instructions for Re Activating Reversing Edge wireless Page 10 Instructions for De Activating PE 1 Front Photo Eye Page 11 Instructions for Re Activating PE 1 Front Photo Eye Page 12 Instructions for De Activating PE 2 Rear Photo Eye Page 13 Instructions for Re Activating PE 2 Rear Photo Eye Page 14 Instructions fo...

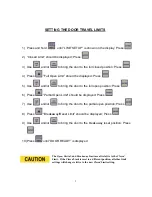
Страница 3: ... position Press 6 Press Partial Open Limit should be displayed Press 7 Use and or to bring the door to the partial open position Press 8 Press Breakaway Reset Limit should be displayed Press 9 Use and or to bring the door to the breakaway reset position Press 10 Press until DOOR READY is displayed The Open Partial and Breakaway Limit are all relative to the Closed Limit If the Closed Limit is rese...

Страница 4: ...mmonly changed SYSTEM OPTIONS Rev Edge Auto Close Photoeye Auto Close Panel Open Man 1 Auto Close Setting Timers 1 Press and hold until LIMIT SETUP is shown on the display 2 Press until SET TIMERS is shown Press Use and or to cycle through the available options Press to edit an option Use and or to change the value Press to store that value 3 When finished press until DOOR READY is displayed Commo...

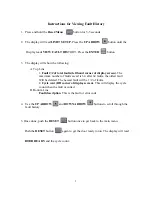
Страница 5: ...ximum number of faults saved is 64 after 64 faults the oldest fault Will be deleted The newest fault will be 1 of faults 2 Cycle cont RH corner of display screen This will display the cycle count when the fault occurred B Bottom Line Fault description This is the fault or error code 4 Use the UP ARROW and DOWN ARROW buttons to scroll through the fault history 5 Once done push the RESET button once...

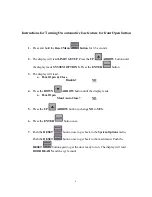
Страница 6: ...on 3 The display will read a Panel Open Close Disable NO 4 Press the DOWN ARROW button until the display reads a Panel Open Man1 Auto Close NO 5 Press the UP ARROW button to change NO to YES 6 Press the ENTER button once 7 Push the RESET button once to get back to the System Options menu Push the RESET button once to get back to the main menu Push the RESET button again to get the door ready to ru...

Страница 7: ...way I 2 I 1 should be left side and I 2 should be right side Determine which one you wish to disable 6 The display will read Breakaway I 1 Press the UP ARROW button if you want breakaway I 2 Press the ENTER button The cursor will be flashing underneath the word Breakaway Press the UP ARROW button to change this to Not Assigned Press Enter The second line should read NO 7 Press the ENTER button Twi...

Страница 8: ...nd I 2 should be the right side determine which one you wish to activate 4 The display will read Breakaway I 1 or NOT ASSIGNED I 1 press the up arrow button if you want Breakaway I 2 or NOT ASSIGNED I 2 press the ENTER Button The cursor will be flashing underneath the word NOT ASSIGNED Press the UP ARROW button to change this to BREAKAWAY Press the ENTER button The second line should read NO Press...

Страница 9: ...e display will read Breakaway Press the UP ARROW button until the display reads Reversing Edge I 3 Press the ENTER button The cursor will be flashing underneath the word Reversing edge Press the UP ARROW button to change this to Not assigned Press Enter button The second line should read NO 5 Press the ENTER button Twice The cursor will go away 6 Press the RESET button once to get back to the main...

Страница 10: ...tton two times 4 The display will read BREAKAWAY Press the UP ARROW button until the display reads NOT ASSIGNED I 3 Press the ENTER button The cursor will be flashing underneath the word NOT ASSIGNED Press the UP ARROW button to change this to REVERSING EDGE Press ENTER button The second line should read NO Secure 5 Press the ENTER button twice The cursor will go away 6 Press the RESET button once...

Страница 11: ...ing underneath the word PHOTO 1 FRONT Press the UP ARROW button until the display reads NOT ASSIGNED 5 Press the ENTER button 6 The cursor will be blinking in the lower left hand corner If the display reads NC at the cursor press the UP ARROW button to change this to NO If the display reads NO at the cursor go to the next step 7 Press the ENTER button The cursor will go away and the display will r...

Страница 12: ...ay reads MOD B Press the ENTER button two times 4 The display will read Not Assigned Press the ENTER button 5 Press the UP arrow button until Photo 1 front is displayed Press enter 6 The cursor will be flashing under the NO in lower left hand corner press the UP ARROW button and change to NC Press Enter 7 Press the RESET button two times to get back to the main menu Push the RESET button again to ...

Страница 13: ...ENTER button until the cursor is flashing underneath the word PHOTO 2 REAR Press the UP button to change this to NOT ASSIGNED Press ENTER 6 The cursor will be blinking in the lower left hand corner If the display reads NC at the cursor press the UP arrow button to change this to NO If the display reads NO at the cursor go to the next step 7 Press the ENTER button The cursor will go away and the di...

Страница 14: ...times 4 The display will read Photo 1 Front 5 Press the UP ARROW button until Not Assigned I2 is displayed Press ENTER 6 Press the UO ARROW button until the display reads Photo 2 REAR Press ENTER 7 The lower left hand corner The cursor will be flashing under NO Press the UP ARROW button and change to NC press ENTER 8 Press the RESET button two times to get back to the main menu Push the RESET butt...

Страница 15: ... times 5 You want the word that the cursor is blinking underneath to be CYCLE Press the UP ARROW button until you get to CYCLE Press the ENTER button 6 Press the RESET button until the display reads MODULE CONFIGURATION 7 Press the UP ARROW button until the display reads SET TIMERS Press the ENTER button 8 The display will read OPEN RUN TIMER Press the DOWN ARROW button until the display reads DEF...

Страница 16: ... corner of the display This is the time in minutes that the defrost heat will stay off Pressing the UP ARROW and DOWN ARROW will change the time Press the ENTER button once the desired time is reached 12 Push the RESET button once to get back to the main menu Push the RESET button again to get the door ready to run The display will read DOOR READY and the cycle count The door is now ready to run ...

Страница 17: ...FROST Press the ENTER button 2 times 4 Press the UP ARROW button until the display reads O3 in the upper right hand corner Press the ENTER button 5 The cursor will be flashing underneath the first letter of the first word in the upper left hand corner Press the UP ARROW button until the display reads DOOR NOT CLOSED 6 Press the ENTER button the cursor will be flashing under NO Press the UP ARROW b...

Страница 18: ...18 ...
Отзывы: