background image

7

BEFORE FIRST USE

• 

Unpack the unit carefully and remove all protective packaging and wrapping. Make sure no packaging debris 
remains on the appliance.

Warning!

Packaging materials are not toys. Do not allow children to play with packaging materials as they pose a 
choking hazard if swallowed!

• 

Check for completeness and transport damage. In case of damages or incomplete delivery, please contact your 
dealer (  Warranty).

• 

Keep the packaging for storing your appliance when not in use for an extended period of time.

• 

Clean the appliance (  Cleaning and care).

OPERATION

• 

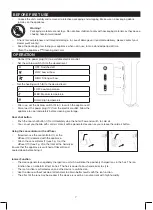
Connect the power plug (12) to a suitable electrical outlet.

• 

Set the air blow switch (9) to the desired level:

O

OFF: Switched off

LOW: Low air flow

HIGH: Strong air flow

• 

Set the heating switch (8) to the desired level:

LOW: Low temperature

MED: Medium temperature

HIGH: High temperature

• 

After use, set the air blow switch (9) to 0 to switch the appliance off.

• 

Disconnect the power plug (12) from the electrical outlet. Allow the 
appliance to cool completely before cleaning or storage.

Cool shot button

• 

Push the cool shot button (7) to immediately stop the hot air flow and switch to cold air.

• 

You can set your hairdo with cold air. Hot air will be generated as soon as you release the cold air button.

Using the concentrator or the diffuser

• 

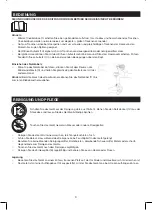
If desired, use the concentrator (1) or the 
diffuser (13) delivered with the appliance.

• 

Attach the concentrator (1) (see fig. 1) or the 
diffuser (13) (see fig. 2) to the front of the hair dryer.

Ensure that the appliance is switched off (level 

0

) and 

cooled down before fixing it.

Ionizer Function

• 

The device generates negatively charged ions, which neutralize the positively charged ions in the hair. The ion 
function has an antistatic effect on hair. The hair is easier to brush and easier to style.

• 

The ion function is activated as soon as the device is switched on.

• 

Use the device without nozzle or attachment to obtain better results with the ion function.

• 

The effect of the ions may be weaker if the device is used in an environment with high humidity.

Содержание HD2100R

Страница 1: ...Bedienungsanleitung Ionen Haartrockner HD2100R...

Страница 2: ...nutzen lesen Sie sich diese Gebrauchsanweisung sorgf ltig durch Sie enth lt wichtige Informationen f r Ihre Sicherheit sowie zum Gebrauch und zur Pflege des Ger ts 1 Beachten Sie alle Sicherheitshinwe...

Страница 3: ...ecker von Wasser und anderen Fl ssigkeiten fern 11 Wenn das Ger t in einem Badezimmer verwendet wird ist nach Gebrauch der Stecker zu ziehen da die N he von Wasser eine Gefahr darstellt auch wenn das...

Страница 4: ...vom Ger t genutzten Stromkreis empfohlen Die Installation muss von einem erfahrenen Elektriker vorgenommen werden 21 Ziehen Sie den Netzstecker nicht am Netzkabel sondern am Stecker aus der Steckdose...

Страница 5: ...Gegenst nden blockiert werden 34 Lassen Sie das Ger t vollst ndig abk hlen bevor Sie Teile entfernen oder anbringen 35 Achten Sie darauf dass hei e Luft nicht gegen Augen oder andere w rmeempfindlich...

Страница 6: ...6 LIEFERUMFANG 1 Ionen Haartrockner X 1 2 Ondulierd se X 1 3 Diffusor X 1 4 Bedienungsanleitung X 1...

Страница 7: ...se 2 Vorderes Geh use 3 Kabeleinziehtaste 4 Hinteres Geh use 5 Abnehmbare Abdeckung 6 Einlassgitter 7 Kaltlufttaste 8 Temperaturschalter 9 Gebl seschalter 10 Kabelschutz 11 Netzkabel 12 Netzstecker 13...

Страница 8: ...ebl seschalter 9 auf Stufe 0 um das Ger t auszuschalten Ziehen Sie den Netzstecker 12 aus der Steckdose Lassen Sie das Ger t vollst ndig abk hlen bevor Sie es reinigen oder aufbewahren Kaltlufttaste D...

Страница 9: ...zstecker mit der anderen Hand Hinweis Beim Gebrauch des Haartrockners k nnen Sie das Netzkabel 11 bis zum roten Klebeband herausziehen REINIGUNG UND PFLEGE Schalten Sie das Ger t vor der Reinigung ste...

Страница 10: ...n Hausm ll Wir m chten Sie daher bitten uns mit ihrem aktiven Beitrag bei der Ressourcenschonung und beim Umweltschutz zu unterst tzen und dieses Ger t bei den eingerichteten R cknahmestellen abzugebe...

Страница 11: ...Instruction manual Ionic hair dryer HD2100R...

Страница 12: ...ell as operating and maintenance advice 1 Observe all safety instructions to avoid damage through improper use 2 Keep this instruction manual for future use Should this appliance be passed on to a thi...

Страница 13: ...he appliance in water or other liquids Never hold the appliance under running water 13 Regularly check the power plug and power cord for damage If the supply cord is damaged it must be replaced by the...

Страница 14: ...ompletely switch off the appliance Use the power plug as the disconnection device 23 Disconnect the power plug from the electrical outlet when not in use and before cleaning 24 Always turn the applian...

Страница 15: ...t be sucked into the air intake 37 Do not cover the air intake and air outlet during use Keep them free from lint and hair INTENDED USE This appliance is only intended for drying and styling of hair i...

Страница 16: ...1 Concentrator 2 Front housing 3 Retract button 4 Rear housing 5 Removable cover 6 Inlet grille 7 Cool shot button 8 Heating switch 9 Air blow switch 10 Cord guard 11 Power cord 12 Plug 13 Diffuser 14...

Страница 17: ...nect the power plug 12 from the electrical outlet Allow the appliance to cool completely before cleaning or storage Cool shot button Push the cool shot button 7 to immediately stop the hot air flow an...

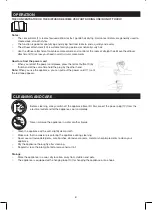
Страница 18: ...umb and at the same time hold the plug by the other hand Note When you use the appliance you can pull out the power cord 11 until the red tape appears CLEANING AND CARE Before cleaning always switch o...

Страница 19: ...and should not be discarded in the domestic waste Please actively support us in conserving resources and protecting the environment by returning this appliance to the collection centers WARRANTY A sta...

Отзывы: