


Ki Pro Ultra v1.2r1
www.aja.com
26
Network
Connections
Ki Pro Ultra can be networked to a computer using a single CAT-5 Ethernet cable (straight
or cross-over) or using an Ethernet 10/100/1000 local area network (LAN) connection to
the Ethernet RJ45 connector.
If connecting via a LAN, connect the Ki Pro Ultra’s Ethernet connector to a LAN hub or
switch. A LAN is a shared network that includes other Ethernet devices all attached via a
hub or digital switch. LANs may be divided into zones, and devices on a LAN may have
fixed or dynamically assigned (DHCP) IP addresses. Before connecting Ki Pro Ultra to the
LAN, talk to your network administrator to find out how they want it connected (static IP
or DHCP).
TCP/IP Information
You’ll Need
If your LAN has a DHCP server that assigns IP addresses dynamically, you don’t have to
configure anything (Ki Pro Ultra defaults to DHCP). If your IT administrator prefers an
assigned IP address that is fixed (called a “static IP”), get the IP address and you will enter
it in the “IP CONFIG parameter.” If your LAN requires static IP addresses, also ask your IT
administrator for the
Subnet Mask
and
default gateway
IP address (your LAN’s internet
router). DHCP or via a static IP addressing are discussed in the following two topics.
Networking via
DHCP
The default configuration (from the factory) automatically looks for a DHCP server to
issue an IP address. As long as your network has a DHCP server (usually part of your
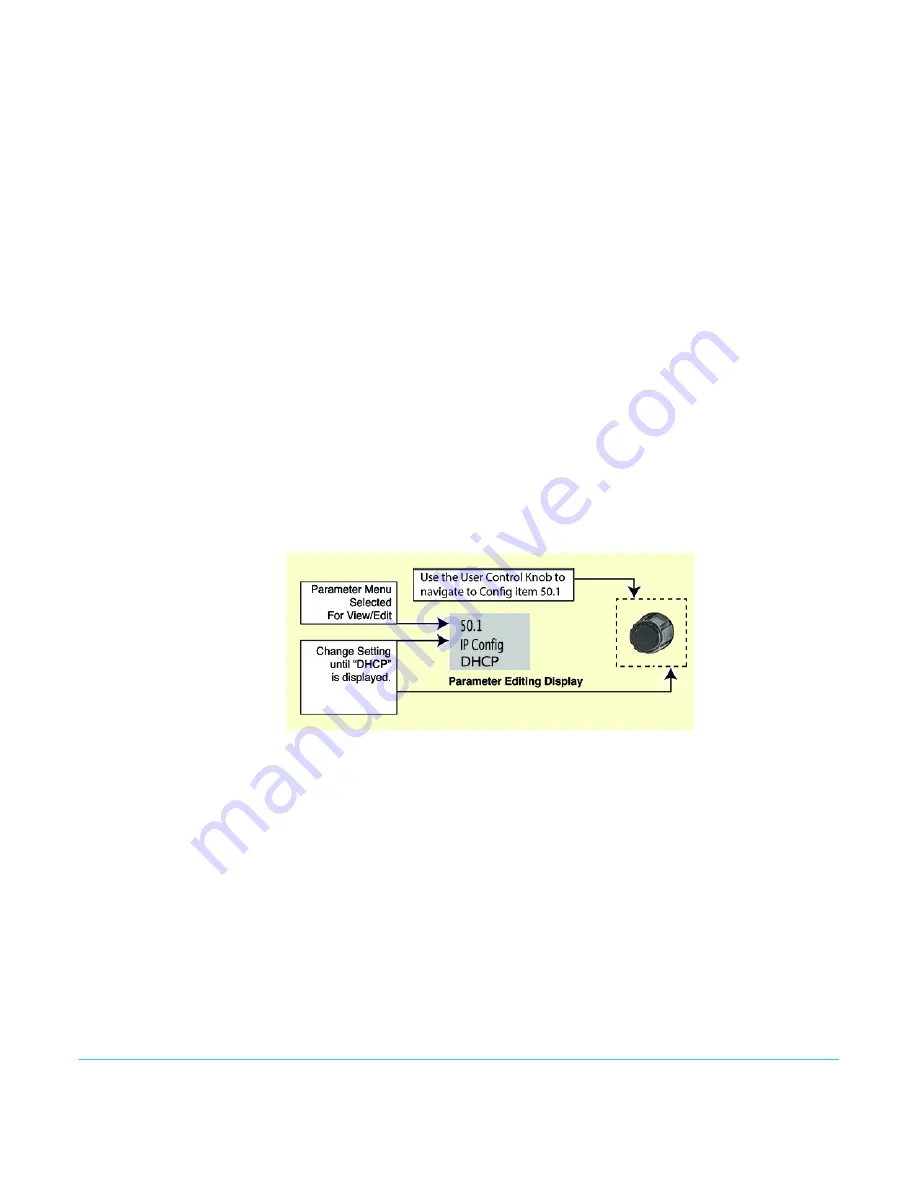
router), you need to do nothing other than plug the Ki Pro Ultra into the net. If you need
to manually select DHCP, use the User Control Knob to navigate to the parameter
50.1 IP CONFIG
, press the knob to activate the menu list, scroll to DHCP and press the
knob again to select it.
Here are the steps to communicate with Ki Pro Ultra after choosing the DHCP selection:
1. Use the User Control Knob to navigate to parameter
50.2
. Make note of the DHCP
supplied IP address shown to enter in your browser (Step 2).
2. With your laptop or desktop computer DHCP enabled and connected to the same
LAN, type the IP address from step 1 into the browser address bar. You should now
see Ki Pro Ultra’s browser status screen.
If Ki Pro Ultra cannot get an address from the DHCP server, it will automatically drop back
to a preset factory IP address of
192.168.0.2
. If this happens, you can follow the steps
below:
1. Set the computer’s Ethernet IP address to
192.168.0.n
(where n is not 2).
2. Set the computer’s Subnet mask to 255.255.255.0 (most computers default to the
proper netmask when the address is set).
3. Run a browser on the computer and type
192.168.0.2
(the factory fallback IP
address). You should now see Ki Pro Ultra’s browser status screen.
Содержание Ki PRO ULTRA
Страница 1: ...Installation Operation Guide Version 1 2r1 Published June 6 2016 ...
Страница 6: ...Ki Pro Ultra v1 2r1 www aja com 6 Index 97 ...
Страница 25: ...Ki Pro Ultra v1 2r1 www aja com 25 Remote Network Control Figure 6 Ki Pro Ultra Networking Examples ...
Страница 79: ...Ki Pro Ultra v1 2r1 www aja com 79 Dimensions ...
Страница 80: ...Ki Pro Ultra v1 2r1 www aja com 80 ...
Страница 81: ...Ki Pro Ultra v1 2r1 www aja com 81 ...
Страница 82: ...Ki Pro Ultra v1 2r1 www aja com 82 ...
Страница 94: ...Ki Pro Ultra v1 2r1 www aja com 94 ...


