


1
31
Io XT Installation and Operation Guide — Control Panel Operation
Input Select Tab
Screen
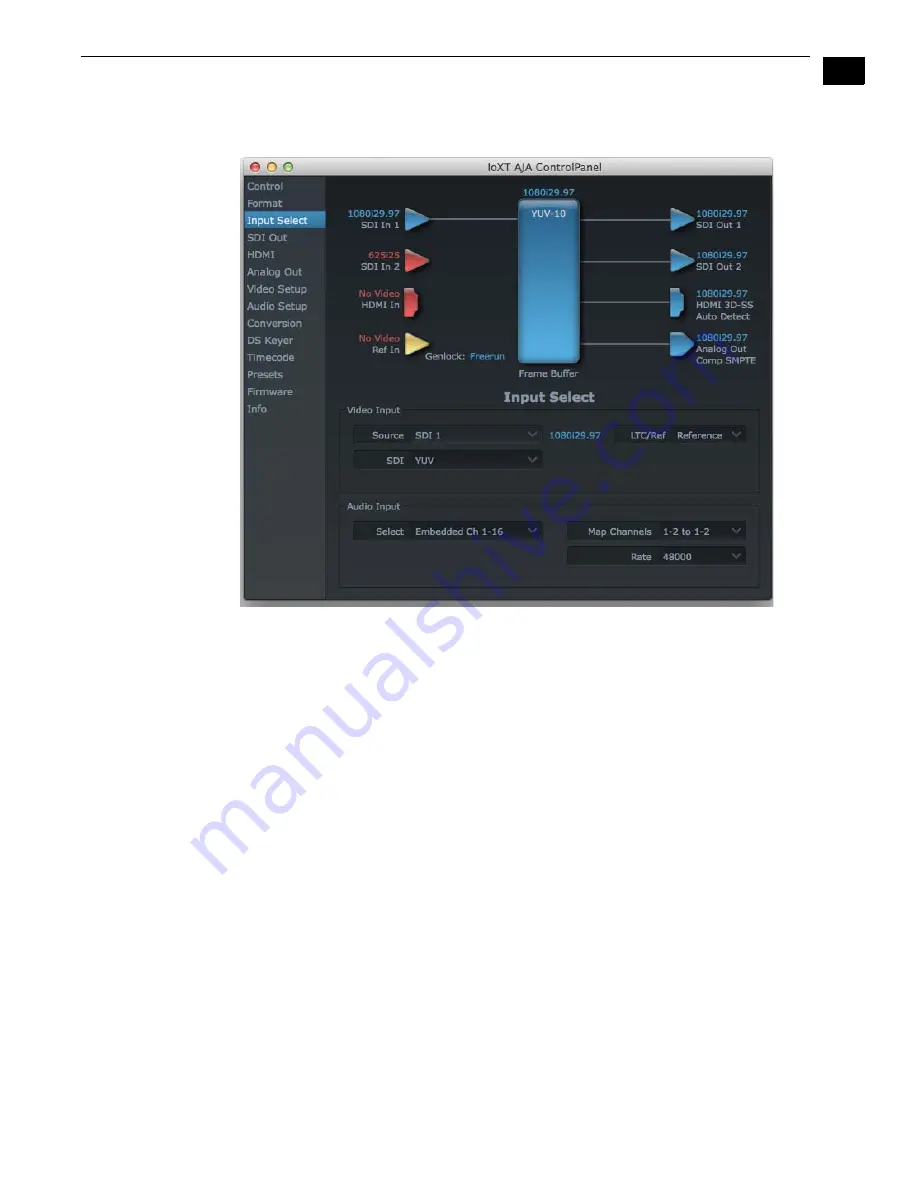
On the Inputs screen you can view the currently selected video and audio input sources and
map audio sources to the channels supported by Final Cut Pro 7 (more on this later). Two
information panes in the screen are provided: Video Input and Audio Input.
AJA Control Panel, Inputs Tab
Input Select Tab Settings
Video Input
—the pulldown menu allows you to see and change what's currently selected and
the video format that Io XT has detected (if any). In the example shown previously, it shows
that video is selected at the HDMI input and the format is 1080i with a frame rate of 29.97.
Since this text is shown in blue, you can tell that it matches the framebuffer's primary
format selected in the “Formats” screen. By looking at the input source, you can determine
how the primary format should likely be set (unless you want to perform a conversion on
input.) If you wish to select a different input use the pulldown to select either SDI 1, 2 or
Dual Link for two-wire 4:4:4 RGB, or Stereo 3D. For 3G single-link, choose the SDI Source
used and select Stereo 3D from the SDI pulldown menu.
Use the LTC/Ref menu pulldown next to Video Input to select how the LTC BNC is used:
selecting Reference means it’s used a Reference standard; selecting LTC means it’s used for
lateral time code (LTC) input.
Audio Input
—this pulldown menu allows you to pick where the audio comes from. Io XT
supports up to 16 channels of embedded audio. Here you can also select which two
channels from the 16 embedded would be mapped to your editing application if only two
channels were selected in that application.


