

EN
10
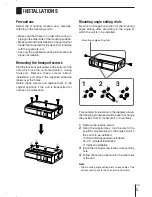
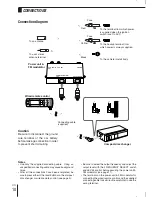
Connection diagram
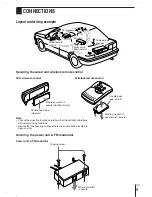
CONNECTIONS
Notes
• Use only the supplied connecting cable. Using an
unspecified connecting cable may cause background
noise.
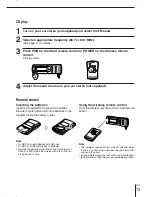
• After all the connections have been completed, be
sure to press either of the reset buttons on the compact
disc changer or wired remote control (see page 3).
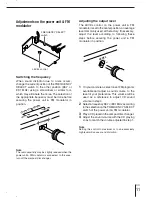
• Be sure to select the output frequency and adjust the
output level with the FREQUENCY SELECT switch
and LEVEL control before securing the power unit &
FM modulator (see page 11).
• The terminals on the power unit & FM modulator for
connecting the wired remote control and the supplied
connecting cable look similar. Be careful not to use the
wrong terminal.
1A
2A
CD CHANGER
REMOTE CONTROL
UNIT
CAR ANT
CAR AUDIO
ANT
POWER
To an antenna
Compact disc changer
To the vehicle (metal) body
To the backup terminal from
which power is always supplied
To the terminal from which power
is supplied when the ignition
switch is set to ACC
Connecting cable
(supplied)
Power unit &
FM modulator
Black
Yellow
Red
Wired remote control
To a car stereo
antenna terminal
Caution
Be sure to disconnect the ground
wire terminal of the car battery
before making a connection in order
to prevent short circuiting.
Fuse
Fuse
Содержание ADC-M35
Страница 16: ...87 KM1 901 01 970123ATM OX Printed in Korea A...


