background image


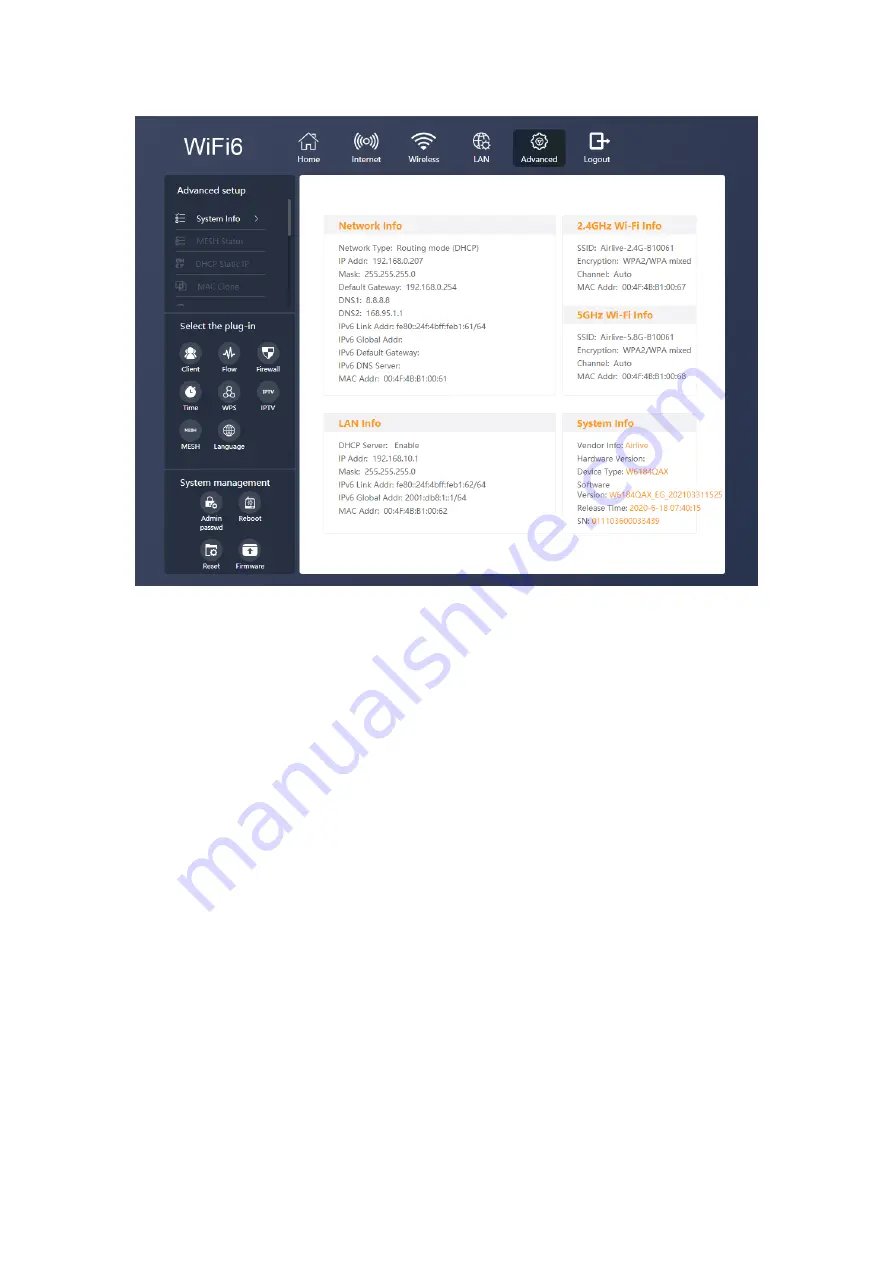
Advanced Setup 

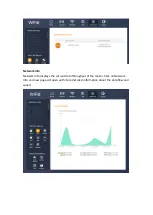
System Information: Displays all the detailed router information, Network Info, LAN, 
2.4Ghz and 5Ghz Wi-Fi Info and System Info. 


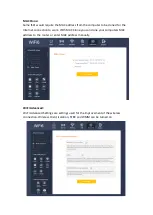
MESH Status: 

When the MESH function has been enabled the MESH status will show the device 
information. When the MESH function is disabled, the Status will be blank. 


Содержание W6184QAX

Страница 1: ...User Manual Wi Fi 6 AX 1800 Indoor Gigabit Router W6184QAX ...

Страница 2: ...Back Panel 3 4 CONNECTIONS and SETUP STEPS 4 5 Login to your Router 4 6 MESH SETUP STEPS 5 Option 01 WIRED MESH SETUP 5 Option 02 WIRELESS MESH SETUP 6 7 Setup Wizard 6 8 Main Setup Home 12 9 Internet 15 10 Wireless 21 11 LAN 25 12 Advanced 26 FAQ 45 ...

Страница 3: ...thernet ports 1 for WAN port 3 for LAN port 2 2 2 4GHz 11ax 2 2 5GHz 11ax Wi Fi 2 LED Description Name Color Description Status Power Blue The device is normally powered ON The device is not powered on OFF WAN Blue The WAN Interface is connected normally ON No WAN Connected OFF WIFI Blue WLAN 2 4GHz or 5GHz is enable ON WLAN 2 4GHz or 5GHz is disable OFF MESH Blue Mesh is connected normally ON Mes...

Страница 4: ...ethernet cable from this port to your modem 5 Reset button When the router is powered on push the Reset button with a needle The LEDs starts to flash and hold the reset button for 10 more seconds Then release it and the Router will reboot Wait for about 2 minutes then the factory default reset is completed 6 Mesh button Push this button to setup a Mesh network between this router and one or more o...

Страница 5: ...Wireless clients can use the SSID password in the bottom shell label to connect to Internet 5 Login to your Router Step1 Set your PC to obtain an IP address automatically Step2 Open the web browser and enter http 192 168 10 1 in the address bar Management IP address in the bottom shell label Step3 Enter the Username and Password in Login web Username and Password in the bottom shell label and clic...

Страница 6: ...ss down the ON OFF button on the Sub Router AP When the Power status LED is ON the Sub Router is switched on Step2 Place the Sub Router AP near the Main Router Step3 After the Wi Fi LED is burning solid Press both the MESH buttons Main router first then the Sub router respectively Pairing is in progress when both the MESH LEDs of the Main Router and Sub Router are blinking Pairing is successful wh...

Страница 7: ...oth the MESH buttons Main router first then the Sub router respectively Pairing is in progress when both the MESH LEDs of the Main Router and Sub Router are blinking Pairing is successful when both the MESH LEDs of the Main Router and Sub Router are solid Step4 You can move the Sub Router to the network expansion location Step5 Wireless clients can use the same Wi Fi SSID and password as the Main ...

Страница 8: ...figuration After the login the Wizard will be shown The Wizard will only be shown during the first time login Select your mode for Internet connection Route Mode The default selection is Route mode In Route mode the default selection is DHCP When your modem is using PPPoE as connection type Then from the Pull down menu select PPPoE and enter your Account and password as provided by your ISP ...

Страница 9: ...e NAT features will no longer be in effect Select Bridge mode when you want the device router to which the W6184QAX is connected to act as a DHCP server for your network Devices connected to the W6184QAX will get an IP address from the device connected to the WAN port of the router Please note that the AirLive W6184QAX will also get an IP address from the router and its default IP address 192 168 ...

Страница 10: ...ireless devices can connect To change the SSID name click on the behind 2 4G and or 5Ghz and change the name from the default one to your own Wi Fi Password This is the password you will be asked to enter when connecting to the wireless network The default wireless password is 123456789 Note For security it best to change this default password to your own password Click on the eyelash icon to see ...

Страница 11: ...To enable Band Steering click on the slider bar behind the function Enabling Auto Band Steering allows the router to connect devices automatically on 2 4 or 5GHz band based on the signal strength When enabled only one SSID will be shown for both 2 4 and 5Ghz ...

Страница 12: ... the MESH network Wi Fi 6 Mode Wi Fi 6 is a new generation of Wi Fi technology that supports a variety of new functions such as OFDMA which can make the connected Wi Fi terminals have a better experience However when this function is enabled some old terminals may have compatibility problems such as unable to scan the Wi Fi signal or unable to connect to Wi Fi and they just need to switch from Wi ...

Страница 13: ...tups This Main page shows the upload and downloaded data in real time and shows the device health and operation Connected Devices The number shows in the circle shows the total number devices connected to the router at the current time Click on Connected Devices to see more detail including Device Name IP Address and MAC Address ...

Страница 14: ...Network Info Network Info displays the current data throughput of the router Click on Network Info and new page will open with more detailed information about the data flow and speed ...

Страница 15: ...ssword click on the eyelash icon Network Detection To see more detailed information of the health and operation click on Network detection in the bottom right corner A new page will open which will test the device A green checkmark means the function is okay No green check mark means a failure Red text will mean the function is working be needs your attention ...

Страница 16: ...internet connection When the router was already setup via the Wizard Then these settings would be the same The default selection is Router mode In Route mode the default selection is DHCP Automatic Internet Access Protocol can be IPv4 IPv6 or IPv4 IPv6 ...

Страница 17: ...commend DNS address automatically Press Save Apply to save your changed settings PPPoE When your modem ISP is using PPPoE as connection type Then from the Pull down menu select PPPoE and enter your Account and password as provided by your ISP When more information needs to be entered then click on the Special Dial to setup the MTU and DNS information Depending on your location the MTU is 1500 or 1...

Страница 18: ...nd operator IP Address Enter your static IP Subnet Mask Enter your Subnet Gateway Enter your Gateway IP DNS You can assign a static DNS addresses or leave them NULL to use the DNS assigned by ISP You can also select Recommend then the router will fill in the recommend DNS address automatically Press Save Apply to save your changed settings ...

Страница 19: ...IPv6 or IPv4 IPv6 are selected the same from the protocol selection The same Internet options are available DHCP PPPoE and Static IP Note that only now also your IPv6 information needs to be entered as provided by your ISP ...

Страница 20: ...vice router to which the W6184QAX is connected to act as a DHCP server for your network Devices connected to the W6184QAX will get an IP address from the device connected to the WAN port of the router Please note that the AirLive W6184QAX will also get an IP address from the router and its default IP address 192 168 10 1 will no longer work unless the router is reset back to default To find your r...

Страница 21: ...MESH function After Repeater is enabled you need to click on the slider bar to select your primary router Select the SSID you like to connect to and enter the wireless password for that router When the repeater mode is in use in the same network as the primary router make sure there is no network cable connected the WAN port of the slave device the one which enabled repeater mode ...

Страница 22: ...lays all the wireless settings To turn off all the wireless functions of the router click on the slider bar to off By disabling the wireless function you will no longer be able to access the router via Wi Fi Only the LAN ports on the router will function To access the router after Wi Fi has been turned off please use the LAN ports ...

Страница 23: ...wn menu No Encryption WPA WPA2 WPA3 WPA2 WPA WPA2 WPA3 Wi Fi Password Type to modify your password click on the eyelash icon to see the password Wi Fi Channel Click the pull down menu to select your wireless channel Select Auto and the Router will select the best channel by itself Select 1 13 2 4GHz 34 64 5GHz Channel Select your wireless channel channel number is dependent on your region To chang...

Страница 24: ...own menu No Encryption WPA WPA2 WPA3 WPA2 WPA WPA2 WPA3 Wi Fi Password Type to modify your password click on the eyelash icon to see the password Wi Fi Channel Click the pull down menu to select your wireless channel Select Auto and the Router will select the best channel by itself Select 1 13 2 4GHz 34 64 5GHz Channel Select your wireless channel channel number is dependent on your region To chan...

Страница 25: ...ted Wi Fi terminals have a better experience However when this function is enabled some old terminals may have compatibility problems such as unable to scan the Wi Fi signal or unable to connect to Wi Fi and they just need to switch from Wi Fi 6 to Wi Fi 5 Turn this mode off when an older wireless device has problem connecting to the router ...

Страница 26: ...nabled click on the slider bar to disable the DHCP server Note your router will no longer give IP addresses to connected devices IP Address Pool Type to modify the starting range IP address to the end range IP address Default Gateway Automatic Address Lease Time Select the maximum lease time from 2 mins 1 week Domain Name Server Default is Automatic this means the DNS used is the one from the ISP ...

Страница 27: ...pe to change this To start the IPv6 DHCP service checkmark the circle and enter your DHCP start IP address and end IP address LAN DNS Access is default set on Automatic to change this select Manual and enter your preferred DNS Prefix Settings Default is set to Automatic select Manual to enter your own Prefix and Prefix length 12 Advanced The Advanced menu is divided into 3 different parts Advanced...

Страница 28: ...e detailed router information Network Info LAN 2 4Ghz and 5Ghz Wi Fi Info and System Info MESH Status When the MESH function has been enabled the MESH status will show the device information When the MESH function is disabled the Status will be blank ...

Страница 29: ...tatic IP address assign fixed IP address for your phone or connected device Click on the slider bar behind the devices for which you want the function to be active After modification click Save Apply button to save the setting ...

Страница 30: ...e Internet connection to work With MAC Clone you can clone your computers MAC address to the router or enter MAC address manually Wi Fi Advanced Wi Fi Advanced Settings are settings used for the improvement of the wireless connection Wireless Client Isolation STBC and WMM can be turned on ...

Страница 31: ...is shown DDNS DNS DynamicDNS allows users to map the static domain name to a dynamic IP address to use this function you must have a username password and your static domain name from the DDNS service which you are using This router supports no ip com easydns com and several others You can select the DDNS which are supported by the router from the pull down menu ...

Страница 32: ...ications to work correctly it is necessary to open a port or a port range on the router This is possible with the Firewall Rule here a single port can be opened for an IP address or range of ports can be opened for an IP address ...

Страница 33: ...you would like to make Select TCP UPD or TCP UPD now enter the Start port and End port of the port range you like to use then enter the IP address for which the rule will be made Click Add to add the rule after this click Save and Apply to active the rule UPnP The Router UPnP function is used for the local area network and mobile devices which can use the network smoothly and accelerate the speed ...

Страница 34: ...ening the DMZ function allows external users to access a special network set up in the internal network Both the intranet and the extranet cannot directly access this area and are mostly used to connect public servers such as WWW servers To enable the DMZ click on the slider bar and enter the IP Address for which the DMZ should be used and press Save Apply ...

Страница 35: ...up Management Protocol IGMP is a communications protocol used by hosts and adjacent routers on IPv4 networks to establish multicast group memberships IGMP is an integral part of IP multicast and allows the network to direct multicast transmissions only to hosts that have requested them IGMP snooping is the process of listening to Internet Group Management Protocol IGMP network traffic to control d...

Страница 36: ...ogs the operation of the equipment and analyzes the cause of the failure when the equipment fails To save the log file you can export it and save it as a txt file on your computer Click Export log to save the log information ...

Страница 37: ...Advanced Select the Plug in Client Client will display all devices which are connected to the router The Device name IP address and MAC address will be shown ...

Страница 38: ...all level the higher the level the more secure your connection will be But this can also limit your traffic select the level depending on your use Select the level from the pull down menu High Allows legitimate WAN Access Middle Allows legitimate WAN side access while resisting some dangerous data streams on the Internet Low Allows legitimate WAN access Wan side ping is allowed ...

Страница 39: ... be accessed Only addresses in the Whitelist can be accessed Add the URL which you want to add to either the Blacklist or Whitelist in the URL Address field A description can be written down under Annotation MAC Filter blocks or Permits certain MAC addresses from access This can be done by adding them to either to Blacklist or Whitelist Select Blacklist or Whitelist Addresses in the Blacklist are ...

Страница 40: ......

Страница 41: ...lect one of the NTP Servers click Save Apply to activate the settings WPS The function of WPS is so that the user does not need to know the WIFI password When the WPS function is turned on by clicking the slider bar Click on Start Configuration for either the 2 4Ghz or 5Ghz Wi Fi WPS After this also click on the WPS button of your other Wi Fi device which you want to connect to the router Note tha...

Страница 42: ...IPTV The IPTV can be used when an IPTV set is connected When this function is turned on it would benefit the IPTV Select the LAN port to which the IPTV is connected ...

Страница 43: ...r MESH mode there are two options Controller and Agent In a MESH network there is always only one Controller all other devices are Agents in the MESH To change the MESH ID click on the field to see the ID click on the eyelash behind it Language To change the language of the router select your language from the pull down menu when available ...

Страница 44: ...Advanced System Management Admin Password To Change the Admin Password of the router please enter a New password and Confirm it After Save Apply the new password can be used to login to the router ...

Страница 45: ...fault settings Press the reset button and confirm Note all settings will be set back to default Firmware Update the firmware in the router only when you have a problem To update the router remove the checkmark from keep current configuration and click Upload Now select the update file and click ok The router will now be updated ...

Страница 46: ...nnection back to wireless after successful wired networking what should I do Disconnect the wired connection between the Sub Router and the Main Router power off and restart the Sub Router When the Wi Fi LED is ON press the MESH buttons of the Sub Router and Main Router to pair Pairing is successful when both the MESH LEDs of the Main Router and Sub Router are ON Q5 Mobile phones and other devices...

Отзывы: