


4
2 Multi-Functional Printer Server Installation
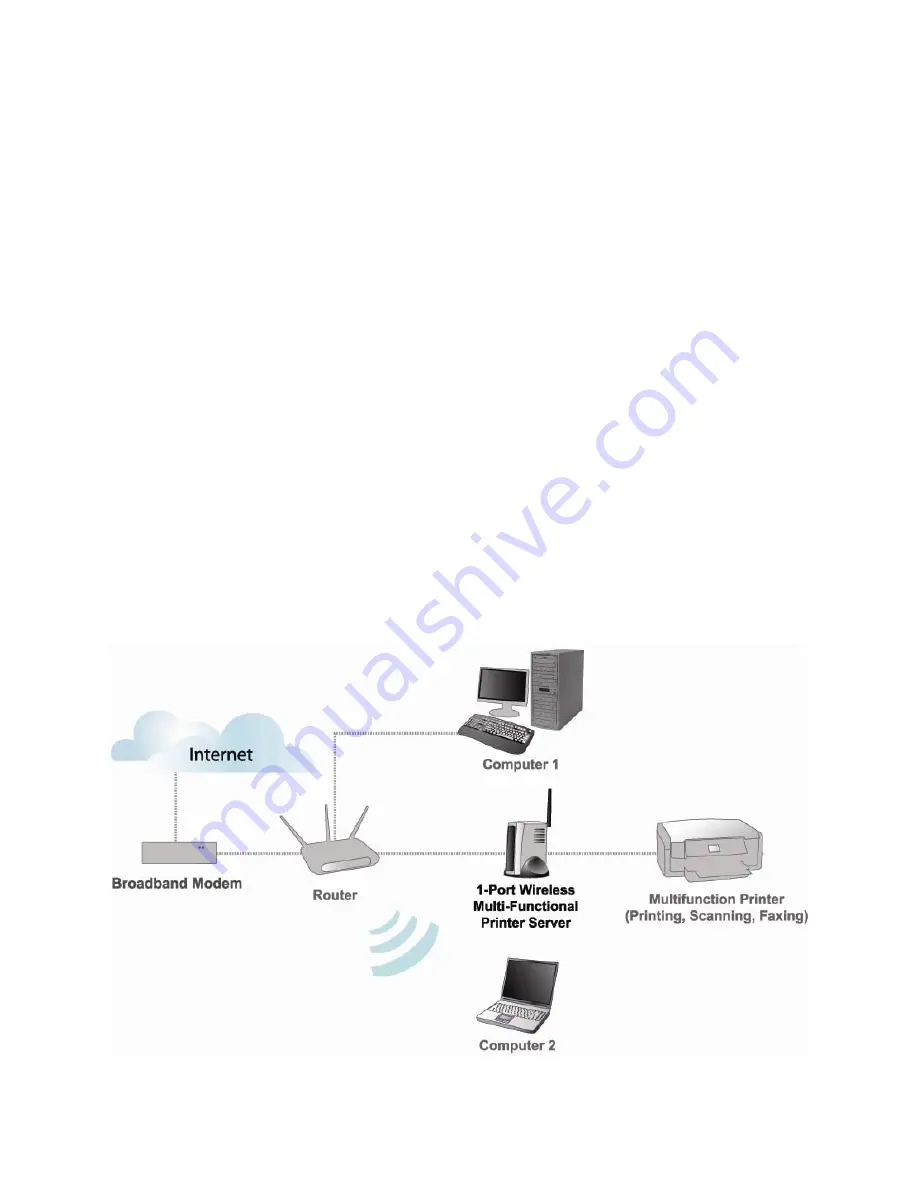
2.1 Connecting the Printer Server
WARNING:
Only a USB printer may be connected to the USB port of the Printer Server.
Connecting any other USB device to the Printer Server may damage the Printer Server.
Note:
Before connecting the hardware you must install the printer on each computer
you plan to use with the printer. Make sure that you are able to print, scan, and fax from
each with your multi-functional printer directly connected to your computer(s).
Step 1
Power down the printer and the printer server.
Step 2
Connect one end of a networking cable to your router, then connect the other
end to the Ethernet port on the back of the print server.
Step 3
Connect the USB cable coming from your printer into the USB port on the printer
server.
Step 4
Turn on the printer. Once the printer is powered on, connect the print server’s
power adapter to an electrical outlet.
Содержание AMPS240W
Страница 1: ...Wireless USB 2 0 1 Port Multi Functional Printer Server Model AMPS240W User s Manual Ver 1A...
Страница 6: ...6 Step 3 Click Next at the welcome screen Step 4 Click Next at the Choose Destination Location screen...
Страница 34: ...34 3 5 Help The Help category provides brief information about the MFP Server for your reference...


