6
MN-337
TO PREVENT THE ELEMENTS FROM ENTERING THE CAB AREA.
3. Connect wiring harness #1 to the back of the gauge panel.
a. With your thumb against the front side of the switch, connect the wire by pushing
the female connectors onto the blade connectors on the switch.
b. Match the air line by the color band on the air line to the color band on the tees.
c. Push the air lines onto the “T” fittings until the air line completely covers the barb
(fig. 4). Lubricating the air line will ease pushing the air line over the barb.
d. Do not connect the power wire at this time.
e. Wiring harness #1 also connects the gauge panel to the low pressure sensor
assemblies. The low pressure sensors protect the air springs from failure resulting
from low pressure in the unloaded condition. These sensors are preset to maintain
a MINIMUM pressure of 5 psi in the air springs. The sensors measure the pressure
in each spring and turn on the compressor if the pressure falls below 5 psi.
The low pressure sensors are preassembled onto wiring harness #1. The sensors should
be located under the dash inside the vehicle and secured with the provided tie straps.
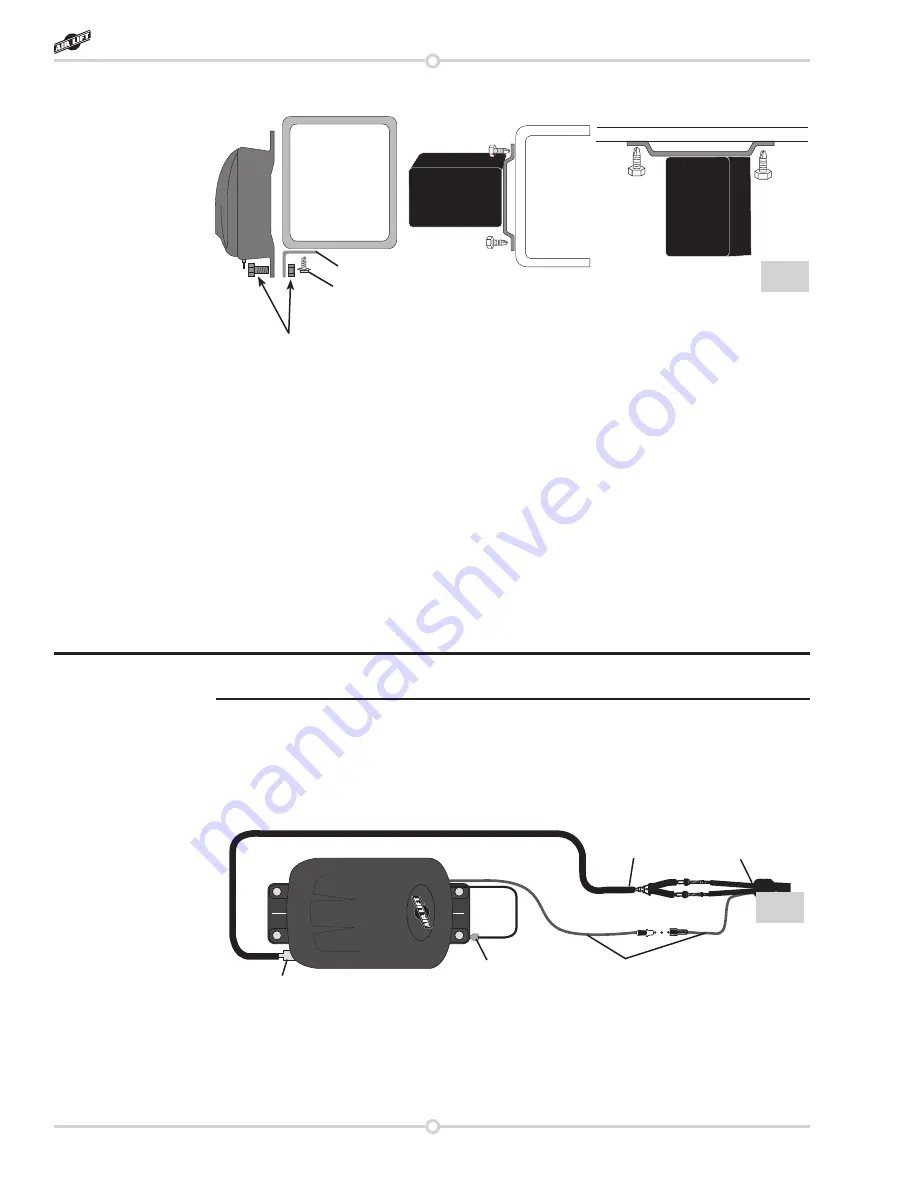
4. Push the air line coming from the “Y” assembly onto the barb fitting on the compressor.
Make sure the air line covers all barbs. A small amount of water or lubricant and pushing
with a slight circular motion will ease installation (fig. 7).
5. Connect the check valves and power wire on harness #2 to the “Y” assembly as shown
in fig. 1. Do not overtighten the check valve connector. Hand tight is sufficient.
6. Route wiring harness #2 from the compressor.
a. Use existing grommets in the floorboard or firewall to route the harness from the
compressor to the low pressure sensors on harness #1.
NOTE
fig. 7
Power (red) wires
Air line
Harness #2
Ground
Barbed fitting/
check valve
fig. 6
Compressor
Compressor
Floor plan
Frame
L-bracket
Supplied self
tapping screw
¼” Bolt and nut will need to
be provided if the L-bracket
is fabricated.
Load Controller II
Содержание Load Controller II 25812
Страница 2: ......


