background image

User’s Manual 


Page 17

EN 

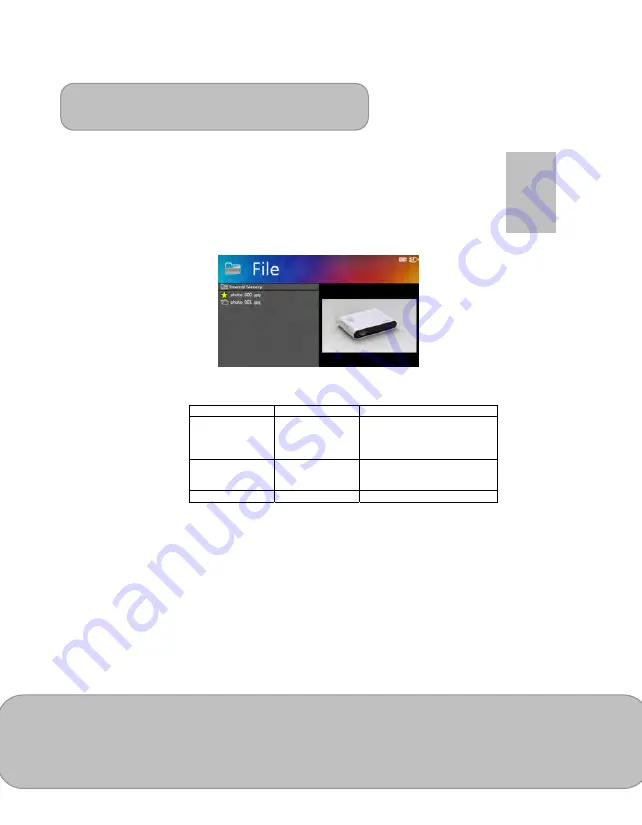
2)  My Favorite: The file will be marked 

  icon and be grouped into “My Favorite” 

folder for easy access (like a bookmark). (Please refer to page 21, “My 
Favorite” section introduction.) 


You may also select a file in the file list and press 

/

OK for 2 

seconds to mark the file. If want to unmark the selected file, just press 
the 

  “OK” for 2 seconds again to remove the mark. 


Note:

  The projector supports the following video formats: 


File Extension

Video Decoder

Audio Decoder

*.avi MJPEG 

Xvid 
H.264/AVC 
MPEG4 

AAC (AAC-LC and HE-AAC) 
PCM 
ADPCM 

*.mov 
*.mp4 

MPEG4 
H.264 

AAC 
PCM 
ADPCM 

*.mpg MPEG1 

LPCM 


Projecting Photos 

Select and project still images. 

1. Select ‘

Photo

’ and press 

/

OK


to enter Photo mode on the main menu. 

2. Use 




to select the folder and press 

/

OK


to open the selected folder. Use 




 to navigate the thumbnail of photos.   

3. Press 

/OK


to project the selected photo in full screen.     

4. Press the Left/Right (


) key to move to previous/next picture. 

5. Zoom or Pan the picture: 

  Press the Up 

 key to enter Zoom mode. Use Up/Down (



) keys to Zoom in 

/ Zoom out. 

  In Zoom mode, press 

/OK to switch to pan function.

Содержание RV7001

Страница 1: ...r hands before you use it Do not place objects filled with liquids such as vases etc on or near the device 3 Make sure that the used power outlet is always readily available and never hidden In case of emergency use the power adapter to separate the device from the power network 4 Keep your device away from all flames such as candles and do not set them up in the vicinity of the device 5 Keep the ...

Страница 2: ...t may damage the internal components 5 Use the enclosed power adapter see technical data Check whether the mains voltage of the power supply matches the mains voltage available at the setup location This equipment complies with the voltage type specified on the unit Notice for Long time Projection The built in battery supports approximately 120 mins of projection For long time projection you are r...

Страница 3: ...t into an outlet on a circuit different from that to which the receiver is connected Consult the dealer or an experienced radio television technician for additional suggestions For product available in the USA Canada market only channel 1 11 can be operated Selection of other channels is not possible This device and it s antennas s must not be co located or operating in conjunction with any other ...

Страница 4: ...jecting from External Video Input Source 9 HDMI VGA AV IN 10 Smartphone Tablets 13 Charging the external mobile devices 13 Projecting from Memory 14 Main Menu 15 Video 16 Photo 17 Document 19 Music 20 File Manager 20 MyFavorite 21 Setting 21 Enable Wirelss Connection 23 Wireless Driver for PC or Mac 23 Wireless App on Apple or Android devices 28 Trouble Shooting 35 Specifications 36 ...

Страница 5: ...nt Please check if the following items are located in your packaging Pico Projector Power Adapter Exchangeable Power Plug Remote Control HDMI Cable A to A type MHL Cable HDMI A to USB D type AV Cable Micro USB Cable Carry Bag User s Manual ...

Страница 6: ... Menu OK Down Exit Right Next Infrared Receiver DC IN HDMI MHL Connector SD SDHC SDXC Card Slot USB Connector Tripod Socket AV jack Speaker Connector Focus Lever Projection Lens Speaker Keypad Ventilation VGA Port Ventilation Micro USB Connector Power Source External video input Up ...

Страница 7: ... battery and its contact Remove the sheet before use 3 Insert the battery holder Warning Improper use of the battery may cause overheating explosion or ignition which can result in an injury or a fire Battery leakage may damage the remote controller Do not expose the remote controller unit to direct sunlight Do not expose the battery to fire or water Immediately replace the exhausted battery Take ...

Страница 8: ...upplied AC adapter to DC IN jack and the other end to a power outlet to start charging Exchange the plug EU US and etc of AC adapter that accommodates the type of power outlet in your country if it s different Charging LED Indicator During charging the LED on Power button turns Orange It turns to Green when the battery is fully charged Turn On Off the Projector Push the Power button for 2 seconds ...

Страница 9: ... projectional image when necessary The tripod socket is located under the projector Select the Language Use the navigation keys to select Setting and press OK to enter the submenu Select Language and press OK to enter the language list Select your preferred language and confirm with OK Press Exit to return to Main Menu Projecting from External Video Input Source The projector has built in multiple...

Страница 10: ...GA port on the rear panel of the projector to the external VGA signal source After connected press the Source button on the remote control or control panel to select VGA source Note VGA cable is not included in standard package AV IN Follow the figure below to connect the external AV output device to the AV jack Connection is color coded After connection press the Source button on the remote contr...

Страница 11: ...1 Pan Scan the image is scaled up to fit to 16 9 screen 2 Letterbox the image is displayed by original aspect ratio Illustration for the Aspect ratio setting Source Screen 4 3 Aspect Ratio Projection Screen Pan Scan 16 9 Letterbox 16 9 2 Brightness It allows you to change the brightness according to the environment and the power consumption 1 Enhanced Select this mode when external power supply is...

Страница 12: ...ont Ceiling The projector turns the image upside down for ceiling mounted projection Rear The projector reverses the image so that it can project from behind a translucent screen Rear Ceiling The projector reverses and turns the image upside down It can project from behind a translucent screen in the ceiling mounted position 4 Scene selection It allows you to select the ideal mode for watching mov...

Страница 13: ...onnector Connect iPhone 5 iPad 4th iPad mini and iPod touch 5th with the projector via Apple Lightning Digital AV adapter and A to A type HDMI cable iPhone 4S 4 New iPad iPad 2 and iPod touch 4 th can connect with projector with Apple 30 pin digital AV adapter and A to A type HDMI cable Charging the External Mobile Device The internal battery of the projector cannot only be used for projection but...

Страница 14: ...2 Please refer the supported file format in Functions and Operations P 15 Projecting from External Memory 1 External SD SDHC SDXC card slot The memory card slot is built in to reading SD SDHC and SDXC card up to 128 GB Gently insert the card by following the direction shown below until it reaches the bottom of the slot To remove the memory card gently push the top edge of the card and pull it out ...

Страница 15: ...rd Excel and PDF files for projection Wi Fi Enable wireless function for the projector Music This function allows users to select MP3 WAV and OGG files to playback on the projector File This function allows users to navigate all folders and files regardless their file format in the selected memory source Photo and Video can be previewed while navigating the list You can copy selected file to anoth...

Страница 16: ...evious next video 4 Press longer to fast rewind fast forward 5 Press OK to pause and press it again to resume 6 To adjust the video volume press to adjust the value Changing Video Playback Setting Under the file list press Menu to enter the video setting 1 Playback Select the playback mode as Table A for video clips Table A Repeat Off Play current video or track once Normal Play current folder Rep...

Страница 17: ...e Extension Video Decoder Audio Decoder avi MJPEG Xvid H 264 AVC MPEG4 AAC AAC LC and HE AAC PCM ADPCM mov mp4 MPEG4 H 264 AAC PCM ADPCM mpg MPEG1 LPCM Projecting Photos Select and project still images 1 Select Photo and press OK to enter Photo mode on the main menu 2 Use to select the folder and press OK to open the selected folder Use to navigate the thumbnail of photos 3 Press OK to project the...

Страница 18: ...Left Right key to select the direction to rotate and press OK to confirm To return press Exit to photo folders or thumbnails Changing Photo Playback Setting Under the file list select a thumbnail and press Menu to enter Photo Setting 1 Slideshow To turn On or turn Off the slideshow 2 Music To have or without background music during the slideshow To play the music please save the preferred music un...

Страница 19: ...ey to enter Zoom mode Use Up Down keys to Zoom in Zoom out In Zoom mode press OK to switch to pan function Changing Document Playback Setting Under the file list select a document and press Menu to enter Document Setting 1 Slideshow To turn On or turn Off the slideshow 2 Speed To set up the slideshow interval speed as 5 sec 10 sec 30 sec 1 min or 10 min 3 During slideshow press OK to stop or resum...

Страница 20: ...K to pause the music Press it again to resume normal playback 5 The screen will be automatically turned off after 20 seconds to save power To turn on the screen touch the keypad to activate the projection function 6 Press Menu to enter the music setting 1 Playback Select the playback setting as Table A Page 16 2 My Favorite The file will be marked icon and be grouped into My Favorite folder Please...

Страница 21: ... file 4 Press Menu to enter Delete the Path function Note Delete the Path only remove the file path from the list of My Favorite If you need to delete the files please select File on the main menu Then select the file and press Menu button to enter Copy Delete function Setting Change the default setting of projectional brightness Projection methods language and memory devices 1 Brightness It allow...

Страница 22: ...deshow Text ideal for image with text 4 Memory Source This function allows users to select the storage devices between internal memory Micro SD Card and USB devices Internal memory SD SDHC SDXC card USB Dongle 5 Language This item allows users to select the displayed system language 6 Auto Power Off This item allows users to enable or disable the auto power off function of the projector If auto po...

Страница 23: ...reless application software on your computer 1 Select and enter Wi Fi on the main menu to launch the wireless function of the projector 2 The W Fi Display shows the wireless status Wi Fi connected or disconnected and password for connecting the projector 3 Enable your WLAN of Notebook or PC Select the access point labeled WiFi_projector XX to connect the projector Wireless network ...

Страница 24: ...ess network you will loss wireless connectivity with other wireless networks 4 Press Menu on the projector to enter the Driver App Installation 5 The screen shows the IP address and QR code for downloading Driver App 6 Open the Internet browser on your computer then enter the default IP Address http 192 168 111 1 in the browser s address bar 7 Select the driver for Windows or Mac OS depending on y...

Страница 25: ...installation is completed an icon labeled EZ View will appear on your computer desktop Note To rename your projector network name SSID or change the wireless security password is disabled as default you can type the projector s IP address 192 168 111 1 into your web browser to open its configuration page and find the settings to enter the new name or create the password ...

Страница 26: ...ommended to use Home Network Mode see page 32 when you need Internet access for the projection Peer to Peer wireless projection from computer 1 Select and enter WiFi on the main menu of the projector 2 Make a note of the Login Code in 4 digits XXXX You will need the information to log in later 3 Connect your computer to the projector Wireless network by selecting WIFI Projector XX on the network l...

Страница 27: ...d Mode Extend the screen from computer to the projector D Link Link to the projector Download Configure management page E Exit Click to close the application F Mode Click to select the ideal mode for watching movie or photo slideshow Video ideal for watching movie Graphic ideal for photo slideshow G Compatible Mode Click to enhance 3rd party software compatibility The performance frame rate of wir...

Страница 28: ...ireless connection If you are connecting your phone to the projector using a cable you can use the built in video out feature of your phone Installing EZ View from Google Play For Android device 1 Connect to the Internet and open the Google Play or Google Play web page Google Play is a trademark of Google Inc 2 In the search bar type EZ View Or scan the QR code directly from the installation page ...

Страница 29: ...3 Click the INSTALL button to download and install the EZ View application Peer to Peer wireless connection from Android or Apple device to the projector Before you can transmit images to the projector using EZ View you must connect your Android smartphone or Apple i device to the projector peer to peer or in the same available wireless network 1 Select and enter Wi Fi on the main menu to launch t...

Страница 30: ...rojector 3 Enable your WLAN on smartphone Select the access point labeled WiFi_projector XX to connect the projector Wireless network Opening EZ View and Logging into the projector 1 Open the EZ View application EZ View will search for compatible devices 2 Choose WiFi Projector and enter the Login password shown on the projector screen ...

Страница 31: ...WiFi connection Stream video stored on your iOS and Android devices to the projector Allow up to four devices be projected through one projector in the same time Adding Content to EZ View using iTunes For Apple i Device 1 Attach your iPhone to your computer 2 On your computer launch iTunes unless it automatically opened when you attached your iPhone 3 Click the iPhone or iPad device in the sidebar...

Страница 32: ...twork Home Network Mode for Internet access You are recommended to connect the projector to a Wi Fi network so your computer tablet and smartphone can at the same time have the Internet access You only need to key in the network key to set up the connection for the first time The projector will be automatically connected to the network when it enters the WiFi mode next time 1 Select and enter Wi F...

Страница 33: ...using the navigation keys on the projector or the remote control After typing the password press Exit on the projector or the remote control to quit the keyboard Select Connect and confirm with OK 5 Use Exit button to return to WiFi Display Now you can start the driver or App EZ View to start the wireless projection 6 To disconnect the wireless projection simply close the driver or App and return ...

Страница 34: ...ght Cordless phones bluetooth devices microwaves and anything that may cause RF interference in the 2 4GHz frequency range can affect the WLAN performance as well Therefore once the internet speed drops or intermittent disconnects during the projection we recommend you to select another access point with a stronger signal or disconnect the projector client from your access point disable internet a...

Страница 35: ...Main Menu to enter the WiFi display mode 2 Enable your WLAN of PC or smartphone and select the access point labeled WiFi_projector XX to connect with the projector 3 Disconnect the Ethernet cable from your computer to avoid affecting the wireless network connection The projected image is too dark 1 Use the projector in a darker environment 2 Increase the brightness by using the AC power adapter 3 ...

Страница 36: ...Photo jpeg jpg bmp Video avi mov mp4 mpg Audio mp3 wav ogg Document ppt pptx pdf doc docx xls xlsx WiFi Module IEEE 11n 1T1R Standard 802 11b g n Internal Memory 2 GB 1 2 GB for storage Internal Speaker Mono Card Slot SD SDHC SDXC card up to 128 GB Power Supply Input 100 240V AC Output 12V 2A DC Battery Type Embedded 7 4V 2000 mAh Li polymer battery Battery Life Enhanced mode 80 min Normal mode 10...

Отзывы: