background image

5

EN

'HOHWLQJ¿OHV

1

Press the Playback (

EXWWRQZKLOHLQSUHYLHZPRGH

2

 8VHWKHGLUHFWLRQDOEXWWRQOHIWULJKW

WRVHOHFWWKH¿OH\RXZDQWWRGHOHWHDQG

press the Delete (

) button.

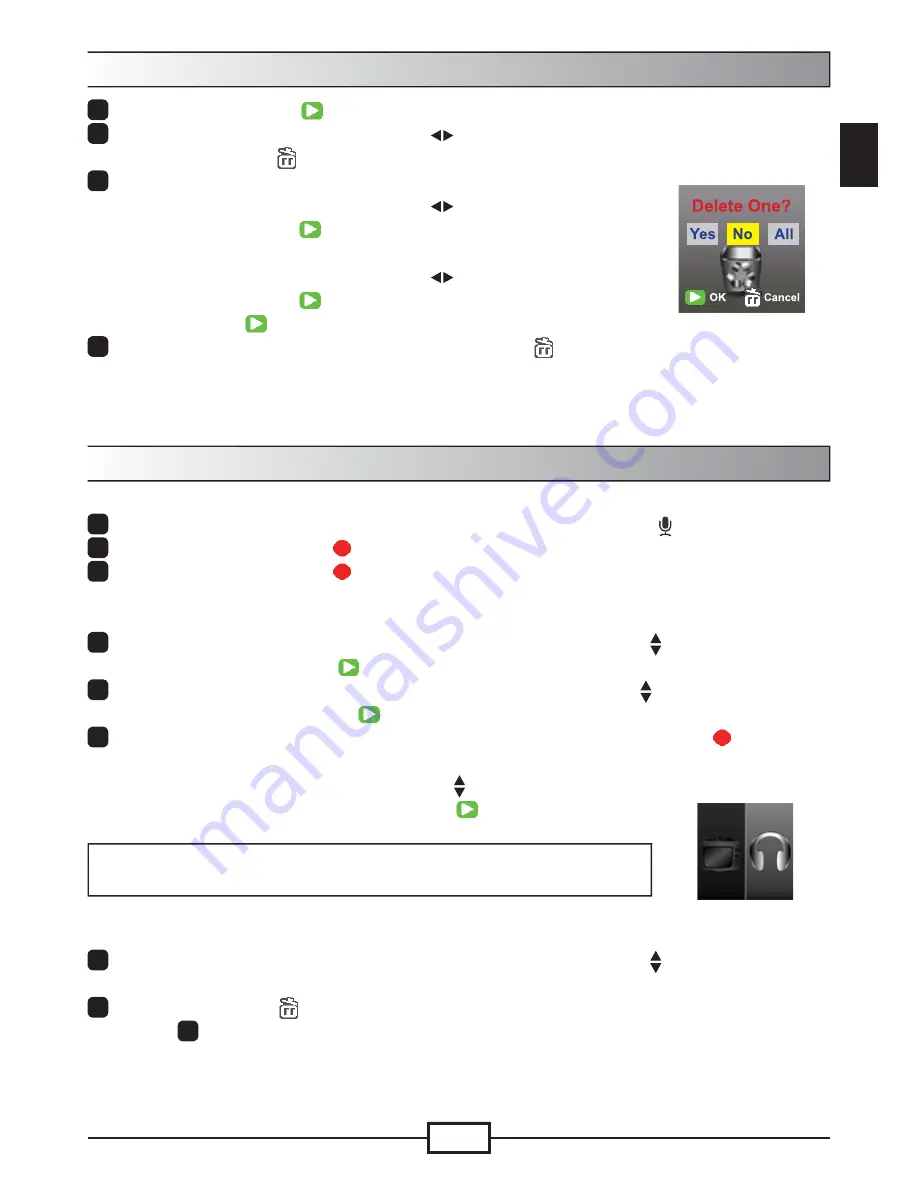
3

7RGHOHWHWKHFXUUHQW¿OH

8VHWKHGLUHFWLRQDOEXWWRQOHIWULJKW

) to select “Yes” and 

press the Playback (

) button.

7RGHOHWHDOO¿OHV

8VHWKHGLUHFWLRQDOEXWWRQOHIWULJKW

WRVHOHFW³$OO´DQG

press the Playback (

) button. Then select “Yes” and press 

the Playback (

EXWWRQWRFRQ¿UP

4

 7ROHDYHWKHGHOHWLRQVFUHHQSUHVVWKH'HOHWH

) button.

'HOHWH¿OHV

Voice recorder

To record a voice clip:

1

 3RZHURQWKHFDPFRUGHUDQGVZLWFKWRYRLFHUHFRUGHUPRGH

).

2

 3UHVVWKH2.5HFRUG

) button to start recording.

3

 3UHVVWKH2.5HFRUG

) button again to stop recording.

To review a voice clip:

1

 ,QYRLFHUHFRUGHUPRGHXVHWKHGLUHFWLRQDOEXWWRQXSGRZQ WRVHOHFWD¿OH

and press the Playback (

) button to play.

2

 :KLOHSOD\LQJ\RXFDQXVHWKHGLUHFWLRQDOEXWWRQXSGRZQ

 ) to adjust sound 

YROXPHRUSUHVV3OD\EDFN

WRSDXVHUHVXPHSOD\LQJ

3

 7RVZLWFKWRDGLIIHUHQWUHFRUGHG¿OHGXULQJSOD\EDFNSUHVVWKH2.

) button to 

UHWXUQWRWKH¿OHOLVW7KHYRLFHFOLSZLOOFRQWLQXHSOD\LQJLILWLVQRWRYHU\HW7KHQ
SUHVVWKHGLUHFWLRQDOEXWWRQXSGRZQ

 ) to select a different 

recorded clip and press the Playback (

) button.

Note:
Select the earphone icon after plugging in the earphone connector.

To delete a voice clip:

1

 ,QYRLFHUHFRUGHUPRGHXVHWKHGLUHFWLRQDOEXWWRQXSGRZQ

 ) 

WRVHOHFWWKH¿OH\RXZRXOGOLNHWRGHOHWH

2

Press the Delete (

EXWWRQDQGIROORZWKHLQVWUXFWLRQVLQWKH³'HOHWLQJ¿OHV

- Step 

3

” section.

Set earphone 
connection

Содержание PenCam Trio HD 8GB

Страница 1: ......

Страница 2: ...t in direct sunlight 4 Avoid applying unnecessary pressure to the camera body 5 For your own safety avoid using the camera during a lightning storm 6 Only use accessories supplied by the manufacturer...

Страница 3: ...instructions may cause harmful interference to radio communications However there is no guarantee that interference will not occur in a particular installation If this equipment does cause interferenc...

Страница 4: ...holder 7 Mode switch Camcorder Voice recorder Camera 8 Power button 9 OLED display 10 Directional button 11 LED indicator 12 Playback button 13 OK Record Shutter button 14 Delete button 15 HDMI output...

Страница 5: ...torage 6XSSRUWV 029 3 DQG 9 OH IRUPDW Supports USB PC connection 6XSSRUWV 79 RXW 0 RXW HDUSKRQH Charging battery KHQ XVLQJ IRU WKH UVW WLPH SOHDVH FKDUJH WKH EXLOW LQ L SRO PHU EDWWHU IRU DW OHDVW 8 h...

Страница 6: ...isplay ratio Due to the nature of OLED screens the display ratio of still picture video on the camcorder and TV PC will vary Please see the following table for details Mode 2 GLVSOD TV PC display Vide...

Страница 7: ...camcorder and switch to camcorder mode 2 3UHVV WKH 2 5HFRUG button to start recording Use the GLUHFWLRQDO EXWWRQ XS GRZQ WR RRP LQ RXW 3 7R VWRS UHFRUGLQJ SUHVV WKH 2 5HFRUG button again Note Press t...

Страница 8: ...G button again to stop recording To review a voice clip 1 Q YRLFH UHFRUGHU PRGH XVH WKH GLUHFWLRQDO EXWWRQ XS GRZQ WR VHOHFW D OH and press the Playback button to play 2 KLOH SOD LQJ RX FDQ XVH WKH GL...

Страница 9: ...al CRT TV 1 7XUQ RQ RXU 79 DQG VZLWFK WR 9 mode 2 RQQHFW WKH DXGLR DQG YLGHR HQGV RI WKH 9 FDEOH WR WKH 79 3 Turn on the camcorder 4 RQQHFW WKH RWKHU HQG RI WKH 9 FDEOH to your camcorder 5 6HOHFW WKH...

Страница 10: ...utton to force a manual shut down to reset the camcorder Addendum Troubleshooting Icon Description Full battery life Moderate battery life RZ EDWWHU OLIH 7KH OLJKW VWUREH ZLOO EH GLVDEOHG PSW EDWWHU O...

Страница 11: ...G WHVW PHWKRG resolution set to 5M 2592x1944 UHVROXWLRQ VHW WR I Note This table is for reference purposes only and is approximate Actual battery life may vary slightly due to numerous factors includi...

Страница 12: ...3 XS WR ISV QWHUQDO 0HPRU 4GB for storage LVSOD FP 2 HQV L HG OHQV I PP ODVK LJKW DFN LJKWLQJ 6XSSRUW Digital Zoom Night Shot Mode XWR KLWH DODQFH XWR 9RLFH 5HFRUGHU Yes Microphone Yes Speaker None 79...

Отзывы: