background image


23 

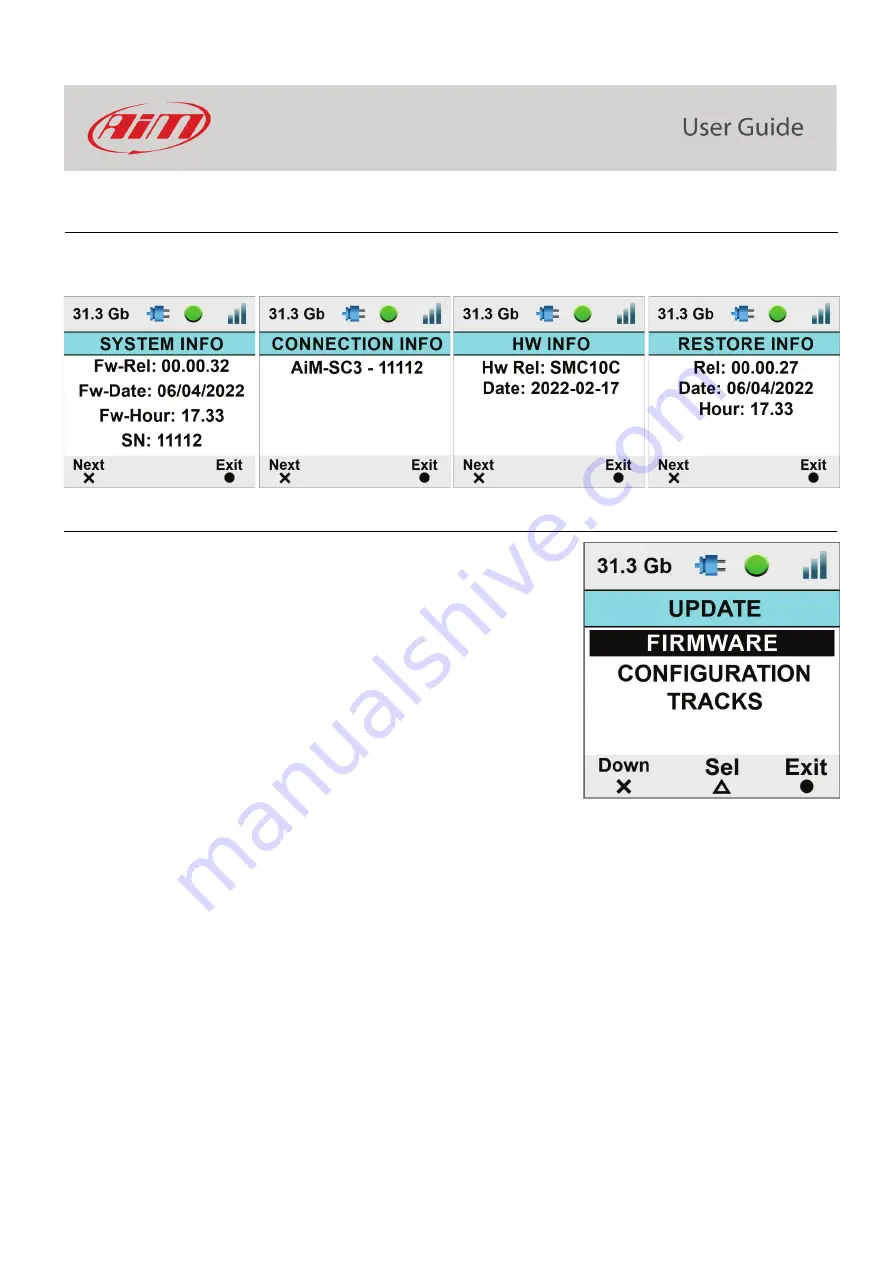
7.3.14 – Info 

The information here shown are important in case you need help from AiM Support Team. “Restore Info” page tells you which firmware 
release will be restored if you decide to perform a factory reset. 


7.4 – Update 

It allows to update: 


Firmware version 


Configuration (the overlay transmitted to SmartyCam3 

Sport/Dual; the camera can load one configuration at a time only) 


Tracks 

Updating can be performed in three ways: 


exporting them to the (Micro) SD through AiM RaceStudio 3 

software and loading them to SmartyCam 3 


through the Ethernet or USB-C connection (

SmartyCam 3 Dual 

only

). 


Содержание SmartyCam 3 Dual

Страница 1: ...User Manual SmartyCam 3 Sport SmartyCam 3 Dual Release 1 04 INDEX 1 SmartyCam 3 preliminary notes 3...

Страница 2: ...Exposure set 19 7 3 7 Audio set 20 7 3 8 Video Out SmartyCam 3 Dual only 21 7 3 9 Rec Counter 21 7 3 10 Overlay 21 7 3 11 Clear tracks 21 7 3 12 Flip over SmartyCam 3 Sport only 22 7 3 13 Factory res...

Страница 3: ...camera SmartyCam 3 Sport SmartyCam 3 Dual The two models are deeply different and are intended for completely different applications but share the same philosophy configuration logic operating system...

Страница 4: ...resolution SmartyCam 3 Sport records video at 30 fps SmartyCam 3 Dual records video at 60 fps Completely waterproof Designed for being used in the hardest environments water dust temperatures are not...

Страница 5: ...n the second case it automatically selects the proper track using the information coming from the GPS Module In this way it can draw the map and calculate lap number lap times and rolling times Video...

Страница 6: ...3 connections SmartyCam 3 has an internal battery that may keep the system alive for a few minutes around 20 min so it is important to power it through an external 12 Volt battery as shown in the pict...

Страница 7: ...tional use the 5 pins Binder 712 female connector you find back on the camera and connect it to the 2 ways Data Hub needed to power the camera To connect SmartyCam 3 Dual to GPS Module use the EXP cab...

Страница 8: ...8 SmartyCam 3 can as well be connected to AiM Dashes and loggers through the AiM CAN network The images below show some examples of connection...

Страница 9: ...ck each of which manages two different features in accordance to what shown in the display The upper pushbutton manages the features corresponding to these icons icons X short pressure long pressure W...

Страница 10: ...ower source to be connected to the front Binder connector for SmartyCam 3 Sport to the 22 pins Deutsch male connector harness proper wires for SmartyCam 3 Dual SmartyCam 3 powers ON when You push the...

Страница 11: ...en non data traffic but ethernet connection detected Blinking Blue non data traffic detected but USB connection Blinking Cyan non data traffic detected but ethernet and USB connection detected Solid G...

Страница 12: ...d not only to store video recorded by the camera but also to load the configuration and the firmware to the camera see paragraph 6 4 for further information For both cameras the housing is closed by a...

Страница 13: ...SmartyCam 3 starts and stops recording without any activity by the user There are two different ways for managing this activity The SmartyCam 3 is connected to a Master it records the video when the m...

Страница 14: ...shows up Available options are GPS STATUS status of the connected GPS TRACKS to show the list SETTINGS UPDATE VIDEO FILE In any situation use Down X button to scroll the options Sel to select and Exit...

Страница 15: ...he one you are racing on and transmits it to SmartyCam 3 that shows it in the video in the position you defined during the configuration please refer to paragraph 7 1 2 for further information Connect...

Страница 16: ...ew seconds SmartyCam 3 loads the tracks SmartyCam 3 Dual allows the user to load the track also using both the Ethernet cable included in standard Ethernet and in Full harnesses or any USB C cable ple...

Страница 17: ...e you need to select the track by yourself To manually set a track on SmartyCam 3 press Change Default setting is Auto the track list is shown locate your track press View press Sel SmartyCam 3 shows...

Страница 18: ...ture sets a delay that the SmartyCam 3 respects before closing the mp4 file when the recording conditions are no longer met 7 3 3 Auto power off SmartyCam 3 turns automatically OFF after a time period...

Страница 19: ...hange button to modify the area to be used for adjusting the light It is shown through a red rectangle Please select the whole frame right image below in case of installations in open cockpits use Exi...

Страница 20: ...Use Change button to set the gain Use Exit button to save and exit SmartyCam 3 Dual supports an external microphone too as shown here below To connect it you need SmartyCam 3 Dual full harness This ha...

Страница 21: ...r 60 fps to perform a video streaming Available options are disable 1080p 30fps 1080p 60fps 7 3 9 Rec Counter This page shows the number of recording of SmartyCam 3 Press Reset to reset the counter 7...

Страница 22: ...that is used for mounting it Sometimes in closed cars it is more comfortable to install the camera upside down In this case you have to flip the video over 7 3 13 Factory reset This menu option reset...

Страница 23: ...rm a factory reset 7 4 Update It allows to update Firmware version Configuration the overlay transmitted to SmartyCam3 Sport Dual the camera can load one configuration at a time only Tracks Updating c...

Страница 24: ...cro SD in its slot in SmartyCam 3 and switch the camera on follow this path MENU FIRMUP the camera shows the available firmware releases Select the one you want to install and wait in a few moments th...

Страница 25: ...25 7 5 Video file This page shows the list of video file stored in SmartyCam 3 Micro SD card...

Страница 26: ...e press NEW to create a new configuration New configuration panel appears select SmartyCam 3 fill in the panel that is prompted and press OK Race Studio 3 software enters directly SmartyCam 3 overlay...

Страница 27: ...on the contrary SmartyCam 3 is connected to a master you also need to set CAN Protocol tab SmartyCam 3 Dual has a second CAN that when in Stand Alone installation allows to set a CAN protocol for gett...

Страница 28: ...set of graphical controls Simply click on the one you prefer and drop it to the desired position in the video itself If a graphical control may show a range of possible information you must select th...

Страница 29: ...may easily change shape dimension and position or add a new logo Please note that when configuring SmartyCam 3 you only set position and dimension of the track map while the shape of the circuit dynam...

Страница 30: ...ing SmartyCam 3 parameters In case of a Stand Alone installation you may set the condition that enables SmartyCam3 Sport start recording If SmartyCam 3 is connected to a Master it starts recording whe...

Страница 31: ...erent ways AiM default Protocol Advanced Protocol AiM Default Protocol transmits a rather limited range of information enough for a wide range of installations They are shown below If you wish to tran...

Страница 32: ...e steps shown in the following figures select Advanced option in SmartyCam Stream layer when you configure the Logger Create your desired Stream defining the required IDs and fields Name the protocol...

Страница 33: ...u may import the protocol in SmartyCam 3 configuration and use the channels as required Please note that ALL data transmitted to SmartyCam3 Sport are stored as metadata directly in the mp4 file in ord...

Страница 34: ...CAN protocol that allows the user to set the ECU Stream of a wide number of supported ECUs At the very first configuration ECU Stream tab prompts the panel to set as shown here below To change it in...

Страница 35: ...he PC slot press Transmit button the software recognizes the MicroSD and loads the configuration remove the MicroSD from the PC slot insert it in SmartyCam3 Sport slot follow this path MENU UPDATE CON...

Страница 36: ...you like it o manual clicking the setting icon a new collection panel is prompted name it and drag and drop the tracks in it bottom the connected devices in the image SmartyCam 3 Sport SmartyCam 3 ID...

Страница 37: ...for New create a new track Import import one or more tracks stored in SmartyCam 3 or on another external device Export export one or more tracks to a specific PC folder or to another peripheral devic...

Страница 38: ...Dual Delete All delete all tracks stored in SmartyCam 3 Micro SD or in SmartyCam 3 Dual Save all save all the tracks stored in SmartyCam 3 Micro SD or in SmartyCam 3 Dual creating creates a zip file t...

Страница 39: ...software page the list of the video stored in the microSD is prompted right of the page press Download button on the top keyboard fill in the panel that is prompted press OK As said before SmartyCam 3...

Страница 40: ...40 Video download starts...

Страница 41: ...Studio3 Analysis and the video just downloaded are prompted in the central column of the page Click on any video to start watching it Please refer to RaceStudio3 Analysis user manual for any further i...

Страница 42: ...ttery included Waterproof IP65 SmartyCam 3 Dual Video format H264 1920x1080 pixels at 60 fps Display resolution 2 4 240x320 pixels Lens Low distortion camera lens CMOS Sensor Global shutter Field of v...

Страница 43: ...43 SmartyCam 3 Sport dimensions in mm inches...

Страница 44: ...44 SmartyCam 3 Sport pinout...

Страница 45: ...45 SmartyCam 3 Dual Dimensions in mm inches...

Страница 46: ...46 SmartyCam 3 Dual pinout...

Страница 47: ...47 SmartyCam 3 Dual Standard harness SmartyCam 3 Dual Standard Ethernet harness...

Страница 48: ...48 SmartyCam 3 Dual Full harness...

Отзывы: