5 - Getting Started
15
QPX750 Instruction Manual
5.6
Navigation controls
The versatile user interface can be navigated using the touch screen, rotary knob, front panel keys or a
combination of all three options.
Many settings can be made quickly and easily using the touch screen alone; the rotary knob is most
useful when, for example, a parameter is being frequently increased or decreased during manual
testing. Using the front panel keys is a quick way to directly edit when frequently changing a value.
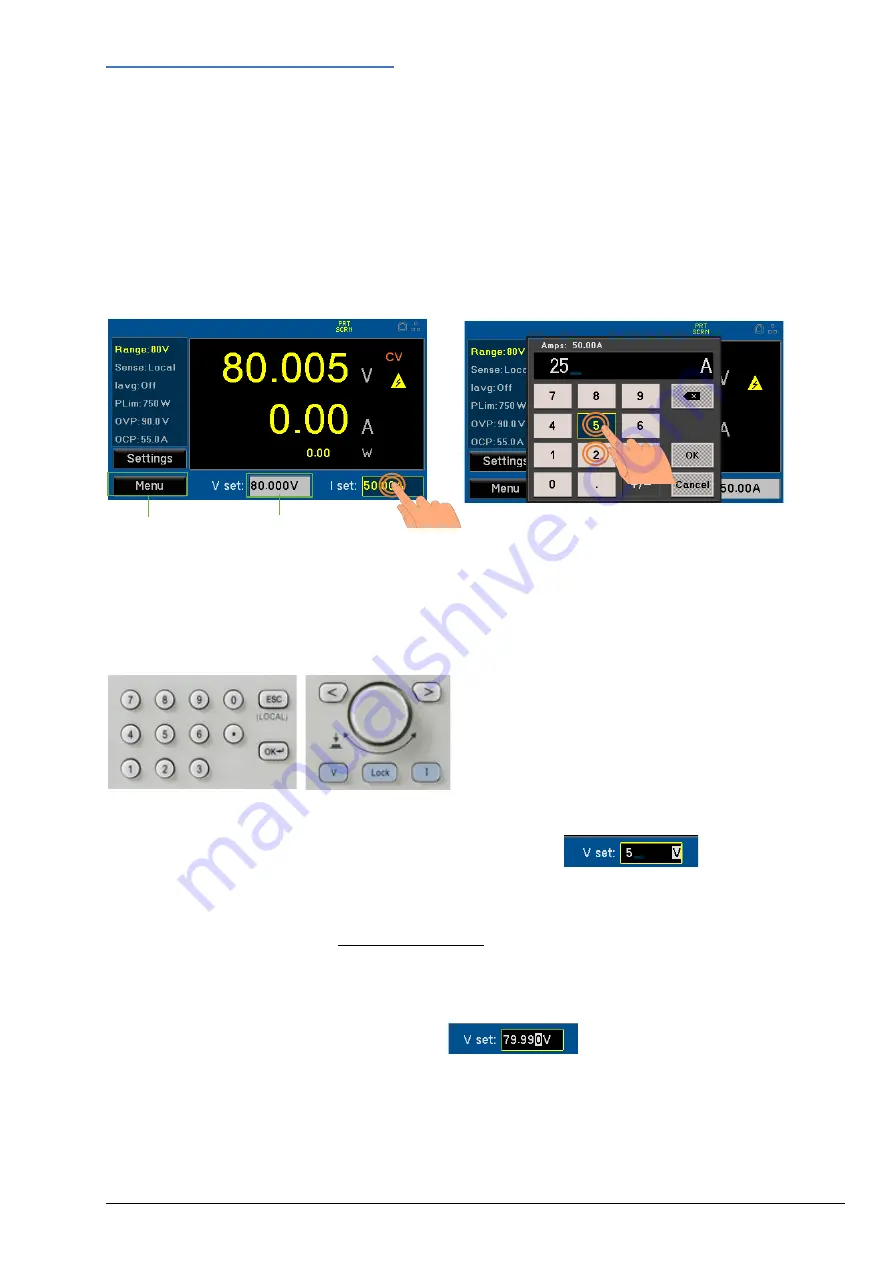
There are two types of field; both of which are explained in this manual. A ‘button’ -
①
- will apply an
action. A ‘parameter’ -
②
- will provide a list of options for the user to choose.
5.6.1
Touch screen
Touch to select an editable field, touch again to adjust the field. An editing screen will appear - enter
the required values and touch
OK
. Editing screens will vary depending on field type, this could be a
numeric keypad, QWERTY keypad or unique options related to that field. See appropriate menus for
more details.
5.6.2
Front Panel Keys
Use the < > keys to highlight the actionable field
and press OK. When editing a numeric field,
pressing a number key will begin editing, other
field type options can be viewed using the rotary
encoder - press the OK key to action the change.
To directly edit set volts or amps, press the V or I key followed by number keys, press OK to action.
Editing state on a numeric field using the front panel numeric keys:
5.6.3
Rotary knob
The rotary knob offers two different states of editing – 2 State (default setting – detailed below) and 3
State. For further information, see ‘Encoder State Adjust’
.
Press to initiate the rotary knob and turn to highlight the actionable fields from top to bottom, left to
right. To select a field, press the knob. When an editable field is selected, adjustments can be made by
turning the knob until the required value is selected. Press the knob to action the change.
Editing state on a numeric field with rotary knob:
①
②


