background image

6

7

8

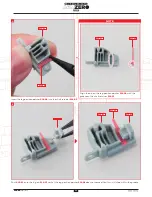
NOTE

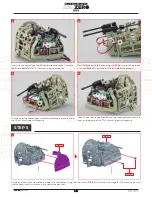
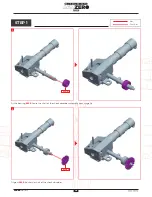
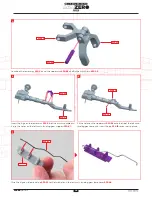
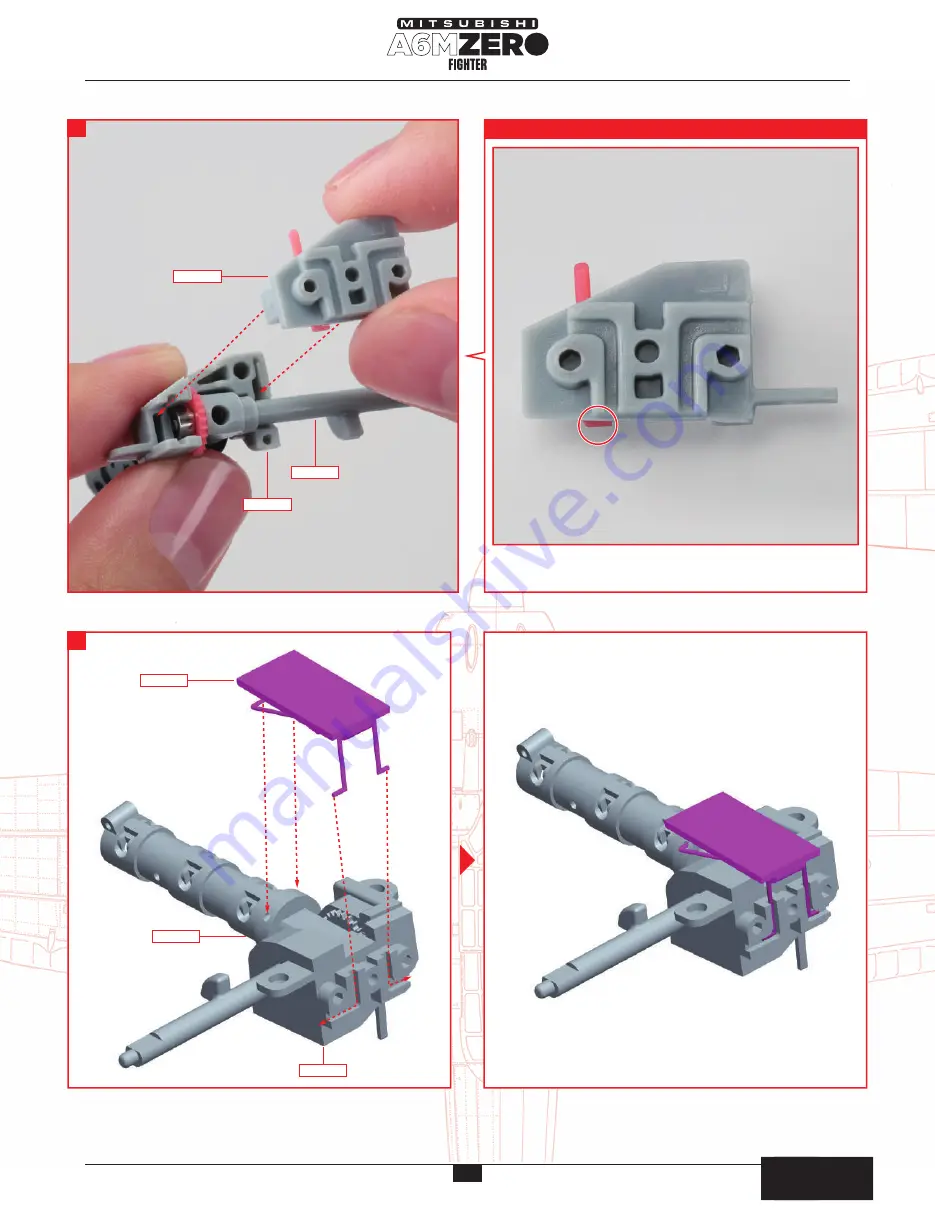
Keep the leg position pointer 

028-08 

in the lowest 

position when fitting.

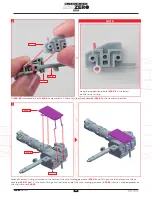
Fit 

028-03 

assembled in 5 onto 

028-04 

assembled in 3. Work with the shock absorber 

028-01

 in the horizontal position.

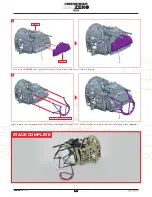
Spread the metal fittings attached to the centre of the main landing gear cover 

028-06 

and fit them into the holes on the shock 

absorber 

028-01

. Next, fit the metal fitting attached to the end of the main landing gear cover  

028-06 

into the L-shaped grooves on 

the shaft retainer 

028-03

.

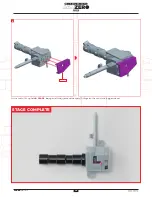
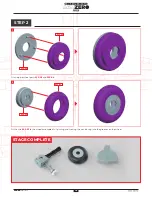
Fit the metal fitting holder 

028-05 

 being careful not to move the metal fittings on the main landing gear cover.

028-05

028-03

028-06

028-01

028-04

028-03

028-01

STAGE COMPLETE

組み立てガイド

組み立てガイド

12

AGORA

MODELS

Содержание Mitsubishi A6M ZERO Fighter

Страница 1: ...T MAIN MOTOR STAGE 35 ASSSEMBLING THE MAIN COVERS STAGE 36 ATTACHING THE LANDING GEAR COVERS Pack 04 Build Instructions Your 1 18 model of the Japanese Zero is reproduced in the most exquisite detail with electronics allowing you to recreate aeronautical operations such as take off and landing turning firing and night combat Lights machine gun and propeller sounds bring your legendary fighter plan...

Страница 2: ... the order in which you placed them The screwdriver can be magnetised by stroking it with a magnet fridge magnet etc enabling it to hold the screws and make assembly easier If a screw is tight going into a metal part do not force it as you may shear the head off Remove it and put a tiny smear of Vaseline soap or light oil on the thread That will lubricate it and make it easier to drive home During...

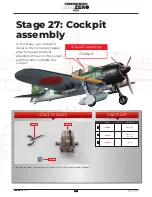
Страница 3: ... 1 1 1 ABS resin ABS resin Die cast Decal MATERIAL No PART STAGE 27 PARTS PARTS LIST Stage 27 Assembly Cockpit In this stage you will add a decal to the instrument panel attach the seat and seat adjustment lever to the cockpit partition and complete the cockpit Stage 27 Cockpit assembly 組み立てガイ ド 3 AGORAMODELS A6M ZERO ...

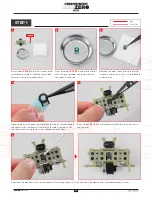
Страница 4: ...it on a tissue to absorb excess water Slide the decal with your finger and grab the part that comes off the mount with tweezers If it s difficult to slide the glue hasn t melted so put it in water for a few seconds and try again Fine tune the position with a cotton bud so that the compass is in the centre of the decal circle and absorb excess water Attach decal 027 03 to the compass in the centre ...

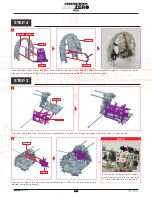
Страница 5: ...on the instrument panel completed in STEP 1 to the two holes on the left side frame of the cockpit STEP 3 NOTE Push the two lugs on the instrument panel circled right into the two holes in the left cockpit frame circled left 019 02 021 02 2 1 1 Glue the three tabs on the left side frame assembled in stage 25 to the three corresponding notches on the cockpit floor 026 02 018 01 024 01 027 01 027 02...

Страница 6: ... on each of the left and right side frames A little extra glue can be applied to adjoining surfaces in 1 4 Our video series shows you how and demonstrates the gluing technique Pass the cord of the cockpit interior light 023 04 on the right side of the cockpit through the groove on the outside of the frame on the right side of the cockpit Pull the tip of the cockpit light wire forward through the h...

Страница 7: ...ket from the left on the board of the 7 7mm machine gun magazine Pull the tip of the cockpit light wire forward through the hole under the 7 7mm machine gun magazine Insert the connector labeled B2 into the second socket from the right on the board of the 7 7mm machine gun magazine Pass the wire of the left interior light 025 04 through the groove on the outside of the frame on the left side of th...

Страница 8: ...tage 20 into the partition wall It does not glue Align the pins on the engine mount frame assembled in stage 17 with the four holes on the partition wall and glue them together 2 3 020 03 019 01 STAGE COMPLETE 組み立てガイ ド 8 AGORAMODELS A6M ZERO ...

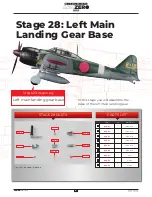
Страница 9: ...028 08 028 09 ABS resin ABS resin ABS resin ABS resin ABS resin ABS resin Steel Plastic Plastic 1 1 1 1 1 1 1 1 1 MATERIAL No PART STAGE 28 PARTS PARTS LIST Stage 28 Assembly Left main landing gear base In this stage you will assemble the base of the left main landing gear Stage 28 Left Main Landing Gear Base 組み立てガイ ド 9 AGORAMODELS A6M ZERO ...

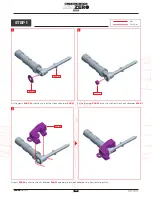
Страница 10: ...ck absorber 028 01 Fit the bearing 028 07 onto the shaft of the shock absorber 028 01 Fit part 028 04 onto the shock absorber 028 01 keeping the shock absorber in a horizontal position 028 09 028 04 028 01 028 07 Glue Don t Glue 組み立てガイ ド 10 AGORAMODELS A6M ZERO ...

Страница 11: ... 028 03 Push 028 02 onto the lug on 028 03 so that the leg position pointer 028 08 does not come off but can still slide within the groove Insert the leg position pointer 028 08 into the shaft retainer 028 03 028 03 028 03 028 02 028 03 028 08 028 02 028 08 028 08 組み立てガイ ド 11 AGORAMODELS A6M ZERO ...

Страница 12: ... horizontal position Spread the metal fittings attached to the centre of the main landing gear cover 028 06 and fit them into the holes on the shock absorber 028 01 Next fit the metal fitting attached to the end of the main landing gear cover 028 06 into the L shaped grooves on the shaft retainer 028 03 028 03 028 06 028 01 028 04 028 03 028 01 組み立てガイ ド 12 AGORAMODELS A6M ZERO ...

Страница 13: ...8 Fit the metal fitting holder 028 05 being careful not to move the metal fittings on the main landing gear cover 028 05 STAGE COMPLETE 組み立てガイ ド 13 AGORAMODELS A6M ZERO ...

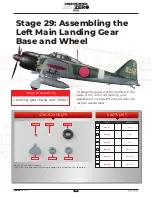
Страница 14: ...29 06 Steel Plastic PVC ABS resin ABS resin ABS resin 1 1 1 1 1 1 MATERIAL No PART STAGE 29 PARTS PARTS LIST Stage 29 Assembly Landing gear base and wheel In stage 29 gears will be installed in the base of the left main landing gear assembled in stage 28 and a wheel will also be assembled Stage 29 Assembling the Left Main Landing Gear Base and Wheel 組み立てガイ ド 14 AGORAMODELS A6M ZERO ...

Страница 15: ... 1 1 2 Fit the bearing 029 01 onto the shaft of the shock absorber assembly from stage 28 Fit gear 029 02 onto the shaft of the shock absorber 029 01 029 02 Glue Don t Glue 組み立てガイ ド 15 AGORAMODELS A6M ZERO ...

Страница 16: ...ue wheel parts 029 05 and 029 06 Fit the tyre 029 03 to the wheel assembled in 1 pulling and tucking the centre ring into the grooves on the wheel 029 06 029 05 029 03 029 05 STAGE COMPLETE 組み立てガイ ド 16 AGORAMODELS A6M ZERO ...

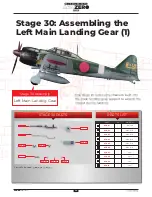
Страница 17: ... Die cast ABS resin ABS resin ABS resin ABS resin ABS resin Steel Steel Steel Steel 1 1 1 1 1 1 1 1 1 1 MATERIAL No PART STAGE 30 PARTS PARTS LIST Stage 30 Assembly Left Main Landing Gear This stage includes a mechanism built into the main landing gear support to absorb the impact during landing Stage 30 Assembling the Left Main Landing Gear 1 組み立てガイ ド 17 AGORAMODELS A6M ZERO ...

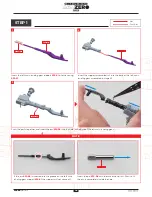
Страница 18: ...ssembled in stage 29 Push the parts together and insert the pin 030 08 into the hole in the base of the left main landing gear If the pin 030 08 is inserted into the groove on the left main landing gear support 030 01 the support will not come off Insert the pin 030 08 with the smooth end first Push until the pin is completely inside the hole 1 3 2 Glue Don t Glue 組み立てガイ ド 18 AGORAMODELS A6M ZERO ...

Страница 19: ...rm 030 05 onto the tip of the left main landing gear base and insert the pin 030 10 to secure it in place Insert the lugs on the lower arm 030 04 of the arm assembled in 4 into the holes on the left main landing gear support 030 01 Glue the lugs on the brake line 030 02 to the two holes in the left main landing gear base cover 030 06 7 4 5 6 組み立てガイ ド 19 AGORAMODELS A6M ZERO ...

Страница 20: ...brake disc 030 03 to the left main landing gear support 030 01 and insert the tip of the brake line 030 02 into the hole on 030 03 Fit the wheel assembled in stage 29 onto the left brake disc 030 03 Do not glue Glue the lugs on the left tyre cover 029 04 to the hole in the left main landing gear support Be careful not to glue it to the left main landing gear base cover 030 06 8 9 10 11 STAGE COMPL...

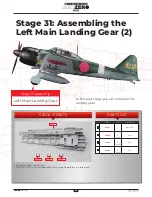
Страница 21: ...2 031 03 031 04 ABS resin Steel Steel Steel 1 2 2 2 031 01 031 02 031 03 031 04 1 spare 1 spare 1 spare MATERIAL No PART STAGE 31 PARTS PARTS LIST Stage 31 Assembly Left Main Landing Gear In this next stage you will complete the landing gear Stage 31 Assembling the Left Main Landing Gear 2 組み立てガイ ド 21 AGORAMODELS A6M ZERO ...

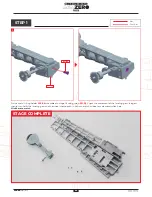
Страница 22: ...screw 031 02 Check the movement of the landing gear the gear should turn to lift the landing gear and the wheel should push in You can watch a video for a demonstration here 031 02 028 05 1 STAGE COMPLETE Glue Don t Glue Click here to watch 組み立てガイ ド 22 AGORAMODELS A6M ZERO ...

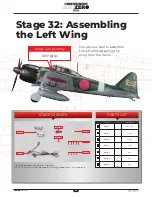
Страница 23: ...6 032 07 032 01 032 02 032 03 032 04 032 05 032 06 032 07 ABS resin Plastic Plastic LED Steel Steel Steel 1 1 1 1 1 5 4 1 spare 1 spare MATERIAL No PART STAGE 32 PARTS PARTS LIST Stage 32 Assembly Wingtip You will now start to assemble the left wing attaching the wing tip to the frame Stage 32 Assembling the Left Wing 組み立てガイ ド 23 AGORAMODELS A6M ZERO ...

Страница 24: ... it in a safe place until required in a later stage Fit the wing tip 031 02 onto the wing frame 032 01 that came wth stage 31 Fix the wing tip 032 02 in place using a 032 07 screw 032 05 032 03 032 02 032 07 031 01 1 1 Glue Don t Glue 組み立てガイ ド 24 AGORAMODELS A6M ZERO ...

Страница 25: ... the wire runs around any screw holes This process can also be done in reverse inserting the LED into the wing tip before fixing the wire in the correct positions on the wing 032 04 LED board LED board 032 07 Fix the two LED boards on 032 04 in place using 2 x screws 032 07 3 The two LED boards 032 04 should be attached with the writing facing upwards STAGE COMPLETE 組み立てガイ ド 25 AGORAMODELS A6M ZER...

Страница 26: ... 033 02 033 03 033 04 ABS resin LED Circuit board Steel 1 1 1 4 MATERIAL No PART STAGE 33 PARTS PARTS LIST Stage 33 Assembly Type 99 Cannon In stage 33 a switch is installed and a cannon is attached to the wing Stage 33 Attaching a Type 99 Cannon to the Wing 組み立てガイ ド 26 AGORAMODELS A6M ZERO ...

Страница 27: ...ion STEP 1 STEP 2 031 01 033 03 033 02 033 01 033 04 Fix the switch 033 03 to the frame 031 01 using 2 x 033 04 screws Feed the end of the switch wire through the gap to the opposite side of the wing Insert the LED 033 02 into the 20 mm cannon 033 01 pushing it in place gently but firmly 1 1 Glue Don t Glue 組み立てガイ ド 27 AGORAMODELS A6M ZERO ...

Страница 28: ...1 01 Feed the wire from LED 033 02 through the same hole as the switch 033 03 Fix the cannon 033 01 in place using an 033 04 screw Check that the wire is routed around any screw holes and fixings 031 01 033 04 033 01 2 3 STAGE COMPLETE 組み立てガイ ド 28 AGORAMODELS A6M ZERO ...

Страница 29: ...1 034 01 034 02 MATERIAL No PART STAGE 34 PARTS PARTS LIST Stage 34 Assembly Landing Gear Motor Next you will attach the landing gear and the motor that drives it to the left main wing frame Stage 34 Installing the Left Main Motor 組み立てガイ ド 29 AGORAMODELS A6M ZERO ...

Страница 30: ...o the wing frame Pass the wire through the same hole in the wing as the previous two wires Fit the landing gear assembled in stage 31 to the main wing frame 1 4 3 2 034 01 031 04 031 03 034 02 Fit the gear 034 02 to the motor 034 01 Pay attention to the orientation of the gear Glue Don t Glue 組み立てガイ ド 30 AGORAMODELS A6M ZERO ...

Страница 31: ...age 32 Fix the cover in place using four screws 032 06 that came with stage 32 NOTE Be careful of the orientation when fitting the gear Make sure that the main landing gear and the gear of the motor are firmly engaged 5 6 7 032 01 032 06 STAGE COMPLETE 組み立てガイ ド 31 AGORAMODELS A6M ZERO ...

Страница 32: ...035 03 035 04 035 01 035 05 035 06 ABS ABS ABS ABS ABS Steel Steel Steel 1 1 1 1 2 2 2 5 035 01 035 02 035 03 035 04 035 05 035 06 035 07 035 08 1 spare MATERIAL No PART STAGE 35 PARTS PARTS LIST Stage 35 Assembly Main Covers In this next stage you will assemble the covers for the landing gear Stage 35 Assembling the Main Covers 組み立てガイ ド 32 AGORAMODELS A6M ZERO ...

Страница 33: ...ort end of 035 03 faces the front and the short arm of 035 06 faces the front Fit the link 035 05 onto the link bracket 035 06 1 2 035 03 035 05 035 06 NOTE It is easier to fit link 035 05 by sliding it on diagonally from the corner 035 06 035 07 Rear Rear Front Front Long Short Short Long Long Short Glue Don t Glue 組み立てガイ ド 33 AGORAMODELS A6M ZERO ...

Страница 34: ...ver 035 04 The short end of 035 04 faces the front and the short arm of 035 06 attaches to the front end Fit the link 035 05 onto the link bracket 035 06 035 07 035 05 035 06 035 06 035 04 1 2 Rear Front Short Long Long Short Front STAGE COMPLETE 組み立てガイ ド 34 AGORAMODELS A6M ZERO ...

Страница 35: ...ARTS LIST Stage 36 Assembly Main Wing Base Frame 組み立てガイ ド In this stage the landing gear covers and the left wing frame are attached to the main wing base frame A carburettor and super charger unit are installed Stage 36 Attaching the Landing Gear Covers and Wing Frame to the Main Wing Base Frame 35 AGORAMODELS A6M ZERO ...

Страница 36: ...5 to the main wing base frame 036 01 Attach part 035 02 left 1 2 035 05 035 04 035 02 035 07 036 01 Fix part 035 02 in place using two screws 035 08 that came with stage 35 3 035 08 NOTE Parts 035 01 035 02 are marked left L and right R Check you have the correct part Glue Don t Glue 組み立てガイ ド 36 AGORAMODELS A6M ZERO ...

Страница 37: ...ed to the right landing gear cover assembled in stage 35 to the main wing base frame 036 01 Attach part 035 01 right Fix part 035 01 in place using two screws 035 08 that came with stage 35 1 2 3 035 05 035 07 035 01 035 03 035 08 組み立てガイ ド 37 AGORAMODELS A6M ZERO ...

Страница 38: ...ng frame assembled in stage 34 with the main wing base frame 036 01 assembled in STEP 2 Fix the main wing frame in place using four 036 02 screws 1 2 036 02 036 02 Align the four raised screw holes 組み立てガイ ド 38 AGORAMODELS A6M ZERO ...

Страница 39: ...STEP 4 Fit the carburettor and supercharger unit assembled in stage 15 to the main base frame 036 01 Secure in place using three 036 02 screws 1 2 036 02 STAGE COMPLETE 組み立てガイ ド 39 AGORAMODELS A6M ZERO ...

Отзывы: