


39
2
x2
x2
x2
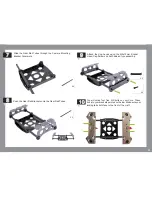
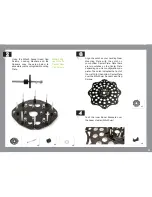
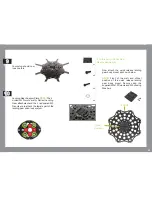
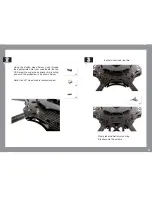
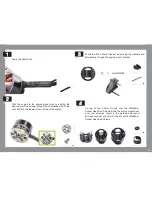
3
x1
Using the Button Head Screw, push through
the appropriate hole from underneath the top
CP. Screw the under body spacer firmly ontop
and wind the grubscrew in as shown below.
Note: Use of Thread Lock is recommended
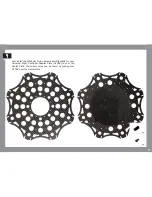
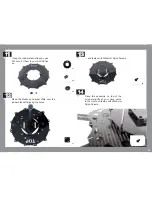
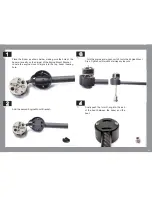
It should now look like this.
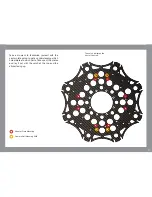
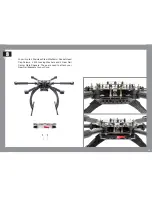
Now place the battery mounting
bracket onto the screws
Содержание XM Titanium
Страница 1: ...1 B u i l d M a n u a l...
Страница 3: ...3 F l i g h t o p e r a t i o n a n d s a f e t y...
Страница 8: ...8 P r e b u i l d C h e c k l i s t...
Страница 10: ...10 A s s e mb l y I n s t r u c t i o n s...
Страница 21: ...21 P a r t 2 G e a r R a i l a s s e mb l y...
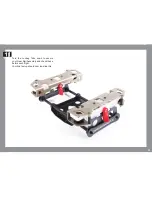
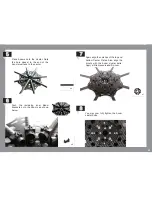
Страница 37: ...37 15 Your setup should now look like this...
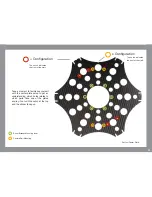
Страница 38: ...38 P a r t 3 XM BATTERY MOUNT PLATES 1 Battery Mounting Position...
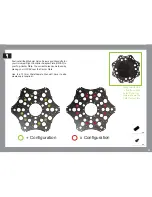
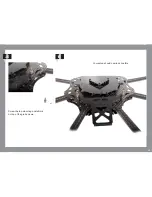
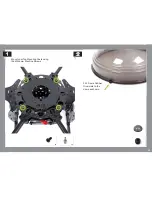
Страница 40: ...40 3 x1 Your setup should now look like this 4 Screw the top mounting posts firmly on top of the grub screws...
Страница 43: ...43 Landing Gear Assembly Core Assembly Gear Rail Assembly P a r t 5 M a i n C o m p o n e n t A s s e mb l y...
Страница 45: ...45 2 Once clipped on secure with M3x20mm Socket Head Cap Screws and M3 Locking Washers as shown below x2 x2...
Страница 52: ...52 Your final setup should now look like this 5...
Страница 59: ...59 8 Your final setup should now look like this...


