


36
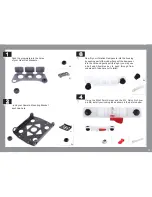
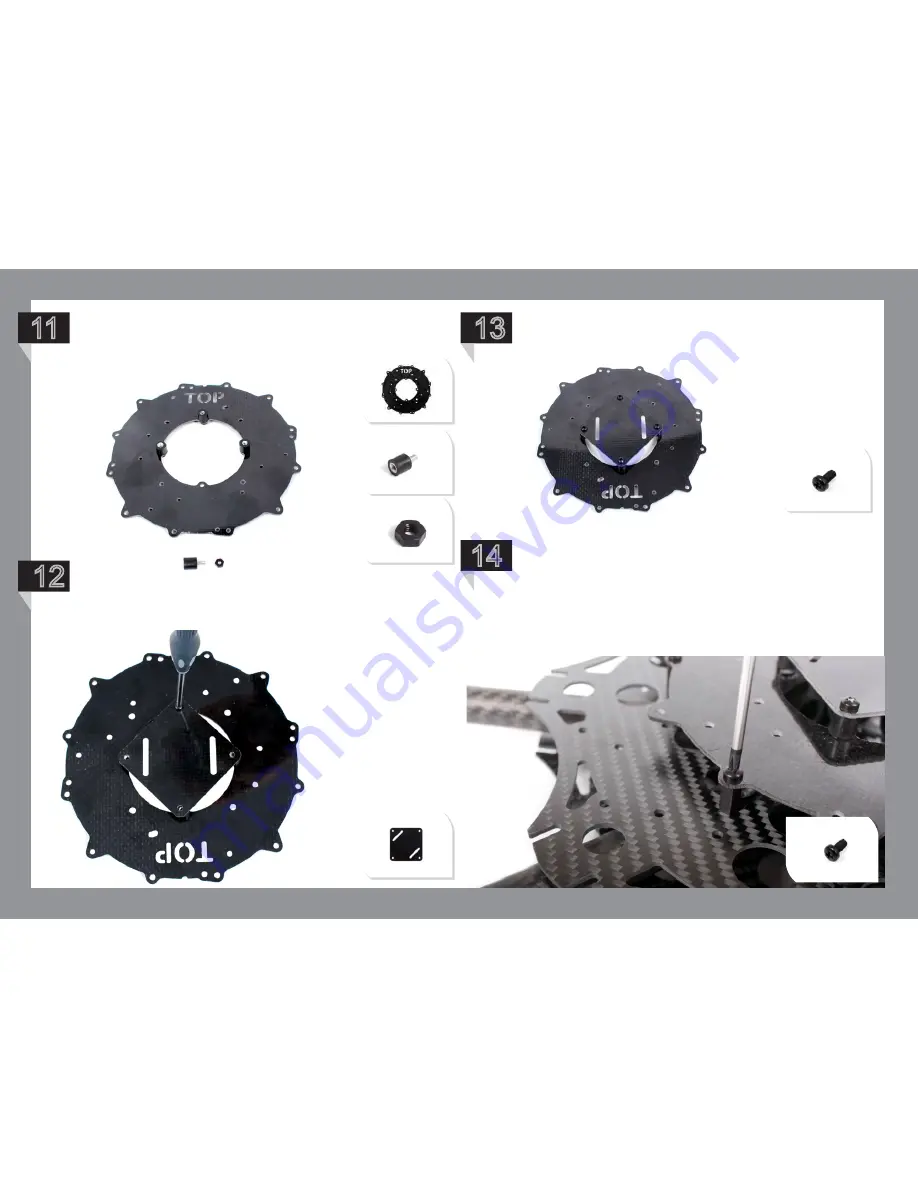
Using the rubber standoffs and nylon
M3 nuts, fit them to your UFCAP like
so.
... and fasten with M3x4mm Nylon Screws.
11
13
14
12
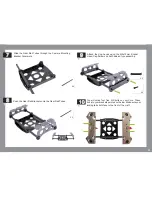
Place this assembly on top of the
nylon standoffs of your Core, notch
to the front and fasten with M3x6mm
Nylon Screws.
x8
x4
x4
x4
Place the Wookong Adapter Plate over the
rubber standoff aligning the holes...
x1
x1
Содержание XM Titanium
Страница 1: ...1 B u i l d M a n u a l...
Страница 3: ...3 F l i g h t o p e r a t i o n a n d s a f e t y...
Страница 8: ...8 P r e b u i l d C h e c k l i s t...
Страница 10: ...10 A s s e mb l y I n s t r u c t i o n s...
Страница 21: ...21 P a r t 2 G e a r R a i l a s s e mb l y...
Страница 37: ...37 15 Your setup should now look like this...
Страница 38: ...38 P a r t 3 XM BATTERY MOUNT PLATES 1 Battery Mounting Position...
Страница 40: ...40 3 x1 Your setup should now look like this 4 Screw the top mounting posts firmly on top of the grub screws...
Страница 43: ...43 Landing Gear Assembly Core Assembly Gear Rail Assembly P a r t 5 M a i n C o m p o n e n t A s s e mb l y...
Страница 45: ...45 2 Once clipped on secure with M3x20mm Socket Head Cap Screws and M3 Locking Washers as shown below x2 x2...
Страница 52: ...52 Your final setup should now look like this 5...
Страница 59: ...59 8 Your final setup should now look like this...


