30
•
Transport to the place of installation.
•
Unload the packaging from the means of transport and place it near the place of installation.
UNPACKAGING
•
Place the packaging onto a stable surface
•
Open the packaging
•
Extract the fan
HOW TO TRANSPORT THE FAN
•
Manual handling is allowed up to 25 kg
•
Over 25 Kg more operators are required or use appropriate lifting measures.
INSTALLATION
HOW TO INSTALL THE FAN
PRECAUTIONS TO BE ADOPTED
WARNING: follow the procedures in this manual extremely carefully
WARNING: use suitable accident prevention clothing .
WARNING: for anything regarding the electric part and for connection contact a qualified electrician
WARNING: before carring out connection to the electricity supply make sure it is impossible to access the impeller with ones limbs. If this is not so segregate the appliance
using the protection grid and connect it to the return and aspiration tubes.
BEHAVIOUR TO BE ADOPTED
1. Transport and unpack as described beforehand
2. Use the fan itself to individuate the position of the fixing screws.
3. Make the slots.
4. Position the fan so that the slots of the support structure corrrespond with those of the surface of installation.
5. Fix the structure to the surface using pressure stoppers or bolts depending whether the surface of installation is of iron or of cement. If present, use the antivibration
supports.
6. Connect the return and aspiration tubes.
7. Isolate the fan using appropriate fixed protections in order to make it inaccessible.
8. If present, apply the condensation discharge in the low part of the volute to allow the condensation to drain away. Make sure there is a system to collect this condensation.
9. Protect the fan using apposite grids/grates to avoid contact should the dangerous moving parts be accessible.
10. End of installation.
CONNECTION TO THE ELECTRICITY SUPPLY
Must be carried out when the fan has been positioned. A qualified electrician must follow the indications of the electrical technical documentation attached to the terminal box
of the electric motor.
Carry out the electric connection to the earth.
The electric connection must be carried out in accordance to law CEI EN 6024-1
CALIBRATION
The fan does not require initial calibration.
MAINTENANCE
WARNING: Maintenance must be carried out only by specialized technical personnel, who know the machine and the risks connected to it.
WARNING: before carrying out maintenance attach signs “maintenance in progress” in well visible and various places.
WARNING: wear protective gloves suitable for contact with the nature of the fluid with possible presence of gas/corrosive/ harmful or toxic vapours and its deposits.
WARNING: wear accident prevention clothing as foreseen by the employer
WARNING: follow the indications in this manual.
WARNING: to see more clearly inside the volute use a portable auxiliary light with protection.
WARNING: before intervening on the fan make sure the electricity supply is cut off and that measures of prevention against undesired start up have been taken.
WARNING: The impeller presents an inertia, therefore after fan shut down it continues to rotate for some time depending on its size. Wait for complete shut down before
access.
Consider also the possibility that the impeller can start to rotate caused by the currents of air inside the pipes.
MAINTENANCE TABLE
INTERVENTION
PERIODICITY
Substitution of the electric motor bearings and of the transmission support, if present.
30.000 hours
Vibration check, anomalous noise , fixing the bolts, general integrity.
500 hours
REPARATION
TYPE OF SPECIALIZATION REQUIRED
Maintenance, reparation and cleaning operations must be carried out by skilled and qualified personnel who know the product. We recommend reparations be carried out only
by the company of manufacture or by a company specialized in fans.
PREVENTIVE MEASURES
WARNING: before carrying out reparations on site attach signs “REPARATION IN PROGRESS” so that they are visible and in different places.
WARNING: wear accident prevention clothing.
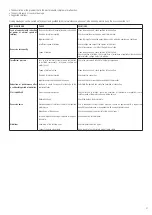
FINDING BREAKAGES
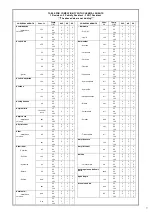
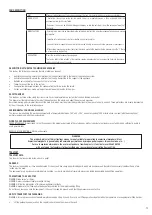
The following table shows:
Содержание QPX
Страница 2: ...2 ...
Страница 35: ...35 NOTES ...

