background image

21

UK

13 

CLEANING AND CARE

Do not clean

 any part of your unit with benzene, thinners or other 

solvent chemicals as this may cause permanent damage which is not 
covered by the Guarantee.

When necessary, clean it with a damp cloth.

Keep your phone system away from 

hot, humid conditions or strong 

sunlight,

 and 

don‘t let it get wet.

14 

GUARANTEE AND SERVICE

The unit is guaranteed for 24months from the date of purchase shown 
on your sales receipt. This guarantee does not cover any faults or 
defects caused by accidents, misuse, fair wear and tear, neglect, faults 
on the telephone line, lightning, tampering with the equipment, or any 
attempt at adjustment or repair other than through approved agents.

Please keep your sales (till) receipt this is your proof of guarantee.

14.1 

While the unit is under Guarantee

• Disconnect the base unit from the telephone line and the mains 

electricity supply.

• Pack up all parts of your device, using the original package.
• Return the unit to the shop where you bought it, making sure you 

take your sales receipt.

• Remember to include the mains adapter.

14.2 

After the Guarantee has expired

If the unit is no longer under Guarantee, contact us via 

www.

aegtelephones.eu

This product works with rechargeable batteries only. If you put 
nonrechargeable batteries in the handset and place it on the base, the 
handset will be damaged and this in NOT covered under the warranty 
conditions.

Содержание Voxtel D135

Страница 1: ...USER GUIDE CORDLESS TELEPHONE Voxtel D135 V1 DE UK ...

Страница 2: ...2 P1 P2 1 2 3 4 5 6 7 8 9 P3 P4 Line Cord 10 ...

Страница 3: ...hen using your telephone equipment to reduce risk of fire electric shock and injury Read and understand all the instructions Follow all warnings and instructions marked on the product Unplug this product from the wall outlet before cleaning Do not use liquid cleaners or aerosol cleaners Use a damp cloth for cleaning Keep this product away from hot humid conditions or strong sunlight and don t let ...

Страница 4: ...ndings The manufacturer will not be held liable for damage arising from such non compliance Do not use third party charging pods Damage may be caused to the batteries Please ensure that the batteries are inserted in the correct polarity Dispose of batteries safely Do not burn immerse them in water disassemble or puncture the batteries 3 INTENDED USE This telephone is intended to be connected to a ...

Страница 5: ...press down until it clicks into place Place the handset on the base and charge for 15 hours before using the handset for the first time The handset will give a double beep when it is properly placed on the base and the battery charging indicator on the base lights up to indicate charging Note The handset may become warm when the batteries are being charged or during prolonged periods of use This i...

Страница 6: ... and hold to go back to idle screen In editing predialling mode press to clear a character digit In editing predialling mode press and hold to delete all the characters digits During a call press to mute unmute the microphone In idle mode press to intercom another handset 3 Off hang up key During a call press to end a call and go back to idle screen In menu editing mode press to go back to previou...

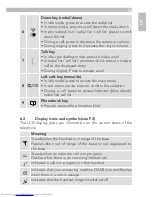
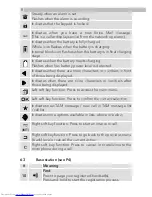
Страница 7: ... to access the main menu In sub menu mode press to confirm the selection During a call press to access Intercom phonebook redial list call list 9 Phonebook key Press to access the phonebook list 6 2 Display icons and symbols see P2 The LCD display gives you information on the current status of the telephone Meaning Steady when the handset is in range of the base Flashes when out of range of the ba...

Страница 8: ...nt of those being displayed Indicates when there are more characters or numbers after those being displayed Left soft key function Press to access the main menu Left soft key function Press to confirm the current selection Indicates new TAM message new call in TAM message list call list Indicates more options available in lists above or below INT Right soft key function Press to start an intercom ...

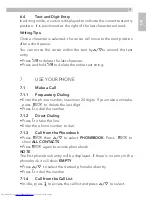
Страница 9: ...ONE 7 1 Make a Call 7 1 1 Preparatory Dialing Enter the phone number maximum 24 digits If you make a mistake press M to delete the last digit Press Tto dial the number 7 1 2 Direct Dialing Press Tto take the line Enter the phone number to dial 7 1 3 Call from the Phonebook Press M then to select PHONEBOOK Press M to show ALL CONTACTS Press M again to access phonebook NOTE The first phonebook entry...

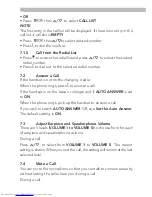
Страница 10: ... call If the handset is on the base or charger and if AUTO ANSWER is set to ON When the phone rings pick up the handset to answer a call If you wish to switch AUTO ANSWER Off see Set the Auto Answer The default setting is ON 7 3 Adjust Earpiece and Speakerphone Volume There are 5 levels VOLUME 1 to VOLUME 5 to choose from for each of earpiece and speakerphone volume During a call Press to select f...

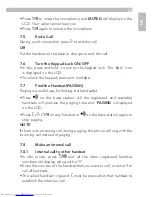
Страница 11: ...ng lost handset s Press on the base station All the registered and available handsets will produce the paging tone and PAGING is displayed on the LCD Press T O m on any handset or on the base station again to stop paging NOTE If there is an incoming call during paging the phone will ring with the incoming call instead of paging 7 8 Make an internal call 7 8 1 Internal call to other handset In idle...

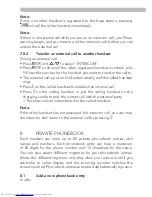
Страница 12: ...nternal call Press O on the calling handset or put the calling handset on the charging cradle to end the current call with the external party The external call is transferred to the called handset Note If the other handset has not answered the intercom call you can stop the intercom and return to the external call by pressing O 8 PRIVATE PHONEBOOK Each handset can store up to 20 private phonebook ...

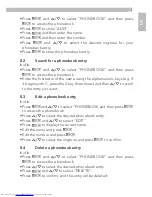
Страница 13: ... if it begins with C press the 2 key three times and then to scroll to the entry you want 8 3 Edit a phonebook entry In idle Press Mand to select PHONEBOOK and then press M to access the phonebook Press to select the desired phonebook entry Press Mand to select EDIT Press Mto display the current name Edit the name and press M Edit the number and press M Press to select the ringtone and press Mto c...

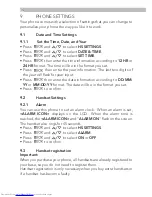
Страница 14: ... date information according to DD MM YY or MM DD YY format The date will be in the format you set Press M to confirm 9 2 Handset Settings 9 2 1 Alarm You can use this phone to set an alarm clock When an alarm is set ALARM ICON displays on the LCD When the alarm time is reached the ALARM ICON and ALARM ON flash on the screen The handset also rings for 45 seconds Press M and to select HS SETTINGS Pr...

Страница 15: ...d the next available handset number This handset number is shown in the handset display in standby mode If the handset registration is unsuccessful the will still flash 10 CALLER DISPLAY NETWORK DEPENDENT 10 1 Call List This feature is available if you have subscribed to the Caller Line Identification service from your telephone company Your phone can store up to 50 received calls with date time i...

Страница 16: ...and then Mto display the date and time of the call Press Mto go back to the previous screen 10 3 Delete an entry in the call list Follow steps 1 and 2 in section 10 1 View the call list Press Mand to select DELETE Press Mto confirm 10 4 Delete all call list entries Follow steps 1 and 2 in section 10 1 View the call list Press Mand to select DELETE ALL Press Mto display CONFIRM Press Mto confirm Al...

Страница 17: ...fter 14 rings and the answer only message will be played to your callers They will not be able to leave you a message Press Mand to select ANS MACHINE Press Mand to select TAM ON OFF Press Mand to select ON or OFF Press Mto confirm If answering machine is set to ON displays on the handset LCD If answering machine is set to OFF will not display on the handset LCD 11 2 Listen to the messages in the ...

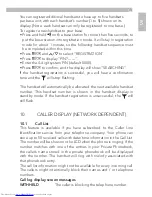
Страница 18: ...to play the next message The date and time information of the next message will display if there is another message PREVIOUS Repeat playing the current message from the beginning The date and time information of the current message will display DELETE Delete the current message and the next message will be played Note Alternatively you can use the following shortcut keys to control different opera...

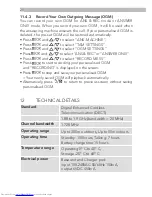
Страница 19: ...ed to call back later Press Mand to select ANS MACHINE Press Mand to select TAM SETTINGS Press Mand to select ANSWER MODE Press Mand to select ANS REC or ANSWER ONLY Press Mto confirm When your answering machine memory is full and it is in ANS RECORD the answer mode will change to ANSWER ONLY automatically It will return to ANS RECORD mode automatically after some messages have been deleted 11 4 2...

Страница 20: ...rt recording your personalised OGM and RECORDING is displayed on the screen Press Mto stop and save your personalised OGM Your newly saved OGM will playback automatically Alternatively press to return to previous screen without saving personalised OGM 12 TECHNICAL DETAILS Standard Digital Enhanced Cordless Telecommunication DECT 1 88 to 1 9 GHz bandwidth 20 MHz Channel bandwidth 1 728 MHz Operatin...

Страница 21: ...g with the equipment or any attempt at adjustment or repair other than through approved agents Please keep your sales till receipt this is your proof of guarantee 14 1 While the unit is under Guarantee Disconnect the base unit from the telephone line and the mains electricity supply Pack up all parts of your device using the original package Return the unit to the shop where you bought it making s...

Страница 22: ...but bring the product to a collection point for the recycling of electrical and electronic equipments The symbol on the product user guide and or box indicate this Some of the product materials can be re used if you bring them to a recycling point By reusing some parts or raw materials from used products you make an important contribution to the protection of the environment Please contact your lo...

Страница 23: ...im Umweltschutz unterstützent 2 WICHTIGE SICHERHEITSANWEISUNGEN Bitte beachten und befolgen Sie diese Hinweise um die Gefahr eines Feuers elektrischen Schlags und Personenschäden so gering wie möglich zu halten Lesen und verstehen Sie alle Anweisungen Befolgen Sie alle auf dem Produkt angegebenen Warnhinweise und Anleitungen Ziehen Sie vor dem Reinigen den Gerätestecker aus der Steckdose Keine flü...

Страница 24: ...nden Beim Einsetzen falscher Akku oder Batterietypen besteht Explosionsgefahr Die Verwendung anderer Akkutypen oder nicht aufladbarer Einwegbatterien Primärzellen kann gefährlich sein Dies kann zu Funkstörungen und oder Schäden am Gerät oder in seiner Umgebung führen Der Hersteller lehnt jegliche Haftung für Schäden ab die aufgrund solcher Nichtbeachtungen verursacht wurden Bitte verwenden Sie kei...

Страница 25: ...n Strom um normal zu funktionieren 4 2 Einsetzen und Aufladen der Akkus siehe P3 Legen Sie die zwei beiliegenden Akkus unter Beachtung der Polarität korrekt ein siehe Markierungen im Akkufach Warnung Bitte nur die im Lieferumfang enthaltenen Ni MH Akkus verwenden Richten Sie die Akkufachabdeckung auf der Rückseite des Akkufachs aus und lassen Sie die Abdeckung mit etwas Druck einrasten Legen Sie d...

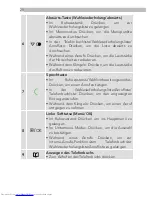
Страница 26: ...chte Sprache auszuwählen Drücken Sie M zum Bestätigen 6 MACHEN SIE SICH MIT IHREM TELEFON VERTRAUT 6 1 Überblick Mobilteil siehe S P1 Symbol und Zeichenerklärung 1 Aufwärts Taste Im Ruhezustand Drücken um zur Anrufliste zu gelangen Im Menümodus Drücken um die Menüpunkte nach oben zu durchsuchen In der Telefonbuchliste Wahlwiederholungsliste Anrufliste Drücken um die Liste nach oben zu durchsuchen ...

Страница 27: ...Ziffern zu löschen Während eines Anrufs Drücken um den Lautsprecher stumm laut zu schalten Im Ruhezustand Drücken um einen internen Anruf zu einem anderen Mobilteil zu tätigen 3 Auflege Ausschalttaste Während eines Anrufs Drücken um eine Anruf zu beenden und zurück in den Ruhezustand zu gelangen Im Menü Bearbeitungsmodus Drücken um zum vorigen Menü zu gelangen Im Ruhezustand Gedrückt halten um das...

Страница 28: ...tons zu reduzieren 7 Sprechtaste Im Ruhezustand Wählvorbereitungsmodus Drücken um einen Anruf zu tätigen In der Wahlwiederholungsliste Anrufliste Telefonbuchliste Drücken um den angezeigten Eintrag anzurufen Während dem Klingeln Drücken um einen Anruf entgegen zu nehmen 8 OK Linke Softtatse Menü OK Im Ruhezustand Drücken um ins Hauptmenü zu gelangen Im Untermenü Modus Drücken um die Auswahl zu bes...

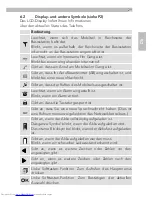
Страница 29: ...sgeschaltet ist Leuchtet wenn ein Alarm eingestellt ist Blinkt wenn ein Alarm ertönt Gibt an dass die Tastatur gesperrt ist Gibt an dass Sie eine neue Sprachnachricht haben Dies ist eine Rufnummernanzeigefunktion des Netzwerkbetreibers Gibt an wenn der Akku vollständig aufgeladen ist Das ganze Symbol blinkt wenn der Akku aufgeladen wird Das interne Blocksymbol blickt wenn der Akku fast aufgeladen ...

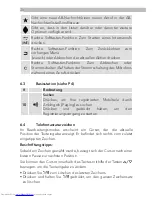
Страница 30: ...tation siehe P4 Bedeutung 10 Suchen Drücken um Ihre registrierten Mobilteile durch Anklingeln Paging zu suchen Drücken und gedrückt halten um den Registrierungsvorgang zu starten 6 4 Telefontastaturzeichen Im Bearbeitungsmodus erscheint ein Cursor der die aktuelle Position der Texteingabe anzeigt Er befindet sich rechts vom zuletzt eingetippten Zeichen Beschriftungstipps Sobald ein Zeichen gewählt...

Страница 31: ... Drücken Sie erneut M um das Telefonbuch aufzurufen HINWEIS Der erste Telefonbucheintrag wird angezeigt Wenn kein Eintrag im Telefonbuch vorhanden ist wird EMPTY LEER angezeigt Wählen Sie mit den gewünschten Telefonbucheintrag Drücken Sie T um die Nummer zu wählen 7 1 4 Anruf von der Anrufliste Drücken Sie im Stand by um zur Anrufliste zu gelangen und drücken Sie um die Anrufliste zu wählen ODER D...

Страница 32: ...siehen Auto Antwort einstellen Die werkseitige Einstellung ist ON EIN 7 3 Laustärkeregelung von Hörer und Lautsprecher Es können 5 Lautstärkestufen VOLUME 1 bis VOLUME 5 LAUTST 1 bis LAUTST 5 des Hörers und der Freisprecheinrichtung eingestellt werden Während eines Anrufs Drücken Sie um VOLUME 1 bis VOLUME 5 LAUTST 1 bis LAUTST 5 anzuzeigen Die aktuelle Einstellung wird angezeigt Wenn Sie das Gesp...

Страница 33: ...heint PAGING auf dem Display Drücken Sie T O m auf einem der Mobilteile oder auf der Basisstation um die Suche zu beenden HINWEIS Wenn während des Paging ein Anruf eingeht klingelt das Telefon mit dem eingehenden Anruf anstelle mit dem Pagingsignal 7 8 Einen internen Anruf tätigen 7 8 1 Interner Anruf zu anderem Handapparat Im Ruhezustand Drücken Sie und alle registrierten Mobilteile Nummern werde...

Страница 34: ...esetzt und das angerufene Mobilteil klingelt Drücken Sie T auf dem angerufenen Mobilteil um einen internen Anruf herzustellen Drücken Sie O des anrufenden Mobilteils oder legen Sie es auf die Basisstation um den aktuellen externen Anruf zu beenden Der externe Anruf wird auf das angerufene Mobilteil weitergeleitet Hinweis Wenn das andere Mobilteil den internen Anruf nicht beantwortet können Sie den...

Страница 35: ...rden Wenn eine Weckzeit eingestellt ist erscheint ALARM ICON auf dem Display Wenn die Weckzeit erreicht ist escheint ein blinkendes ALARM ICON und ALARM ON WECKER EIN auf dem Display Das Mobilteil klingelt außerdem 45 Sekunden lang Drücken Sie M und wählen Sie mit HS SETTINGS MT EINSTELLUNGEN Drücken Sie M und wählen Sie mit ALARM WECKER Drücken Sie M und wählen Sie mit ON EIN oder OFF AUS Zum Bes...

Страница 36: ...ür den Namen haben Sie können außerdem unterschiedliche Ruftöne für Ihre Telefonbucheinträge auswählen Hinweis Die unterschiedlichen Ruftöne werden nur wiedergegeben wenn Sie einen Anruf empfangen und die Rufnummernanzeige abonniert haben und die eingehende Nummer mit der gespeicherten Nummer übereinstimmt Telefonbucheinträge werden alphabetisch nach Namen gespeichert 9 1 Neuen Telefonbucheintrag ...

Страница 37: ...tion registriert werden So registrieren Sie ein neues Mobilteil an Ihrer Basisstation Halten Sie an der Basisstation mindestens fünf Sekunden lang gedrückt um die Basisstation in den Registrierungsmodus zu stellen Sie bleibt ca 1 Minute lang im Registrierungsmodus d h die folgende Mobilteilsequenz muss innerhalb dieser Zeit abgeschlossen werden Drücken Sie Mund um REGISTRIERUNG auszuwählen Drücken...

Страница 38: ...LD PRIVAT Der Anrufer hat die Übermittlung der Rufnummer unterdrückt OUT OF AREA NICHT VERFÜGBAR Die Rufnummer des Anrufers ist nicht verfügbar Ist die Anrufliste voll wird der älteste Anruf durch einen neuen ersetzt 10 2 Anrufliste anzeigen Alle empfangenen Anrufe werden in der Anrufliste gespeichert wobei der zuletzt eingegangene Anruf ganz oben in der Liste erscheint Wenn die Anrufliste voll is...

Страница 39: ...ufzeichnungszeit von ca 15 Minuten speichern Neben eingehenden Nachrichten können Sie auch Mitteilungen für andere Benutzer Ihres Telefons aufzeichnen Wenn der Speicher des Anrufbeantworters voll ist wird am Mobilteil je nach eingestelltem Anzeigemodus im Ruhezustand abwechselnd AB VOLL und der Name des Mobilteils oder die Uhrzeit angezeigt Sie müssen einige Nachrichten löschen bevor neue aufgenom...

Страница 40: ... neue Nachrichten auf dem Anrufbeantworter aufgezeichnet wurden blinkt auf dem Display des Mobilteils bis alle neuen Nachrichten abgespielt wurden Nachdem eine neue Nachricht abgespielt wurde wird sie automatisch als alte Nachricht gespeichert sofern sie nicht gelöscht wird Alte Nachrichten werden nach dem Abspielen sämtlicher neuen Nachrichten abgespielt Drücken Sie Mund um ANRUFBEANTW auszuwähle...

Страница 41: ...gezeigt LÖSCHEN Löscht die aktuelle Nachricht und die nächste Nachricht wird abgespielt Hinweis Alternativ können Sie während der Nachrichtenwiedergabe für verschiedene Funktionen die folgenden Kurzbefehltasten verwenden Drücken Sie die Taste 5 um die Nachrichtenwiedergabe zu stoppen Drücken Sie die Taste 4 um zur erneuten Wiedergabe der aktuellen Nachricht von Anfang an zu springen Drücken Sie di...

Страница 42: ...rdert später erneut anzurufen Drücken Sie Mund um ANRUFBEANTW auszuwählen Drücken Sie Mund um AB EINSTELLUNGEN auszuwählen Drücken Sie M und um ANTWORTMODUS auszuwählen Drücken Sie Mund um MIT AUFZ oder OHNE AUFZ auszuwählen Drücken Sie Mzum Bestätigen Wenn der Speicher des Anrufbeantworters voll ist und er sich im Modus MIT AUFZ befindet wechselt er automatisch in den Modus OHNE AUFZ Nachdem eini...

Страница 43: ...ederhergestellt Drücken Sie Mund um ANRUFBEANTW auszuwählen Drücken Sie M und um AB EINSTELLUNGEN auszuwählen Drücken Sie Mund um ANSAGEN auszuwählen Drücken Sie Mund um MIT AUFZ oder OHNE AUFZ auszuwählen Drücken Sie Mund um NACHR AUFZ auszuwählen Drücken Sie M um die Aufzeichnung Ihrer personalisierten Ansage zu starten AUFNEHMEN wird auf dem Bildschirm angezeigt Drücken Sie M um zu stoppen und ...

Страница 44: ...Lösungsmittelbasis da dies zu bleibenden Schäden führen kann die nicht von der Garantie abgedeckt werden Reinigen Sie das Gerät falls notwendig mit einem feuchten Tuch Halten Sie Ihr Telefon von Hitze Feuchtigkeit Nässe oder starker Sonneneinstrahlung fern und lassen sie es nicht nass werden 14 GARANTIE UND SERVICE Die Garantiefrist für das Gerät beträgt 24 Monate ab dem Datum des Kaufbeleges Dies...

Страница 45: ...as Gerät keine Garantie mehr besteht kontaktieren Sie uns bitte über www aegtelephones eu Dieses Gerät arbeitet ausschließlich mit wiederaufladbaren Akkus Wenn Sie nicht wiederaufladbare Batterien verwenden und das Mobilteil auf die Basisstation stellen wird das Mobilteil beschädigt und die Garantie erlischt 15 CE KONFORMITÄTSERKLÄRUNG Hiermiterklärt VOXTELD135ofBinatoneCommunicationEurope dass de...

Страница 46: ... hin Einige der Materialen können wiederverwendet werden wenn sie an einer Recyclingstelle abgegeben werden Mit der Verwertung einiger Teile oder Rohstoffe aus gebrauchten Produkten leisten Sie einen wichtigen Beitrag zum Umweltschutz Bitte setzen Sie sich mit Ihren örtlichen Behörden in Verbindung falls Sie mehr Informationen zu den Sammelstellen in Ihrer Gegend benötigen Die Akkus müssen entfern...

Страница 47: ...47 DE ...
Страница 48: ...natone Electronics International Limited All rights reserved Subject to availability Rights of modification reserved AEG is a registered trademark used under license from AB Electrolux publ www aegtelephones eu ...

Отзывы: