background image

17

D
GR
NL
F

GB

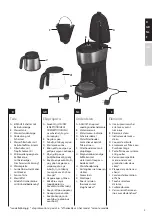
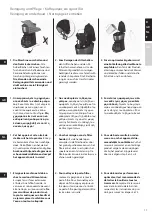
Getting started 

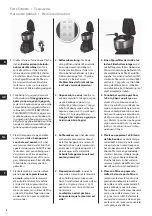
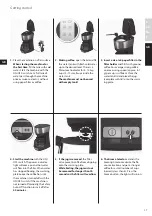
1. 

Place the machine on a flat surface. 

When starting the machine for 

the first time

, fill the tank with cold 

water. Start the machine with the 
ON/OFF switch. Let a full tank of 
water pass through the machine 
once or twice to clean it, without 
using paper filter or coffee.

3.  Insert a size 1x4 paper filter in the 

filter holder

 and fill it with ground 

coffee. For average strong coffee 
one measuring spoon (approx. 6-7 
g) per cup is sufficient. Close the 
water tank lid and place the jug 
(complete with lid) onto the warm-
ing plate. 

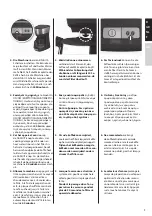
2.  Making coffee: 

open the lid and fill 

the water tank with fresh cold water 
up to the desired level. There is a 
Water level indicator for 2–10 big 
cups / 3–15 small cups inside the 
water tank. 


The machine must not be used 

with empty tank!

GB

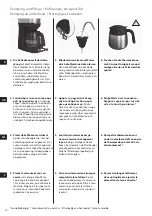
4.  Start the machine

 with the ON/

OFF switch. The power indicator 
light will come  on and hot water 
will flow into the filter. When water 
has stopped flowing, the warming 
plate keeps the coffee hot until 
the machine is turned off with the 
ON/OFF switch. If the machine is 
not turned off manually, the Safety 
Auto-Off function turns it off after 

40 minutes

.

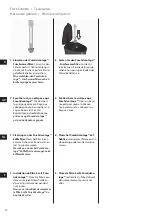
5.  If the jug is removed

, the filter 

valve prevents coffee from dripping 
onto the warming plate. 


While boiling, the jug must not 

be removed for longer than 30 

seconds or the filter will overflow.

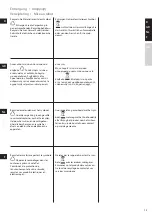
6.  The Aroma Selector

 extends the 

brewing time to maximize the fla-
vour extraction and get a stronger 
coffee for a small number of cups 
(normally less than 6). Press the 
Aroma button, the light will turn on. 

Содержание KF 5 Series

Страница 1: ...D GR NL F GB COFFEE MAKER KF5xxx ...

Страница 2: ...στε τις υποδείξεις ασφαλείας στη σελίδα 5 NL Gebruiksaanwijzing 3 12 Lees het veiligheidsadvies op pagina 6 voordat u het apparaat voor het eerst gebruikt F Mode d emploi 3 12 Avant d utiliser cet appareil pour la première fois veuillez lire les consignes de sécurité en page 7 GB Instruction book 13 17 Before using the appliance for the first time please read the safety advice on page 14 carefully...

Страница 3: ...rdon d alimentation et fiche J Touche sélecteur d arôme K Cuillère doseuse L Verseuse isotherme en inox avec déclencheur Onderdelen A AAN UIT knop met voedingsindicatielampje B Waterreservoir C Waterniveau indicatie D Scharnierdeksel E Waterfilterhouder met actieve koolstof filterpatroon F Filterhouder met anti drupklepje G Magnetronbestendige koffiekan met watermaatstreep aan beide kanten H Warmh...

Страница 4: ...ur mit einer geerdeten Steckdose verbunden werden Falls notwendig kann ein Verlängerungskabel für 10 A verwendet werden Wenn das Gerät oder das Netzkabel beschädigt ist muss es zur Vermei dung von Gefahren vom Hersteller vom Kundendienst oder von einer entsprechend qualifizierten Person ausgetauscht werden Das Gerät immer auf eine ebene Fläche stellen Das Gerät nie unbeaufsichtigt lassen wenn es m...

Страница 5: ...ε γειωμένη πρίζα Αν χρειαστεί μπορεί να χρησιμοποιηθεί καλώδιο προέκτασης κατάλληλο για 10 A Εάν υπάρχει βλάβη στη συσκευή ή στο καλώδιο τροφοδοσίας πρέπει να αντικατασταθεί από τον κατασκευαστή τον αντιπρόσωπο σέρβις ή από άλλο εξειδικευμένο άτομο για την αποφυγή κινδύνου Τοποθετείτε πάντα τη συσκευή σε επίπεδη λεία επιφάνεια Ποτέ μην αφήνετε τη συσκευή χωρίς επίβλεψη όταν είναι συνδεδεμένη στην ...

Страница 6: ...oten op een geaard stopcon tact Indien nodig kunt u een verlengkabel gebruiken die geschikt is voor 10 A Als het apparaat of de voedingskabel is beschadigd moet deze door de fabrikant de servicevertegenwoordiger of een andere gekwalifi ceerde persoon worden vervangen om risico s te vermijden Plaats het apparaat altijd op een horizontale vlakke ondergrond Laat het apparaat nooit onbeheerd achter al...

Страница 7: ...ectrique reliée à la terre Une rallonge électrique adaptée à une intensité de 10 A peut être utilisée si nécessaire Si l appareil ou le cordon d alimentation est endommagé il doit être rem placé par le fabricant l un de ses réparateurs ou toute autre personne dûment qualifiée afin d éviter tout danger L appareil doit toujours être placé sur une surface de travail plane et hori zontale Ne jamais la...

Страница 8: ...mez la machine à l aide de l interrupteur marche arrêt Laissez un réservoir entier d eau s écouler sans utiliser de filtre ni de café Répétez l opération une ou deux fois Verseuse compatible micro ondes 3 Einen Papierfilter der Größe 1x4 in den Filterhalter einlegen und mit Kaffeepulver füllen Neben der Wasserstandsanzeige befindet sich die empfohlene Kaffee Messlöffel angabe Für einen durchschnit...

Страница 9: ...ι το χρόνο προετοιμασίας μεγιστοποιώντας την απόσταξη των αρωμάτων και δίνοντας πιο δυνατό καφέ για μικρότερο αριθμό φλιτζανιών συνήθως λιγότερα από 6 Πιέστε το κουμπί έξτρα αρώματος Θα ανάψει η σχετική ενδεικτική λυχνία 4 Die Maschine über den EIN AUS Schalter einschalten Die Betriebs an zeige leuchtet auf und heißes Wasser läuft in den Filter Wenn kein Wasser mehr fließt hält die Wärmeplatte den...

Страница 10: ...n en koud water en laat 10 minuten weken We raden u aan om het PureAdvan tage koffiefilter te vervangen na 60 koffiezetbeurten 7 Εγκατάσταση του φίλτρου καφέ PureAdvantage Τοποθετήστε το φίλτρο μέσα σε ένα δοχείο με καθαρό κρύο νερό και αφήστε το να μουλιάσει για 10 λεπτά Συνιστάται η αντικατάσταση του φίλτρου καφέ PureAdvantage μετά από 60 κύκλους χρήσης 8 Τοποθετήστε το φίλτρο καφέ PureAdvantage...

Страница 11: ...ijn geleverd Voer vervolgens stap 4 en 5 uit 1 Απενεργοποιήστε τη μηχανή και αποσυνδέστε το καλώδιο ρεύμα τος Σκουπίστε όλες τις εξωτερικές επιφάνειες με ένα υγρό πανί Η κανάτα του καφέ και το καπάκι της πλένονται στο πλυντήριο Μη χρησιμοποιείτε ποτέ καυστικά καθαριστικά ή καθαριστικά για λείανση και μη βυθίζετε ποτέ τη συσκευή σε υγρό 3 Συνιστάται η αφαίρεση των αλά των κάθε τρεις μήνες για καλύτ...

Страница 12: ...en 4 Plaats de koffiekan met deksel op het warmhoudplaatje Laat het ontkalkingsproduct ongeveer 15 mi nuten inwerken en zet het apparaat vervolgens aan Schakel het apparaat uit als de oplossing is doorgelopen Herhaal indien nodig het ontkal kingsproces 4 Τοποθετήστε τη κανάτα του καφέ μαζί με το καπάκι της στη θερμαι νόμενη πλάκα Αφήστε το αποσκλη ρυντικό να δράσει για περίπου 15 λεπτά και στη συν...

Страница 13: ...θρώπινης υγείας ανακυκλώνοντας τις άχρηστες ηλεκτρικές και ηλεκτρονικές Recycle de materialen met het symbool Gooi de verpakking in een geschik te verzamelcontainer om het te recyclen Help om het milieu en de volksgezon dheid te beschermen en recycle het afval van elektrische en elektronische apparaten Gooi apparaten gemarkeerd met het sym bool niet weg met het huishoudelijk afval Breng het produc...

Страница 14: ...14 ...
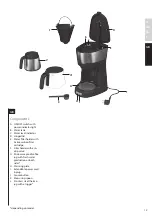
Страница 15: ...r filter holder with Active carbon filter cartridge F Filter holder with anti drip valve G Microwave proof coffee jug with fresh water graduation on both sides H Warming plate I Extendable power cord plug J Aroma button K Measuring spoon L Stainless steel thermo jug with a trigger gb A K B D E F G L H I C J depending on model ...

Страница 16: ...onnected to an earthed socket If neces sary an extension cable suitable for 10 A can be used If the appliance or the supply cord is damaged it must be replaced by the manufacturer its service agent or similarly qualified person in or der to avoid hazard Always place the appliance on a flat level surface Never leave the appliance unattended while connected to the supply mains The appliance must be ...

Страница 17: ...ter level indicator for 2 10 big cups 3 15 small cups inside the water tank The machine must not be used with empty tank gb 4 Start the machine with the ON OFF switch The power indicator light will come on and hot water will flow into the filter When water has stopped flowing the warming plate keeps the coffee hot until the machine is turned off with the ON OFF switch If the machine is not turned ...

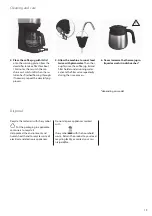
Страница 18: ...s being rinsed The filter holder can also be washed in the dishwasher 3 Decalcifying is recommended every three months for best per formance Fill the tank with water and decalcifier according to prod uct instructions then follow steps 4 and 5 gb 7 Installing the PureAdvantage Coffee filter Place the filter into a container of clean cool water and let soak for 10 minutes We recommend to replace the...

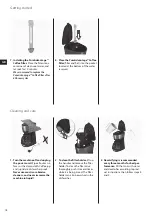
Страница 19: ...e jug lid and filter holder under running water activate the filter valve repeatedly during the rinse process Disposal 6 Never immerse the thermo jug in liquid or wash it in dishwasher depending on model Recycle the materials with the symbol Put the packaging in applicable containers to recycle it Help protect the environment and human health and to recycle waste of electrical and electronic appli...

Страница 20: ...3481AKF5xxx 02021013 Printed on recycled paper www aeg home com Electrolux Hausgerate Vertriebs GmbH Further Strasse 246 D 90429 Nurnberg Germany ...

Отзывы: