English
43
1.
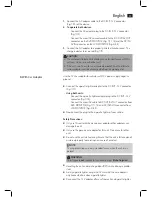
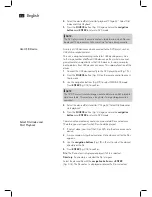
Connect the AC adapter cable to the DC IN 9~12 V connector
(Fig. 1/10) of the device.
2.
To operate both devices:
- Connect the AC adapter plug to the DC IN 9~12 V connector
(Fig. 1/10).
- Connect the mains/AV connector cable to the DC OUT/AV OUT
connector on the DVD MONITOR (Fig. 1/11, 14) and the DC IN/
AV IN connector on the LCD MONITOR (Fig. 2/5, 4).
3.
Connect the AC adapter to a properly installed Schuko socket. The
charge indicator turns on red (Fig. 1/9).
CAUTION:
The enclosed alternate current adapter is intended for use with this
K
unit only. Do not use with other unit.
If the unit is not in use for an extended period of time the alternate
K
current adapter must be disconnected from the power outlet.
B. With Car Adaptor
Use the 12 V car adaptor for vehicles with 12 V power supply, negative
ground.
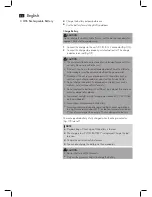
Connect the cigaratte lighter adapter to the DC IN 9~12 V connector
K
(Fig. 1/10).
Using both units:
- Connect the cigarette lighter adapter plug to the DC IN 9~12 V
connector (Fig. 1/10).
- Connect the mains/AV cable to DC OUT/AV OUT connector from
DVD MONITOR (Fig. 1/11, 14) and DC IN/AV IN connector from
LCD MONITOR (Fig. 2/5, 4).
Now connect the plug to the cigarette lighter of your vehicle.
K
Safety Precautions:
Only use this unit with the genuine car adaptor, other adaptors can
K
damage the unit.
Only use the genuine car adaptor for this unit. Do not use for other
K
units.
Do not use the unit while driving. Ensure that the unit is fastened and/
K
or stored properly to avoid injuries in case of accident.
NOTE:
The supplied straps are only intended for use when the vehicle is
parked.
WARNING:
The straps are
not
suitable for use when driving.
Risk of injuries!
Handling the unit and watching videos/DVDs while driving is prohib-
K
ited.
A dirty cigarette lighter can get hot. Ensure that the car adaptor is
K
only connected to a clean cigarette lighter.
Disconnect the 12 V adaptor after use from unit and cigarette lighter.
K
Содержание DVD 4551
Страница 3: ...Übersicht der Bedienelemente 3 Overview of the Components Abb Fig 1 DVD Monitor Abb Fig 2 LCD Monitor ...
Страница 4: ...Übersicht der Bedienelemente 4 Overview of the Components Abb Fig 3 ...
Страница 63: ......
Страница 64: ......
Страница 65: ......

