background image

6

Before first use

 WARNING!

Risk of injury!

Improper set-up and use of the cot may result in 

injury.


− Set the cot up on a level and nonskid surface.


− Do not stand or jump on the cot. The cot can 

tip over easily.


− Make sure that children do not play with or 

on the cot.


− The cot may only be used by one person at a 

time. 


− Do not exceed the cot’s load bearing capacity 

of 265 lbs (120 kg).

 WARNING!

Fire hazard!

The cover of the cot consists of a flammable 

material. If the cot is too close to an intense heat 

source (e.g. a camp fire), the cover could melt or 

burn.


− Keep the cot away from fire and other heat 

sources.

NOTICE!

Risk of damage!

Improper handling of the cot may damage it.


− Shield the cot from weathering effects such 

as rain, direct exposure to sun or dampness.

Before first use

Checking the cot and scope of 

delivery

NOTICE!

Risk of damage!

If you are not cautious when opening the 

packaging with a sharp knife or other pointy 

objects, you may quickly damage the cot. 


− Be very careful when opening.

1. Take the cot out of the packaging.

2. Check to make sure that the delivery is complete 

(see 

Fig. A

).

3. Check whether the cot 

2

 or the individual parts 

are damaged. If this is the case, do not use the 

cot. Contact the manufacturer at the service 

address specified on the warranty card. 

Use

Setting up the cot

 CAUTION!

Risk of injury!

Improper set-up and use of the cot may result in 

injury.


− When setting up the cot, make sure not 

to squash your fingers. If possible, wear 

suitable work gloves. 

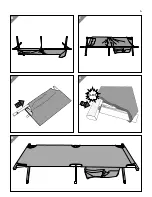
1. Position the cot 

2

 ‘on end’ (upright) in front of 

you and fold the legs of the cot out to the side 

(see 

Fig. B

). 

2. Fold the outer legs all the way up (see 

Fig. C

). 

3. Fold out the legs of the cot so that the bed 

surface is stretched out (see 

Fig. D

). 

4. Once folded-out, turn the cot over (see

 Fig. E

).

The bed surface is now facing up.

5. Push a lateral brace 

3

 through its designated 

loop in the cover at the top and bottom end 

of the cot. In the process, pay attention to 

alignment of the notches in the lateral braces to 

the bed surface (see 

Fig. F

). 

6. Pull the bed surface’s cover tight over the lateral 

braces and anchor the lateral braces’ notches 

into the ducts on the side of the cot’s frame  

(see 

Fig. G

). 

You will have to use some force to do so. 

Make sure that each lateral brace audibly and 

noticeable locks into place. 

You have successfully set up the cot and can begin 

using it (see 

Fig. H

).

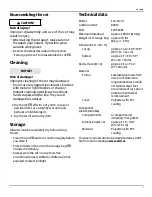
Содержание 94812

Страница 1: ...ID 07177 m y hansecontrol c o m CERTIFIED User friendly Manual User Manual Manual del usuario English 05 Español 09 CAMPING COT CATRE PARA ACAMPAR ...

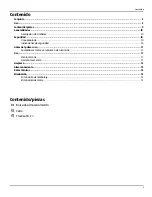
Страница 2: ...l information 5 Explanation of symbols 5 Safety 5 Proper use 5 Safety notes 5 Before first use 6 Checking the cot and scope of delivery 6 Use 6 Setting up the cot 6 Disassembling the cot 7 Cleaning 7 Storage 7 Technical data 7 Disposal 8 Disposing of packaging 8 Disposing of the cot 8 ...

Страница 3: ...A 1 2 3 B C 3 ...

Страница 4: ...D E F H G 4 ...

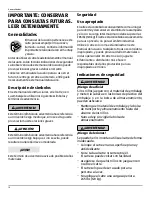
Страница 5: ...d with low risk that if not avoided may result in minor or moderate injury NOTICE This signal word warns against potential damages to property Safety Proper use The cot is designed exclusively as a sleeping and resting place for camping and leisure activities The maximum total load may not exceed 265 lbs 120 kg The cot is only intended for private use and not suitable for commercial purposes Only ...

Страница 6: ...ete see Fig A 3 Check whether the cot 2 or the individual parts are damaged If this is the case do not use the cot Contact the manufacturer at the service address specified on the warranty card Use Setting up the cot CAUTION Risk of injury Improper set up and use of the cot may result in injury When setting up the cot make sure not to squash your fingers If possible wear suitable work gloves 1 Pos...

Страница 7: ...ed Clean the cot 2 and air it out thoroughly before you store it Store all parts of the cot in the storage bag 1 included in delivery Always store the cot in a dry frost free environment inaccessible to children and not exposed to direct sunlight Technical data Model FLX CB 01 Article number 94812 EAN 20053963 Maximum total load approx 265 lbs 120 kg Weight incl storage bag approx 18 lbs 8 kg 5 Di...

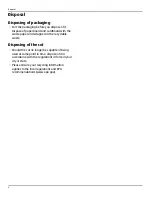
Страница 8: ... waste paper and wrappers in the recyclable waste Disposing of the cot Should the cot no longer be capable of being used at some point in time dispose of it in accordance with the regulations in force in your city or state Please ensure your recycling information applies to the local regulations and EPA recommendations www epa gov ...

Страница 9: ...0 Indicaciones de seguridad 10 Antes del primer uso 11 Comprobar el catre y el volumen de suministro 11 Uso 11 Montar el catre 11 Desmontar el catre 11 Limpieza 12 Almacenamiento 12 Datos técnicos 12 Eliminación 12 Eliminación del embalaje 12 Eliminación del catre 12 Contenido piezas 1 Bolsa de almacenamiento 2 Catre 3 Travesaño 2 ...

Страница 10: ...ad Uso apropiado Elcatreestáconcebidoexclusivamentecomounlugar para dormir y descansar en el ámbito de la acampada y el ocio La carga total máxima no debe superar las 265lbs 120kg Elcatreestáconcebidaexclusivamente para uso privado no para el ámbito industrial Utilice el catre solo como está indicado en este manual del usuario Cualquier otro uso se considera inapropiado y puede provocar daños mate...

Страница 11: ...uedeherirsimontaoutilizaelcatredeforma inadecuada Al montar el catre tenga cuidado de no pillarse los dedos Si puede utilice guantes de trabajo adecuados 1 Coloque el catre 2 de lado ante usted y abra lateralmente las patas del catre véase la fig B 2 Levante las patas exteriores del todo véase la fig C 3 Despliegue las patas del catre de tal manera que la superficie del catre quede tensada véase l...

Страница 12: ...máxima aprox 265 lbs 120 kg Peso bolsa de almace namiento incluida aprox 18 lbs 8 kg 5 Dimensiones largo ancho alto montado plegado aprox 74 8 29 1 16 9 190 74 43 cm aprox 37 7 9 5 9 94 20 15 cm Superficie del catre ancho largo aprox 22 4 72 4 57 184 cm Material Cuadro Funda Tubo transversal de aluminio inoxidable tubo longitudinal de acero inoxidable tubo de base de aluminio inoxidable con refuer...

Страница 13: ... DISTRIBUIDO POR ALDI INC BATAVIA IL 60510 WWW ALDI US USA YEARS WARRANTY AÑOS DE GARANTÍA 2 AFTER SALES SUPPORT SERVICIO POSVENTA MODEL NO DEL MODELO FLX CB 01 94812 05 2017 service 801service net 1 866 558 8096 USA ...

Отзывы: